
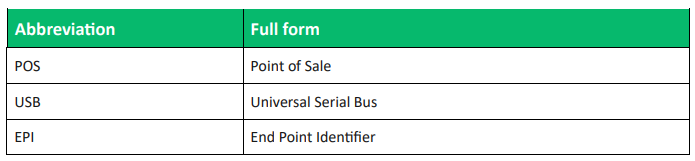
Abbreviations and Acronyms
This section provides a list of abbreviations and acronyms with their appropriate full forms to improve
user comprehension.
Introduction
This guide explains how to establish USB-based communication between Newland POS terminals
(VP500,VP550,VP800,N950,X800,N950s and VP550C) and third-party software applications.
It enables seamless transaction exchange, allowing external systems to interact with Valor devices for
real-time payment processing.
Objective & scope
The objective of this guide is to assist developers and integrators in enabling USB communication
between Valor VP POS terminals and external third-party software.
This guide covers:
- System prerequisites and configuration requirements.
- Enabling USB mode through the Valor portal.
- Preparing the device for Valor Connect listening mode through USB.
- Formatting and sending transaction payloads.
- Parsing response data from the device.
- Testing integration using code examples in Python, Node.js, and C.
- The scope is limited to USB-based semi-integration for supported Valor terminals running
application version 3.0.44 or higher and 1.0.36RT or higher.
To integrate with Valor SDKs and facilitate payment transactions, customers must obtain the following essential data from Valor PayTech:
Prerequisites
- Newland Android POS with USB port available.
- Valor Portal access with permission to edit device parameters.
- EPI with version 3.0.44 or higher and 1.0.36RT or higher assigned.
- USB cable to connect terminal to the computer.
- Your device com port.
- Reference document: Valor POS Integration.pdf (for complete list of API payloads).
- USB Drivers link for VP Linux device.
Benefits
- Enables USB-based communication between Valor POS terminals and third-party desktop
applications. - Supports real-time transaction exchange using JSON-formatted payloads.
- Works across multiple programming languages with sample code in Python, Node.js, and C.
- Configurable via the Valor Portal with minimal setup effort.
- Ensures structured and secure data transmission using framed messages.
Enabling Valor Connect (USB Mode)
- Login to the Valor Portal.
- Navigate to the Device Management module and locate the targeted device.
- Select the Vertical Ellipsis on the right end of the Device management.
- Select Edit Parameters and navigate to the Terminal & Transaction tab.
- Open the Valor Connect sub-tab and enable Connection Type.
- Set the Connection Mode to USB and select Save from the top-right corner.
Preparing the Device for USB Communication
-
Connect your POS terminal to the computer through USB.
-
Perform a Parameter Download on the terminal and wait for the USB Listening screen.
a. If the Listening screen does not appear:
I. Select the three-dash icon on the bottom pane of the home screen.
II. Select Settings.
III. Select Start USB.
Once in USB Listening mode, the device is ready for integration.
Setup to Enable USB Mode in VP Android POS
Step 1: Unzip the USB Driver
- Locate the downloaded driver package (e.g., Usb_Driver.zip).
- Right-click on Usb_Driver.zip and select 'Extract All' or use any unzip tool.
Step 2: Install the Driver
-
Open the extracted folder.
-
Double-click the application named DriverInstall.exe or Driver Install (Application type).
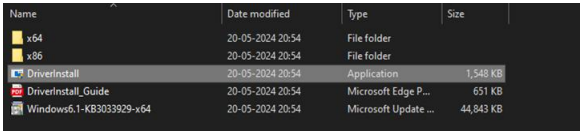
-
A command window will appear, showing the installation progress.
Note: The interface will display installation messages during setup.

Step 3: Finish Installation
- Press any key to close the installation window.
- Your VP Android POS device is now ready to use the USB port.
Communication Protocol
Request Format
- All communication is framed with at the start and at the end.
- Payload is JSON-formatted.
Sample Request Payload
<STX>
{
"TRAN_MODE":"1",
"TRAN_CODE":"1",
"AMOUNT":"450000",
"TIP_ENTRY":"1",
"TIP_EDITABLE":"1",
"ONLINETIP_CONFIRM":"1",
"SIGNATURE":"1",
"PAPER_RECEIPT":"0",
"MOBILE_ENTRY":"1"
}
<ETX>
Refer to Valor POS Integration.pdf for complete transaction API payload options.
Receiving Response
For every executed transaction, the terminal sends back a response in the below format:
<STX>
{response JSON}
<ETX>
Note:
- Strip the and markers to parse the JSON payload.
- The terminal also sends an acknowledgement for every successfully received payload.
Sample Response Payload
<STX>
{
"STATE":"0",
"EPI":"2320047546",
"SERIAL_NO":"125214118808",
"TRAN_TYPE":"Cash",
"TRAN_METHOD":"Cash Sale",
"TXN_ID":"223064651659",
"AMOUNT":"450000",
"PARTIAL":"0",
"SURCHARGE_AMOUNT":"4500",
"ENTRY_MODE":"MANUAL",
"ENTRY_TYPE":" ",
"RRN":"223064651659",
"CODE":"000000",
"DATE":"28072025 03:48:17",
"TRAN_NO":"2",
"BATCH_NO":"2",
"ISSUER":"CASH",
"TOTAL_AMOUNT":"454500",
"STAN_ID":"3"
}
<ETX>
Testing with Sample Code
Below are example snippets for sending a payload over USB and reading the response.
Note: (Replace /dev/ttyUSB0 with the actual USB device path.)
Python Example (Phyton)
import serial ser = serial.Serial('/dev/ttyUSB0', 9600, timeout=1) payload = '<STX>
{
"TRAN_MODE":"1",
"TRAN_CODE":"1",
"AMOUNT":"450000"
}
<ETX>'
ser.write(payload.encode()) response = ser.read(1024).decode() print("Raw Response:", response)
Node.js Example (Javascript)
const SerialPort = require('serialport'); const port = new SerialPort('/dev/ttyUSB0', {
baudRate: 9600 }); port.write('
<STX>
{
"TRAN_MODE":"1",
"TRAN_CODE":"1",
"AMOUNT":"450000"
}
<ETX>', (err) => { if (err) return console.log('Error:', err.message);
console.log('Payload sent.'); });
port.on('data', (data) => { console.log('Raw Response:', data.toString()); });
C Example (C Language)
#include <stdio.h> #include <fcntl.h> #include <termios.h> #include <unistd.h> int main()
{
int fd = open("/dev/ttyUSB0", O_RDWR | O_NOCTTY);
struct termios tty;
tcgetattr(fd, &tty);
cfsetospeed(&tty, B9600);
cfsetispeed(&tty, B9600);
tty.c_cflag |= (CLOCAL | CREAD);
tcsetattr(fd, TCSANOW, &tty);
char payload[] = <STX>{\"TRAN_MODE\":\"1\",\"TRAN_CODE\":\"1\",\"AMOUNT\":\"450000\"}<ETX>";
write(fd, payload, sizeof(payload));
char buf[1024];
int n = read(fd, buf, sizeof(buf));
buf[n] = '\0';
printf("Raw Response: %s\n", buf);
close(fd); return 0;
}
Troubleshooting
- Device not detected on Linux: Run ls /dev/ttyUSB* before and after connecting.
Ensure the user has permissions for the serial device (add to dialout group). - No USB Listening screen: Verify parameter download completed successfully.
Start USB manually from the terminal menu. - Payload not acknowledged: Ensure and are included exactly as required.
Check baud rate (default is 9600).
Conclusion & contact details
As we conclude our user guide, we are committed to creating a positive impact in delivering precision
and perfection across all Valor platforms. This User guide for Semi Integration through USB is one of
Valor’s recent innovations aimed at providing a secure and reliable electronic payment. We truly
believe that this user guide serves as an indispensable source for your regular operations, and we are
delighted to be a vital stakeholder in your business. We are immensely grateful for your
encouragement and look forward to unwavering support.
At Valor, we are extremely glad to assist you with your questions and queries. Please e-mail us at
[email protected] or dial 1.800.615.8755 to get in touch with our support team. Make sure to
visit www.valorpaytech.com/kb for additional resources on Valor products and solutions. We anticipate
your unwavering support for all our future endeavors and wish to remain a loyal partner in your business,
leading towards a successful journey in your business.