
Introduction
The Valor Portal allows ISO administrators to securely associate third-party ISV users with their profile and define access permissions. While only ISO administrators can configure and manage these ISV associations, the assigned ISV users become available for selection during merchant onboarding—whether performed by ISO administrators or operators.
This guide provides instructions for managing ISV associations, configuring access levels, and using those associations during the onboarding process to ensure secure and collaborative operations.
Objective & Scope
This guide provides step-by-step instructions for ISOs to:
- Enable and manage ISV associations through the Integration tab in ISO Settings.
- Select available ISV accounts (public and private) for use during merchant onboarding.
- Define ISV access levels by configuring permissions for:
Adding merchants
Editing merchant information
Deleting merchant accounts
Managing devices
This guide applies to users with ISO Admin and ISO Operator roles who are responsible for configuring merchant–ISV relationships within the Valor Portal.
Prerequisites
Before configuring ISV associations and permissions, ensure the following:
- You are logged into the Valor Portal using valid ISO Admin and ISO Operator credentials.
- Relevant ISV users (public or private) have been created in the system.
- Your ISO account is associated with the private ISV user (if applicable) during onboarding.
- A stable internet connection is available throughout the configuration process.
Understanding Public vs Private ISVs
ISVs in the Valor Portal are onboarded as either Public or Private, and this onboarding type determines how they become visible to ISOs.
Public ISVs
Public ISVs are globally available integrations. They are visible to all ISO admins in the Integration tab, but each ISO must manually select them and configure access levels before they become usable during merchant onboarding.
Private ISVs
Private ISVs are restricted integrations. They are not visible to any ISO admins until the ISV is explicitly assigned to that ISO admin during ISV onboarding. Once assigned, the ISO must still select the ISV in the Integration tab and configure access levels before merchant onboarding.
Managing ISV Associations via ISO Settings
ISO Admins can configure which ISV users—public or private—are available for selection during merchant onboarding by using the Integration tab within the ISO Settings module.
Accessing the Integration Tab
- Log into the Valor Portal using your ISO Admin credentials.
- From the main navigation, go to Settings modules and select Integration tab.
- The Integration tab is only visible to users with ISO Admin roles.
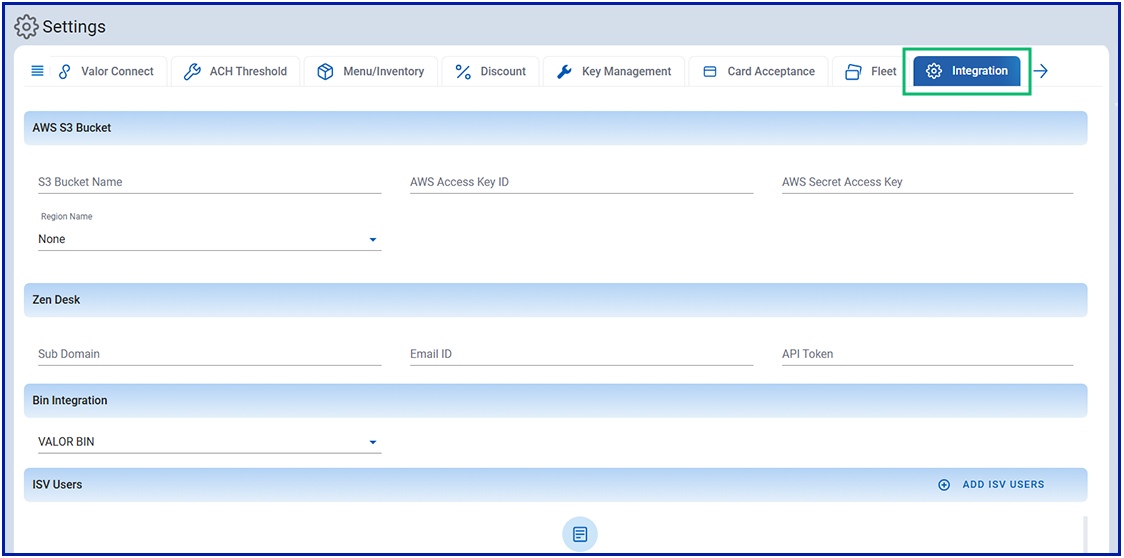
Adding ISV Users
- Navigate to the ISV Users section and click ADD ISV USERS.
- View the available Public ISV Users and Private ISV Users assigned to your ISO.
- Use the search tool to locate specific ISV accounts.
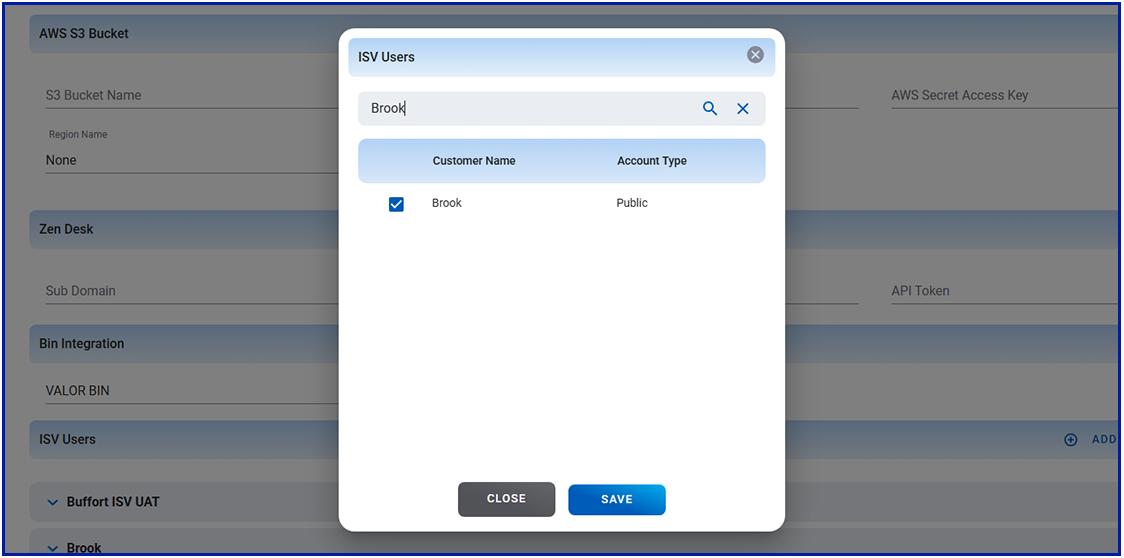
- Select the desired ISV users from the list and click Save to associate them.
Note: More than one ISV user can be selected from the list.
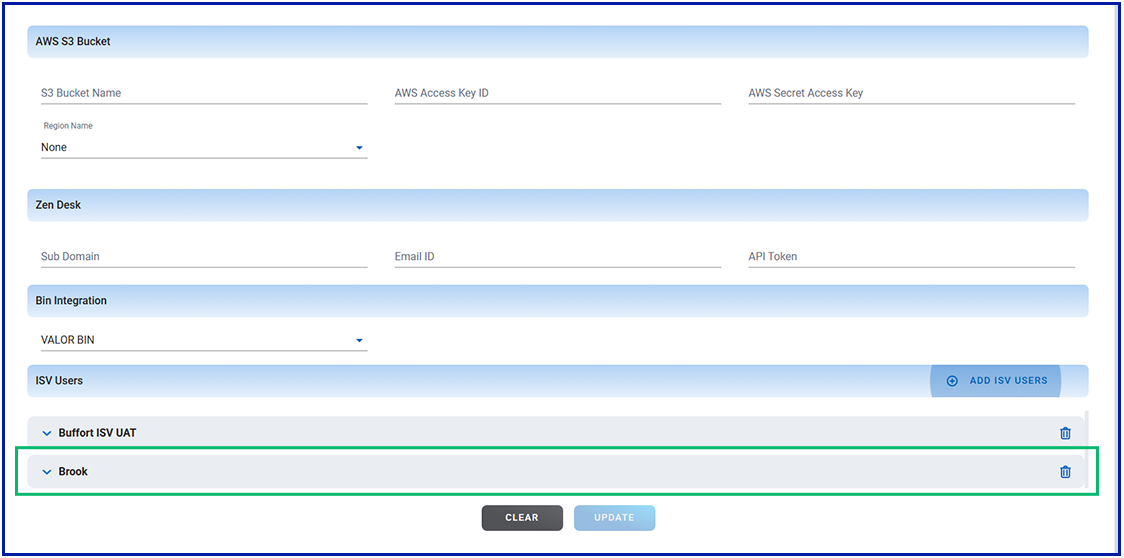
The selected ISV users are now displayed in the ISV Users section.
Configuring ISV Access Levels
Once ISV users are selected and saved in the Integration tab, ISO Admins can configure access permissions for each ISV user.
- In the ISV Users section, click the drilldown arrow next to the desired ISV user.
- You will see a permission matrix with three feature categories:
Device
Store
Merchant
- For each feature, you can enable or disable the following actions:
- Add – Allow the ISV to add a new device, store, or merchant.
- Edit – Allow the ISV to make changes to existing entries.
- Delete – Allow the ISV to delete an existing device, store, or merchant.
- Use the checkboxes to select the appropriate actions for each feature.
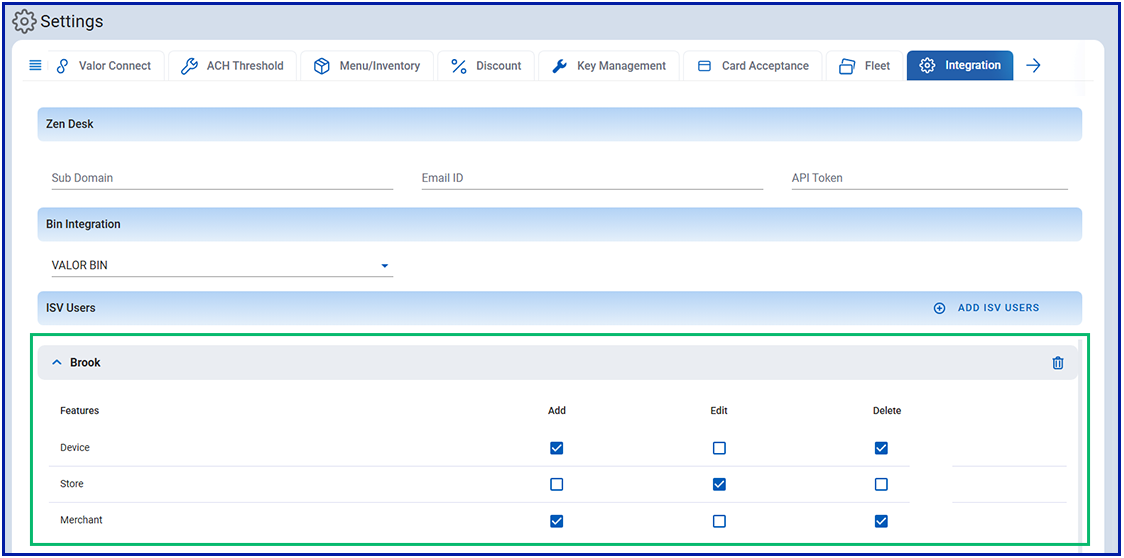
- Select Update to save your changes.
Note:
- These access levels define what actions the ISV user is permitted to perform within the merchant's account, including the ability to create merchants, add or edit stores, and manage devices.
- The access levels have to be configured for all available ISVs, to enable the Update button.
Associating ISVs During Merchant Boarding
Once ISV associations are configured in the Integration tab, the selected ISV users become available during the merchant onboarding process.
To associate an ISV while boarding a new merchant:
- Log into the Valor Portal using your ISO Admin credentials or ISO Operator credentials.
- Navigate to Merchant Management and select Add New option, then choose Full Board.
- In the ISV User field, select one or more ISV users from the dropdown list.
Note: Only ISVs that were previously selected in the Integration tab will appear.
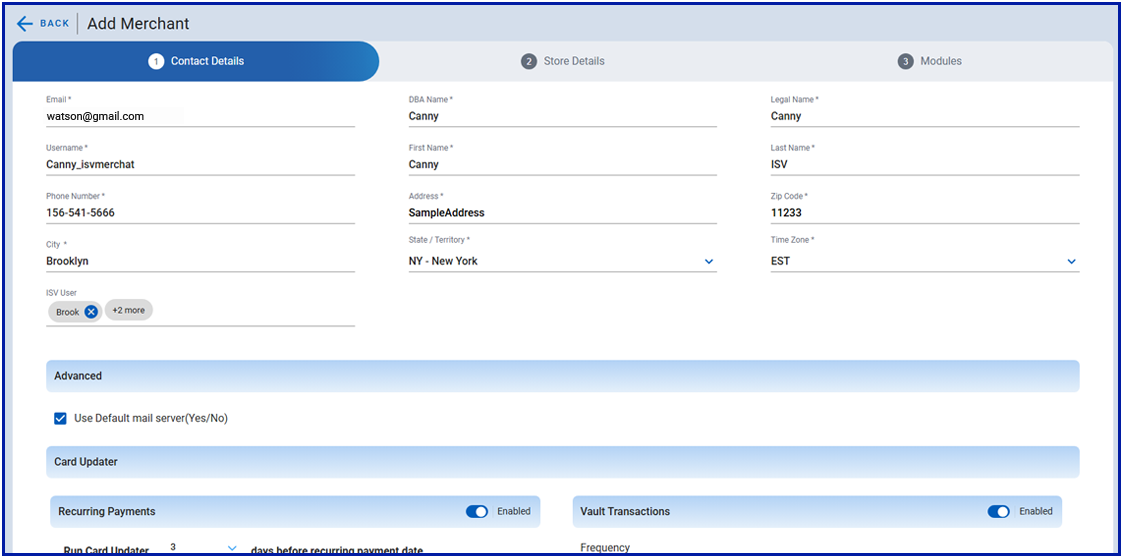
- Complete the remaining steps in the merchant onboarding form, then select Submit to finalize.
Once the merchant is onboarded, the selected ISV users will have access based on the configured permissions—Add, Edit, or Delete—across the Merchant, Store, and Device modules.
Modifying ISV Association for an Existing Merchant
When an ISO is associated with one or more ISVs, those ISVs are automatically available to all merchants under that ISO. If an update is required to change the ISV user associated with a specific merchant, ISO Administrators and Operators can modify the association as outlined below:
- Log into Valor Portal using ISO admin or ISO Operator Credentials.
- Navigate to Merchant Management module and select the required merchant DBA name.
- From the Merchant Overview page, select the horizontal ellipsis and choose Edit Contact Info.
Note:All ISV users associated with the ISO are automatically available to the merchants under that ISO.
- In the Edit Contact pop screen, Select the appropriate ISV User you want to associate the merchant to.
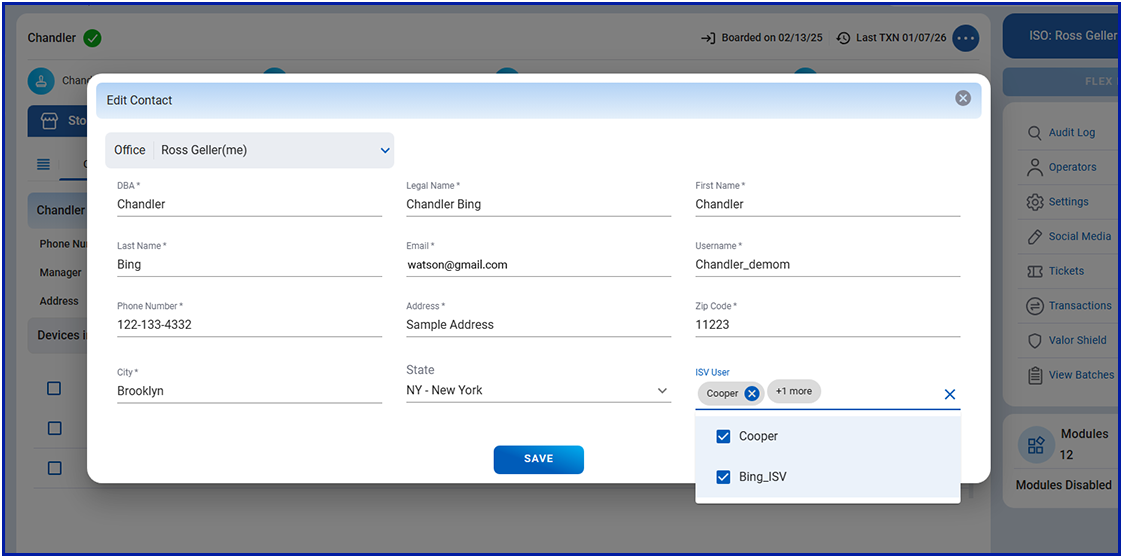
- Select SAVE, to apply changes.
Once saved, the updated ISV association is applied to the merchant. The ISV user will have access based on the permissions configured in the Integration tab of ISO admin settings.
Tips & Troubleshooting
ISV does not appear in the Integration tab
- For private ISVs, confirm that the ISO was assigned during the ISV onboarding process.
- If the ISO was not assigned, the private ISV will not be visible until this association is added.
- For public ISVs, visibility is automatic. If not visible, check with your system administrator.
ISV does not appear during merchant boarding
- Confirm that the ISV (public or private) was selected and saved in the Integration tab of ISO Settings.
- Access-level configuration must be completed before the Update button becomes active.
Cannot update ISV access levels
- The Update button remains disabled until access levels are configured for all ISVs listed in the Integration tab.
- Ensure each ISV has Add, Edit, or Delete permissions selected for Merchant, Store, and Device.
Merchant cannot use an assigned ISV
- Verify that the ISV was correctly selected during merchant onboarding.
- Confirm that the ISV has the required permissions enabled in the ISO’s access matrix.
- If permissions are too limited, the ISV may not be able to perform the expected actions.
Integration tab not visible
- Only ISO Admin users can access the Integration tab.
- If the tab is missing, verify your role or contact your internal administrator.
Changes not applying across merchants
- Access levels apply only to merchants onboarded under the ISO that configured them.
- If an ISV requires updated access for existing merchants, recheck the permission matrix and ensure the latest settings are saved.
ISV user search returns no results
- Confirm that the ISV exists and that the user was created correctly.
- For private ISVs, ensure ISO assignment is completed before searching.
Conclusion
The ISV Management tools in the Valor Portal give ISO Administrators clear and centralized control over which ISV users are available during merchant onboarding and what level of access each ISV is permitted to have. By supporting both public and private ISV types, the system ensures flexibility while maintaining proper visibility and security controls.
Whether enabling standard integrations or managing ISO-specific private ISVs, the structured process outlined in this guide helps reduce errors, strengthen data integrity, and streamline onboarding workflows. Configuring visibility, assignment, and access levels ensures that merchants receive the correct integrations with the appropriate permissions.