Introduction
The Valor PayTech integration with QuickBooks user guide is a comprehensive document crafted to guide
QuickBooks users through the integration process with the Valor portal. This integration offers a quick way
to manage financial transactions, refunds, recurring payments, invoices, customer information, and
inventory. Whether you're a seasoned QuickBooks user or new to financial management, this guide will
take you through every step required to integrate Valor PayTech with QuickBooks. Our aim with this
integration is to transform how you track sales, manage customers, and update inventory efficiently.
Objective & scope
The objective of this guide is to provide step-by-step instructions on effectively integrating Valor PayTech
solutions with QuickBooks accounting software. We aim to help you maximize the efficiency of your
financial operations, reduce the margin for error, and optimize your business performance.
The scope of the document encompasses the following aspects:
- Initial setup: Instructions for establishing a connection between Valor PayTech and QuickBooks,
setting up your account, and configuring the necessary settings for synchronization. - Daily operations: Detailed processes for managing transactions, including creating invoices,
processing payments and refunds, and updating customer and inventory information. - Troubleshooting and support: Guidelines for resolving common issues that may arise during the
integration process and information on accessing further assistance and customer support services
for reintegration. - Best practices: Guidelines for resolving common integration issues and offers information on
accessing additional assistance and customer support services for reintegration.
Prerequisites
- Access to QuickBooks integration is exclusive to ISOs and merchants and is facilitated through the Valor portal. To utilize this feature, merchants must have login access to the Valor portal. You can access the portal by following this link: https://vponline.valorpaytech.com/login.
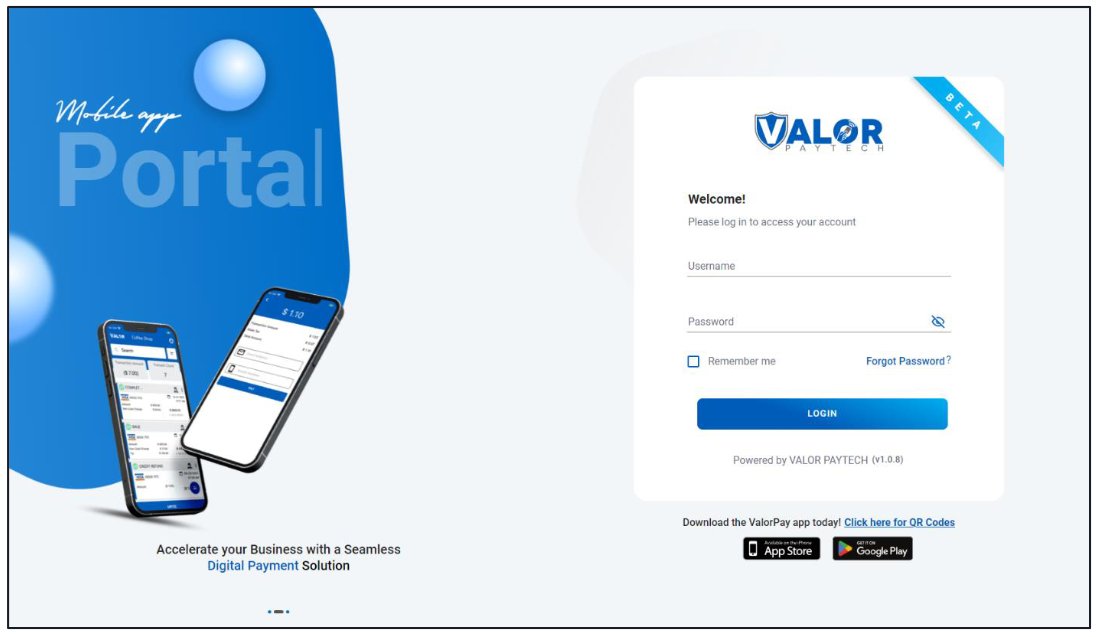
- QuickBooks integration is available to subscribed ISOs only. Merchants can access this feature once the ISO or sub-ISO grants access. ISO or sub-ISO users can enable or disable this module for their merchants as needed, and merchants can do the same for their operators.
Benefits
Seamless workflow integration
Valor and QuickBooks seamlessly integrate, ensuring a smooth workflow. You can now integrate Valor with
QuickBooks in just a few clicks and watch your workflow transform. This minimizes disruptions to your
workflow and eliminates manual data entry, making your processes more efficient and error-free.
Quick & accurate financial management
QuickBooks integrated with Valor streamlines e-invoices management. Effortlessly generate e-invoices and
promptly update payment transaction details for precise and current financial records.
Efficient customer & inventory management
Valor and QuickBooks work seamlessly together, enabling smooth two-way customer and inventory data
updates. Automatic updates streamline customer relationships and inventory management, ensuring
consistency.
Transaction automation
Transition effortlessly to total transaction automation with Valor & QuickBooks. Easily import and sync
sales, recurring transactions, refunds, e-invoices, and PayNow links into QuickBooks.
QuickBooks and Valor portal integration: Step-by-step instructions
To integrate QuickBooks with the Valor portal, you need to follow these steps:
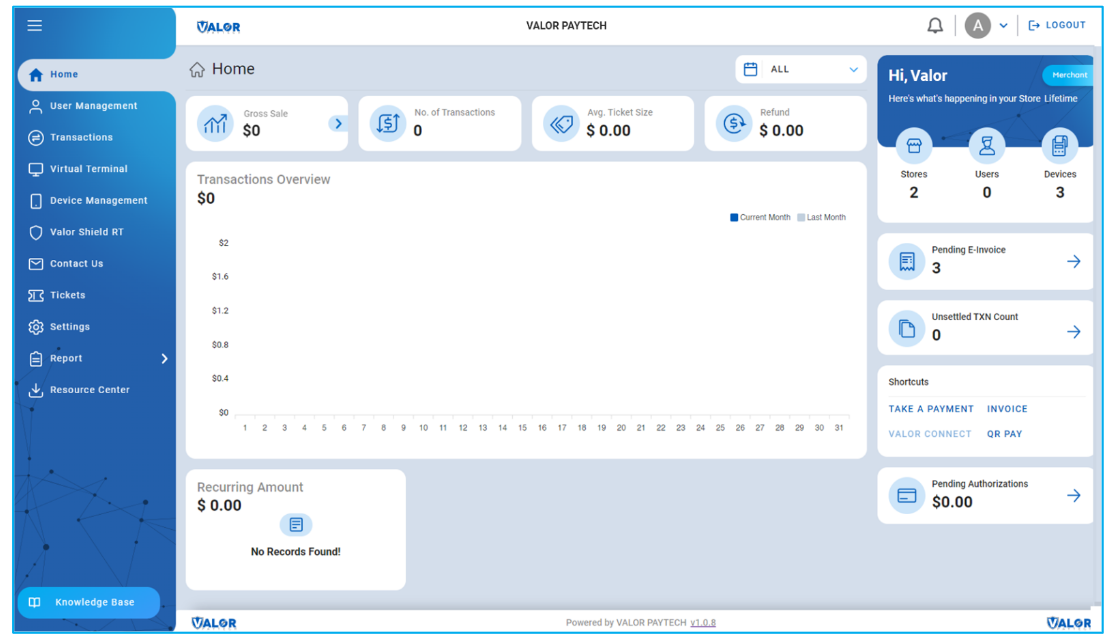
Step 1: Log in to the Valor portal with your merchant credentials, and the homepage will appear.
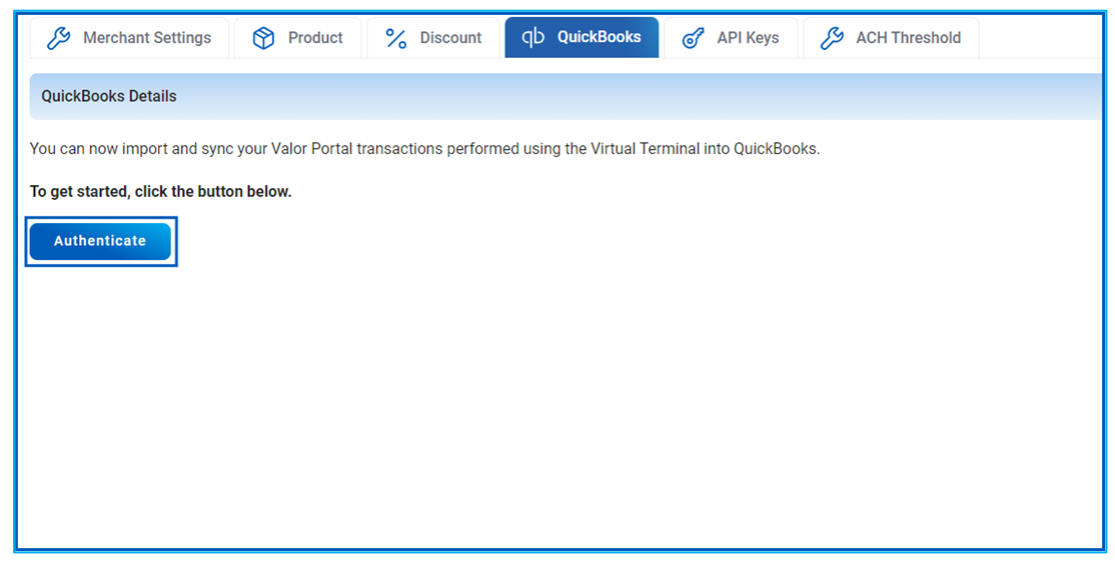
Step 2:Click' Settings' on the left navigation bar. Then, click on the ‘QuickBooks’ tab and click ‘Authenticate’ to start the integration process.
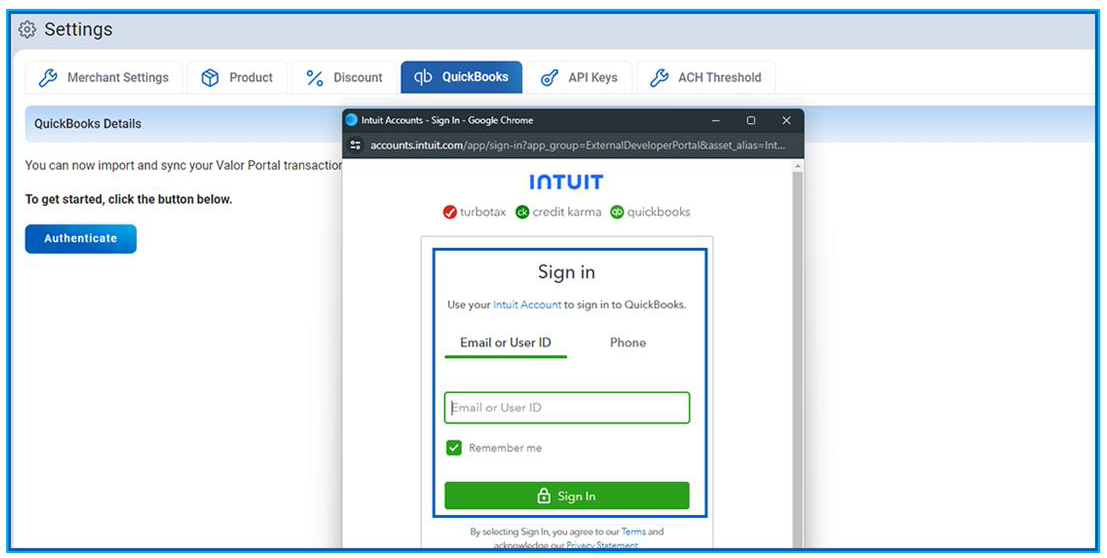
Step 4: The QuickBooks login page will appear. Sign in with your QuickBooks credentials.
Step 5: Once your login has been successful, your customer ID and status confirmation will appear within a few seconds. Once the details appear, the integration process has been completed.
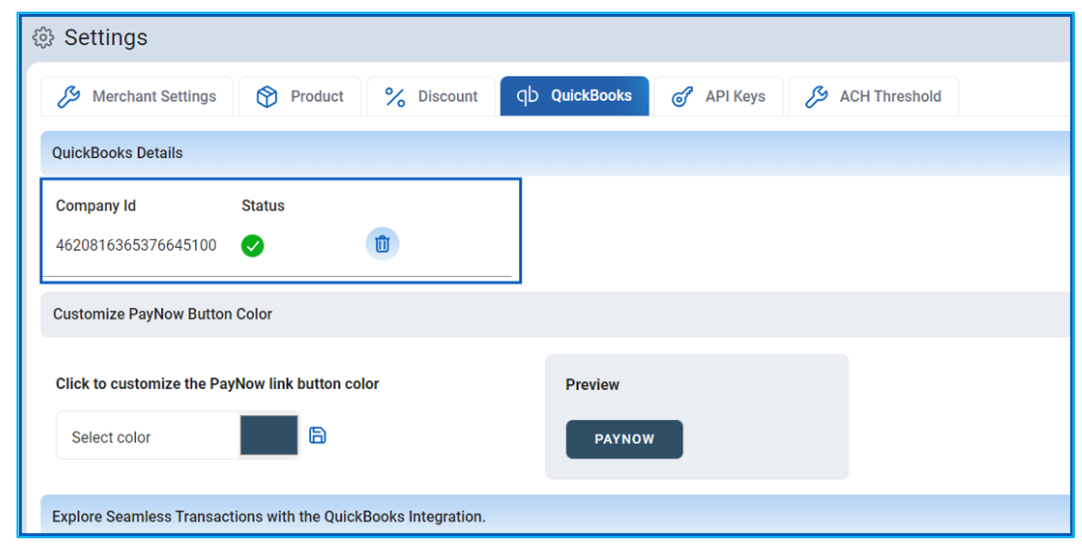
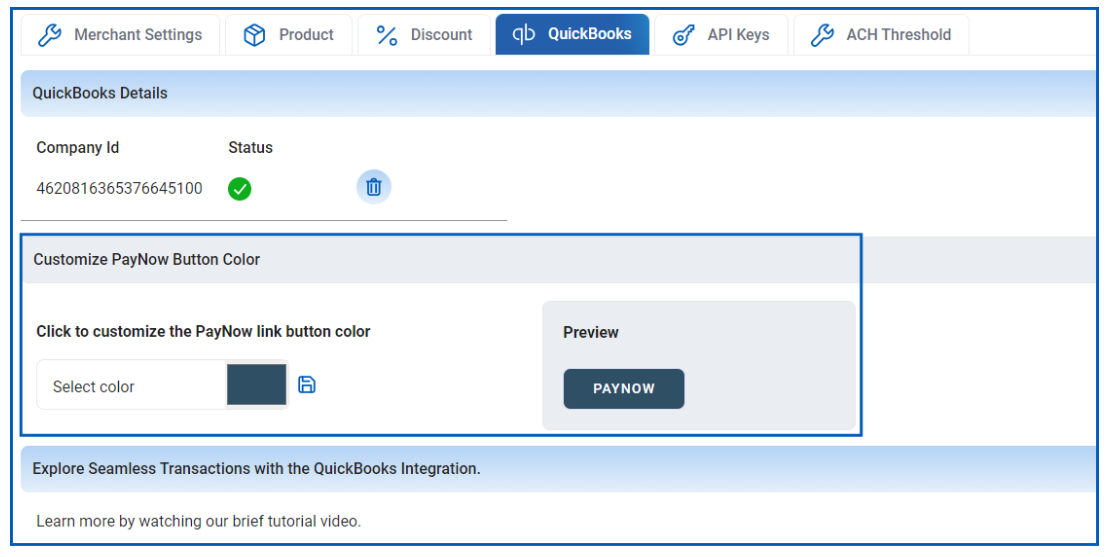
Step 6: In this step, you can customize the PayNow button's color. Simply select your desired color from
the available options. A preview option is also provided on the right side for your convenience.
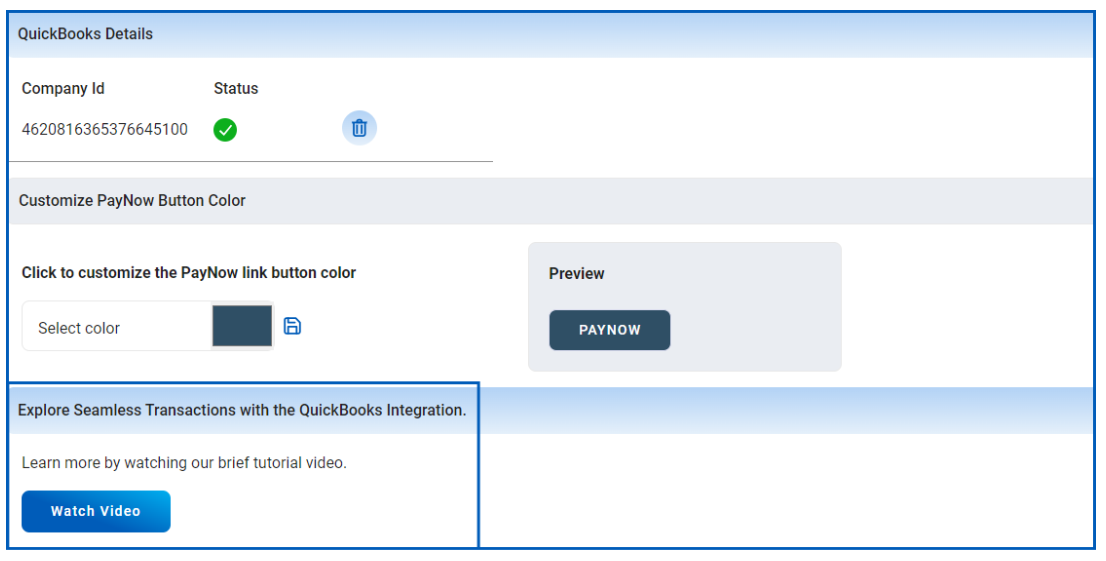
Step 7: In this step, you can watch a tutorial video to guide you through the integration process.
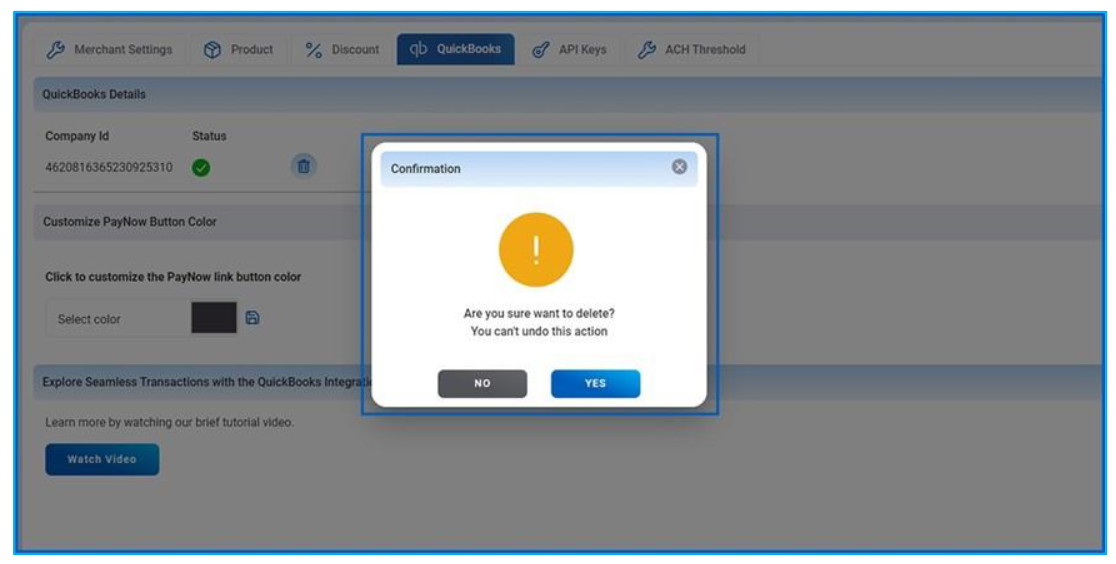
Step 8:To remove the integrated ID, click the delete icon. A confirmation box will then appear. Confirm to
complete the deletion process. To reintegrate, you can easily click 'authenticate' again and follow the
procedure.
Transaction processing in the Valor portal & automatic updates in QuickBooks
How to integrate Sale transactions with QuickBooks
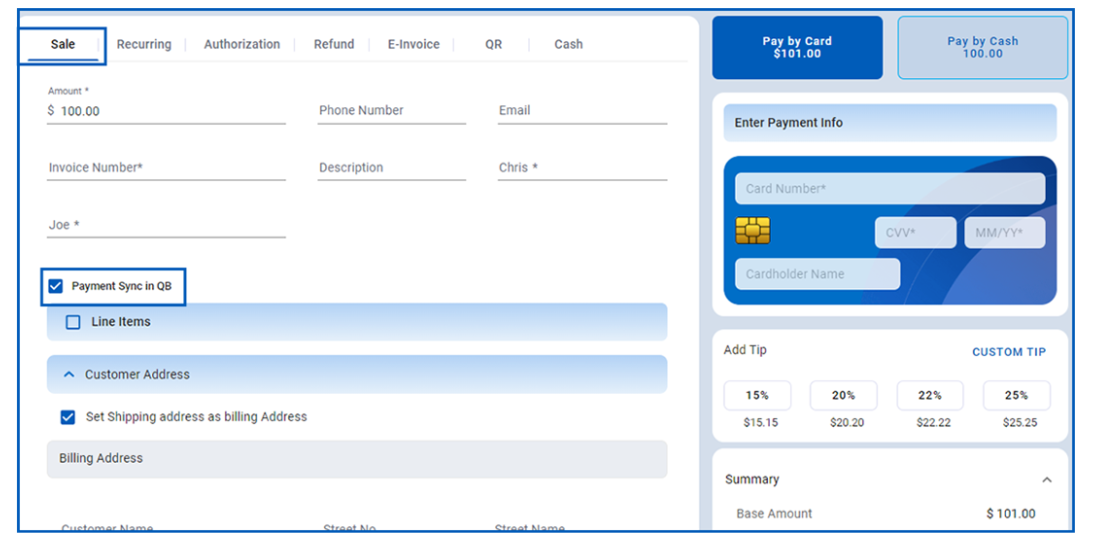
To sync a Sale transaction with QuickBooks while using the Virtual Terminal, the following steps need to be
followed:
- Navigate to the Virtual Terminal page.
- To sync this transaction with QuickBooks, select the ‘Payment Sync in QB’ checkbox during the sale
transaction process. - The sale transaction will automatically update in QuickBooks once the payment is processed.
How to integrate Recurring payments with QuickBooks
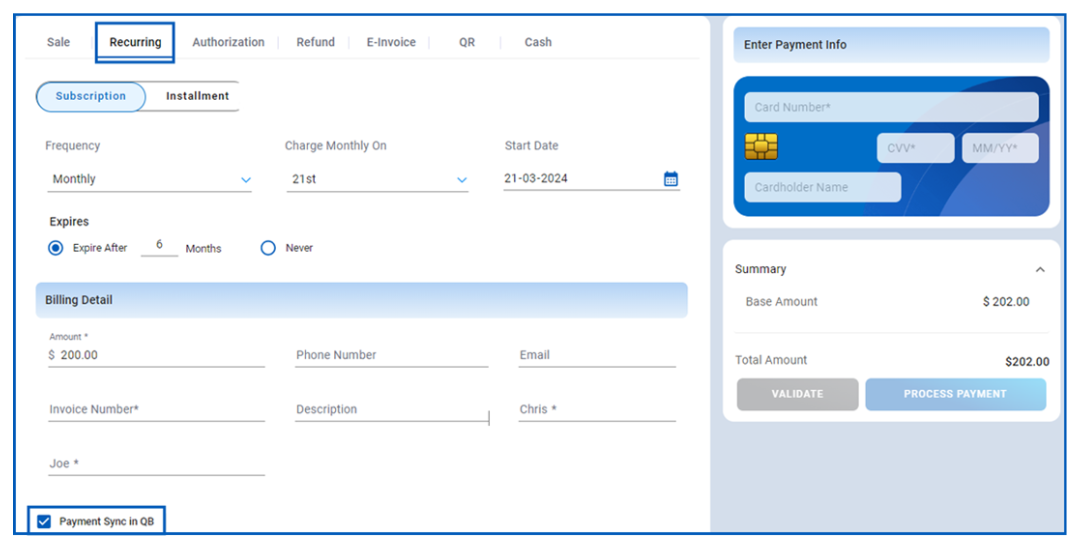
To integrate Recurring payments with QuickBooks, the following steps need to be followed:
- Navigate to the Recurring tab.
- Perform the recurring payment as usual.
- During the payment process, select the ‘Payment Sync in QB’ checkbox to sync this recurring
payment with QuickBooks. - The recurring payment transaction will automatically update in QuickBooks once processed.
How to integrate Refund transactions with QuickBooks
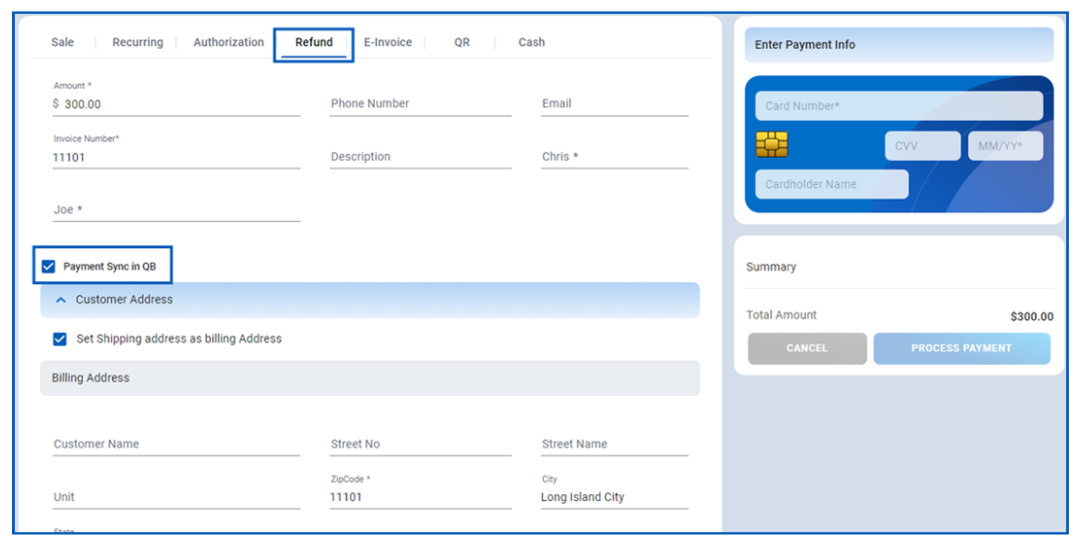
To integrate Refund transactions with QuickBooks, follow these steps:
- Navigate to the Refund tab.
- Process the refund transaction as usual.
- Select the ‘Payment Sync in QB’ checkbox during the refund process if you want this refund
transaction to be synced with QuickBooks. - The refund transaction will automatically update in QuickBooks once processed.
How to create & update an E-invoice & integrate with QuickBooks
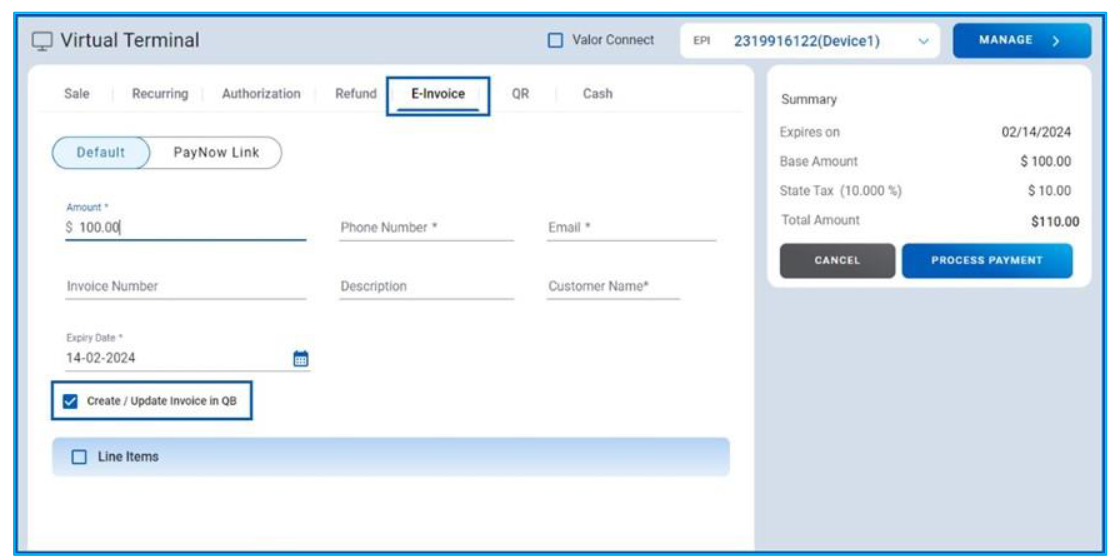
To create or update invoices in QuickBooks and integrate them with E-Invoice, follow these steps:
- Navigate to the E-Invoice tab. You can create or update invoices in QuickBooks here.
- Select the ‘Create/Update invoice in QB’ checkbox during the payment process if you want the e-
invoice to be synced with QuickBooks.
- The PayNow link generated can be used for QB integration in email templates.
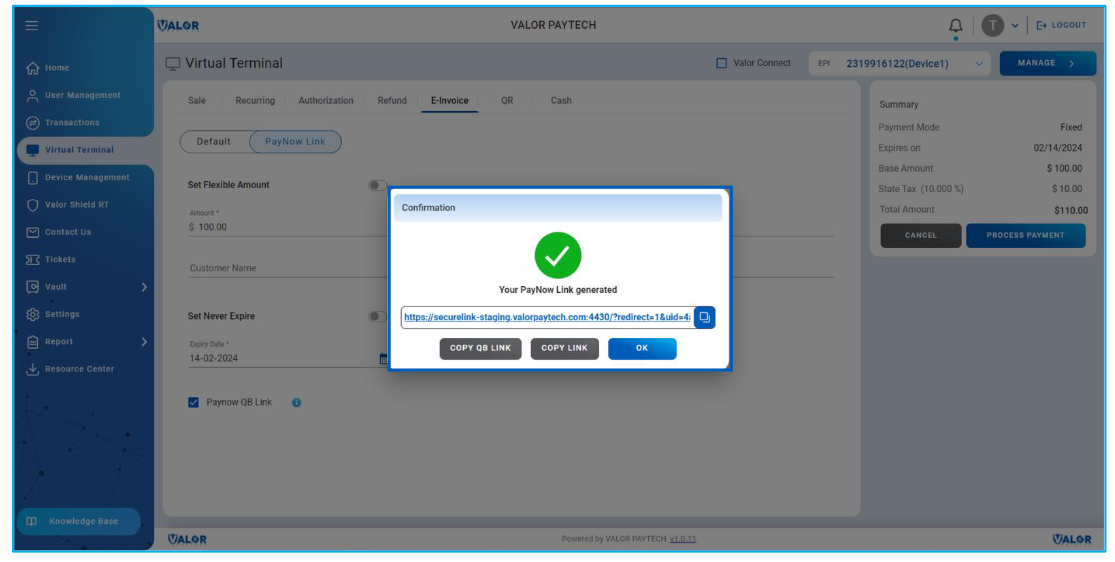
- Once the payment is processed, the transaction will automatically update in QuickBooks. All transactions will be reflected in your QuickBooks account. To view them, log in to the QuickBooks platform and navigate to ‘Sales’ under ‘Invoices.’ Your deposited, paid, due, and overdue transactions will appear here.
How to generate a QuickBooks report
A QuickBooks report provides a comprehensive list of transactions synced with QuickBooks, specifically those conducted via the Virtual Terminal. Follow these steps to generate a QuickBooks report:
- Log in to the Valor portal with your credentials.
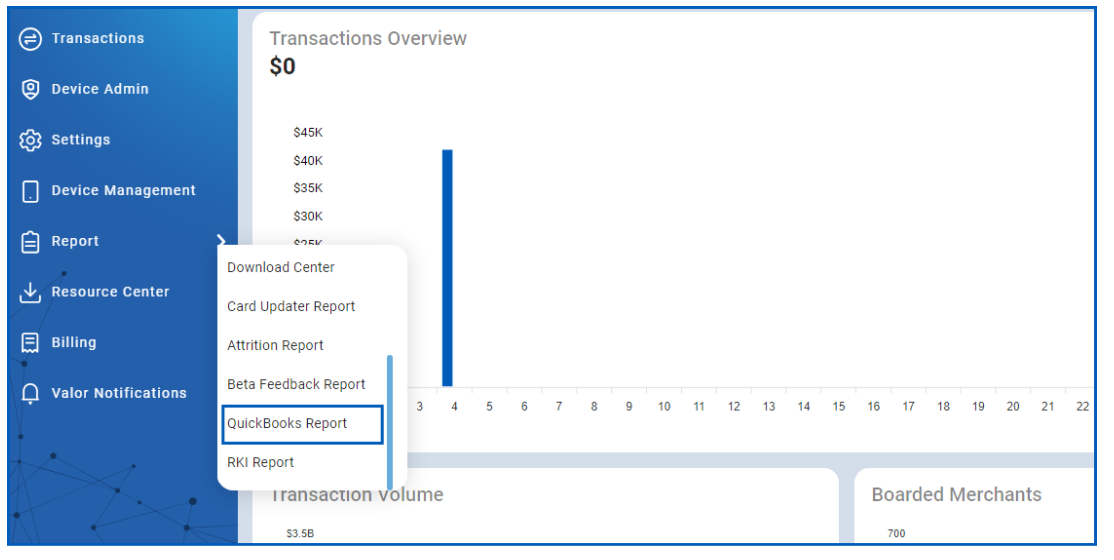
- Navigate to the 'Reports' section on the left navigation bar. Select the ‘QuickBooks Reports’ option
from the list of options.
- The QuickBooks report page will appear, displaying all transactions synced with QuickBooks.
- Access details of individual transactions or view lists of transactions.
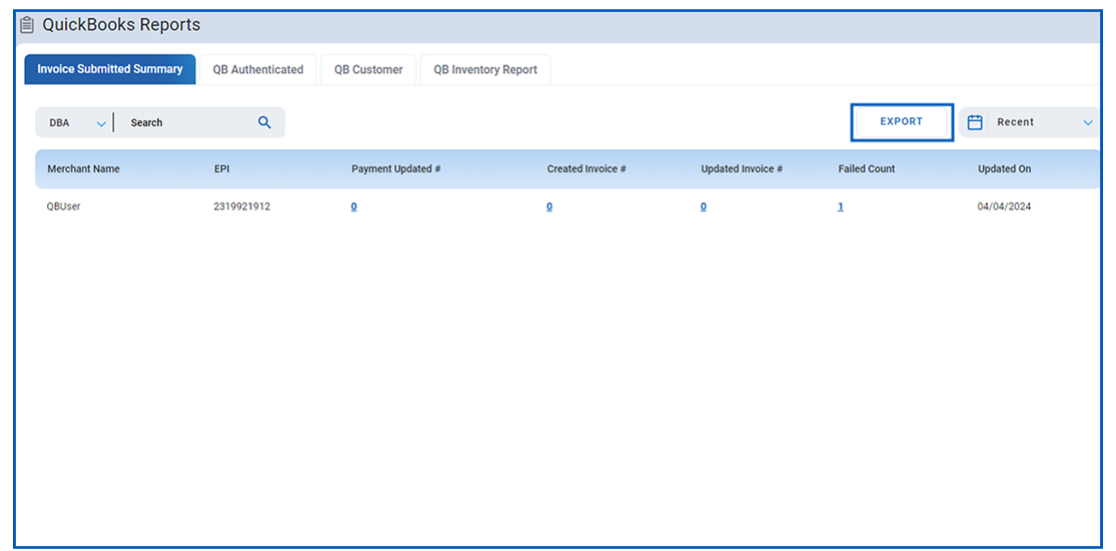
- To export transaction lists, click on the 'Export' option in the upper right corner.
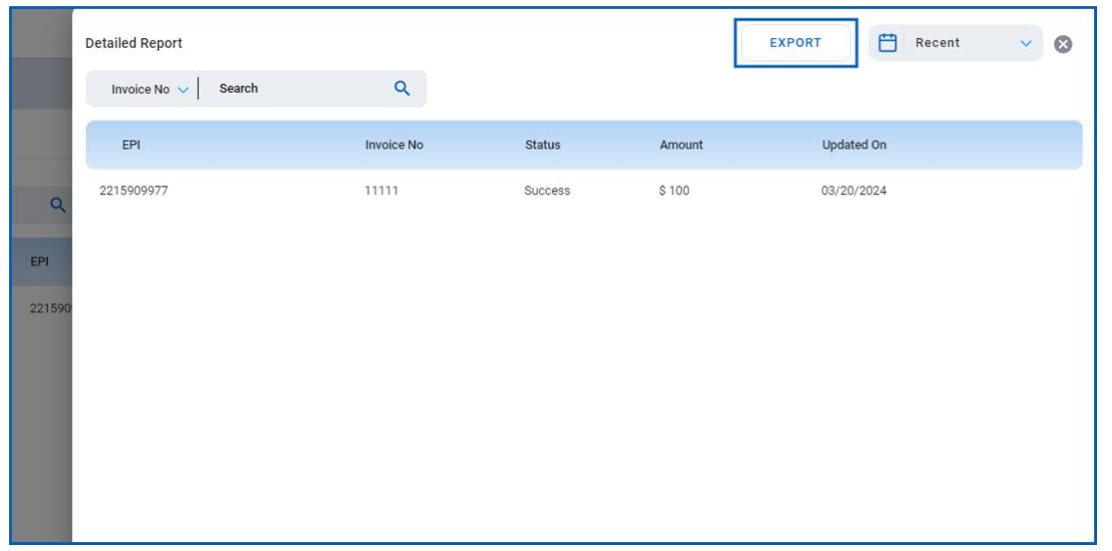
- Choose to export in CSV or XLS format.
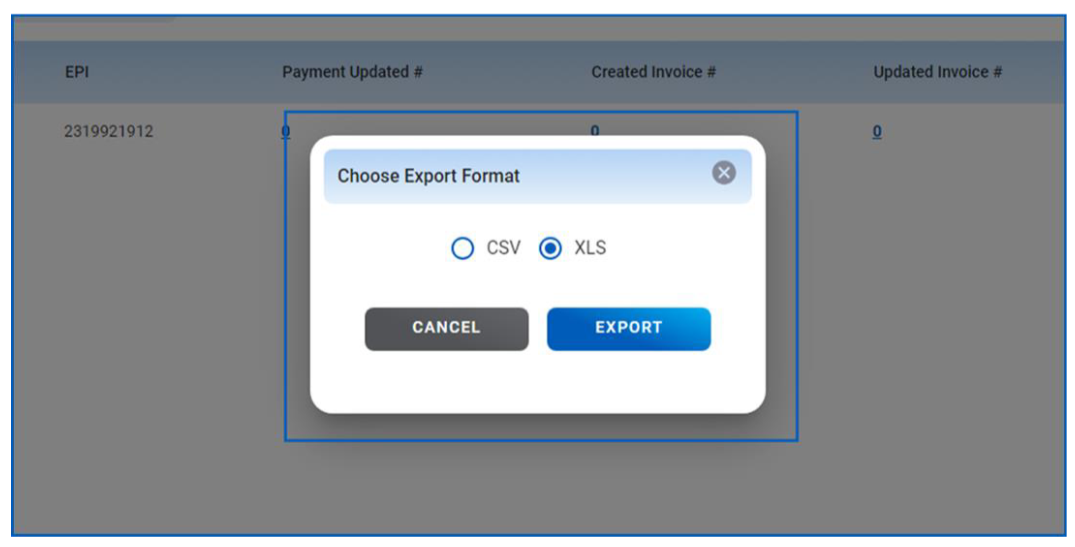
After selecting and clicking ‘Export,’ your report will be automatically downloaded.
QuickBooks Card Present Transactions
When using QuickBooks (QB) with a Point-of-Sale (POS) integration, Card Present Transactions refer to in-person payments processed through a connected POS system that syncs with your QBO account.
- POS device collects the card payment from the customer.
- The transaction is processed in real-time through a payment gateway.
- The sale and payment data are automatically synced to QuickBooks Online.
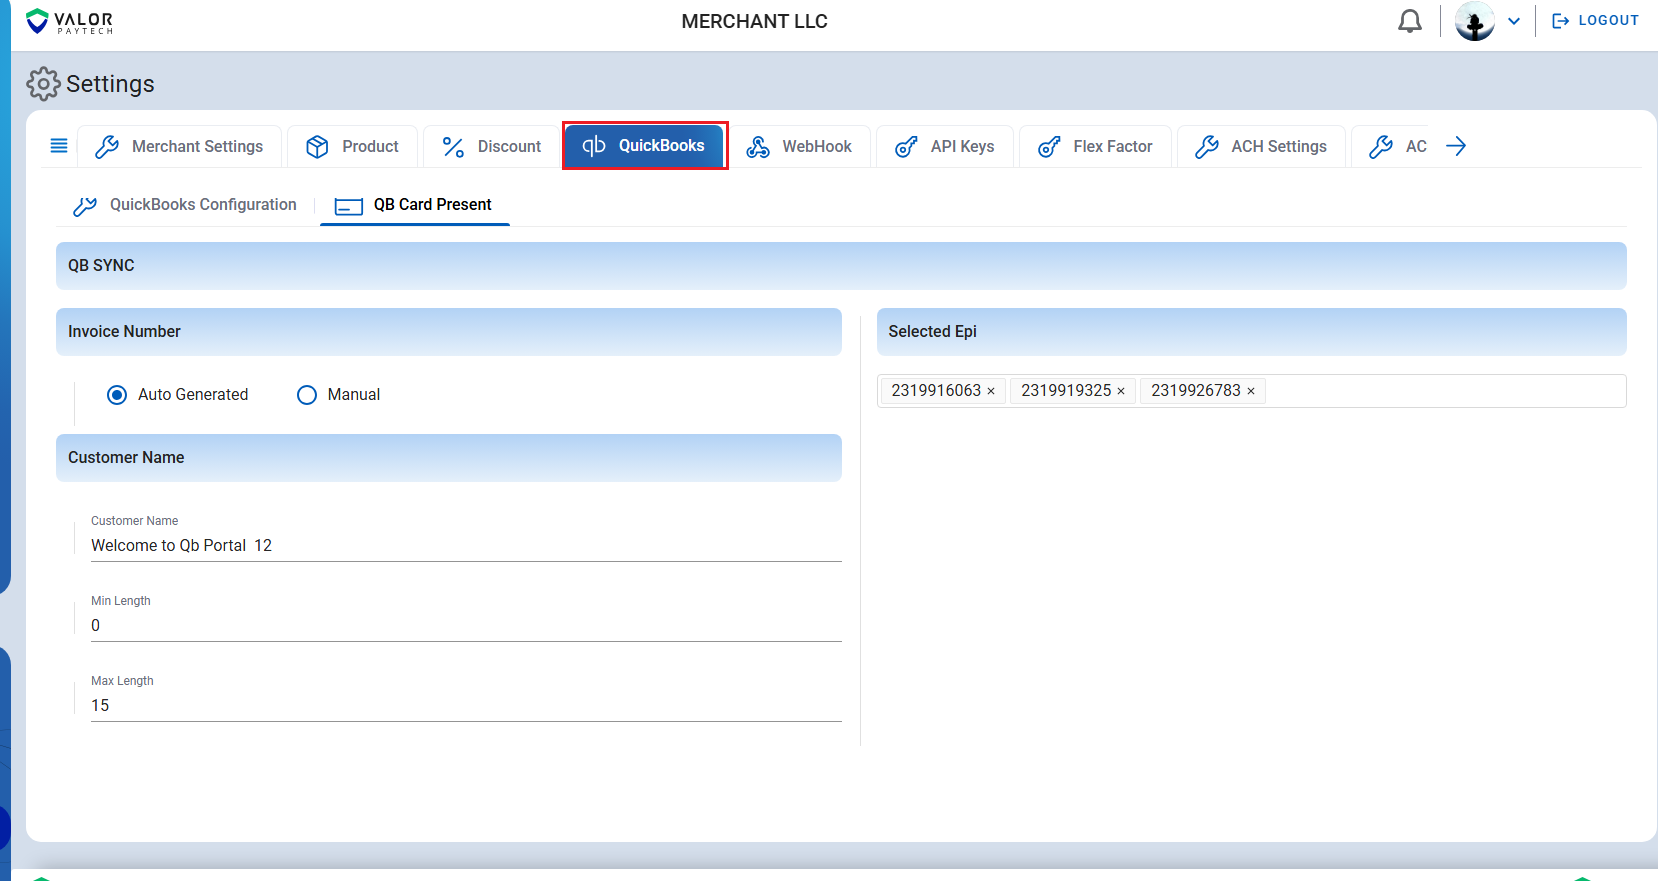
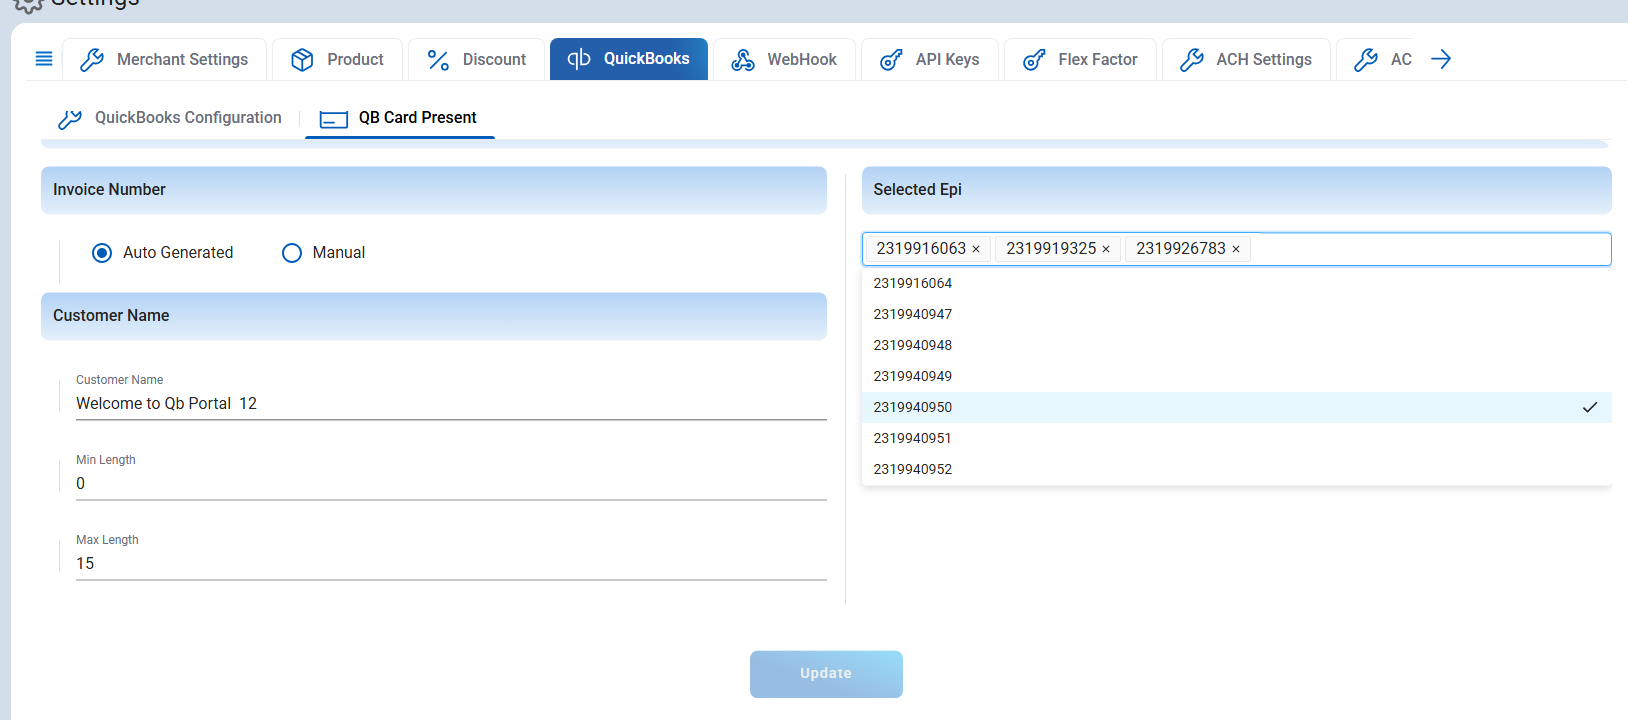
To enable QuickBooks for a selected EPI in a merchant account:
Log in to the Merchant Portal→ Go to Settings → Click on QuickBooks → Select the desired EPI
CUSTOMER NAME
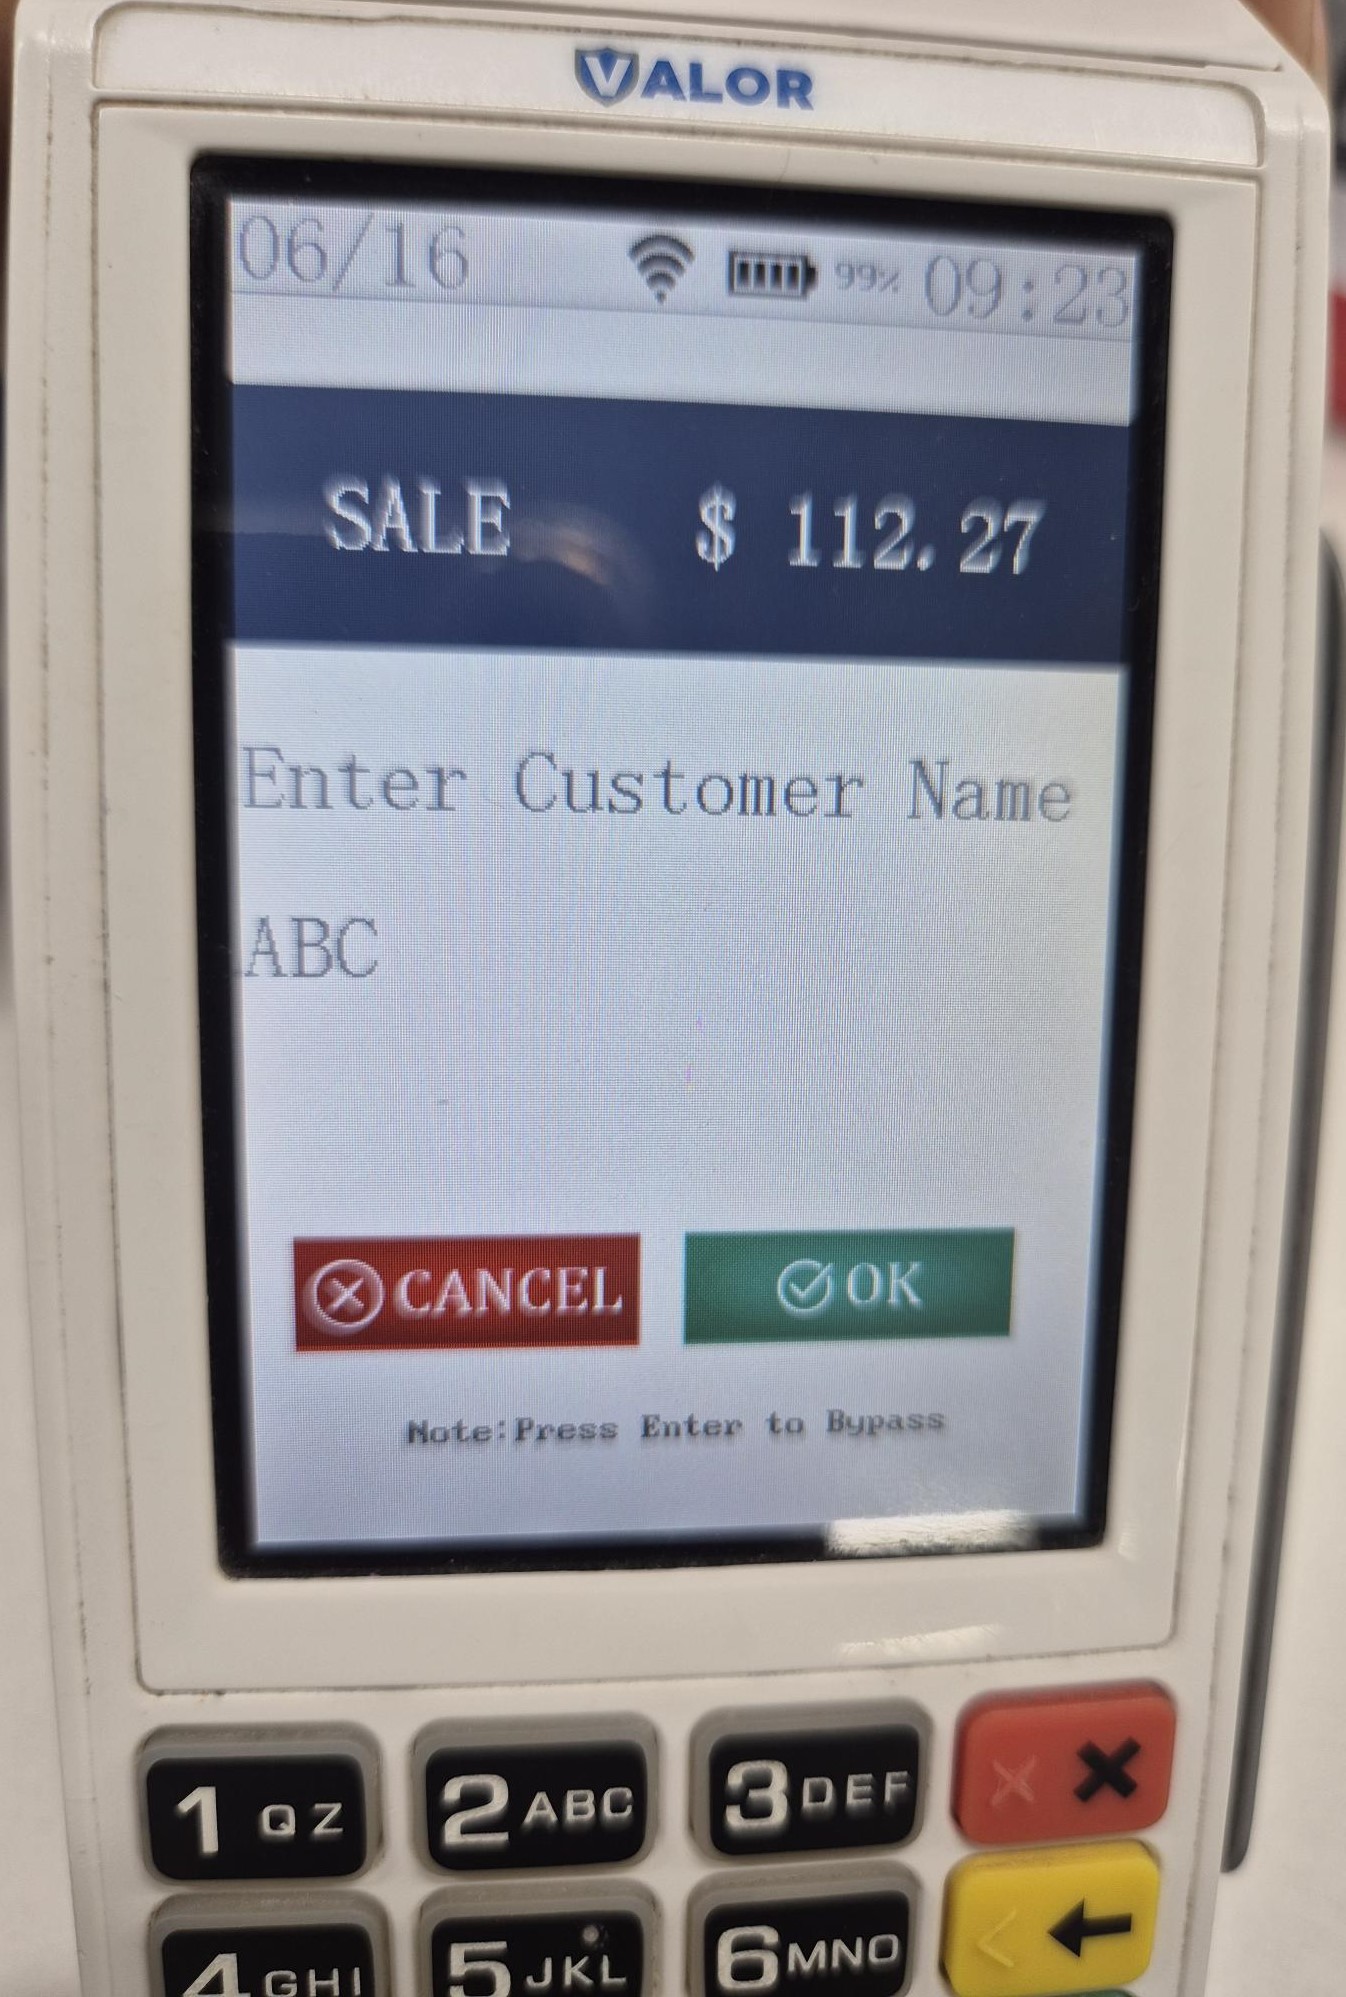
- Customer name for quick book will take input from client
- If the customer’s name should not give in the payload, customer name should be given through POS
Terminals or else it could be bypass. If you bypass that customer name, use the TMS value. - Optional for QuickBooks.
- Max length for the “CUSTOMER_NAME” is 64 characters.
- Min length for the “CUSTOMER_NAME” is 2 characters.
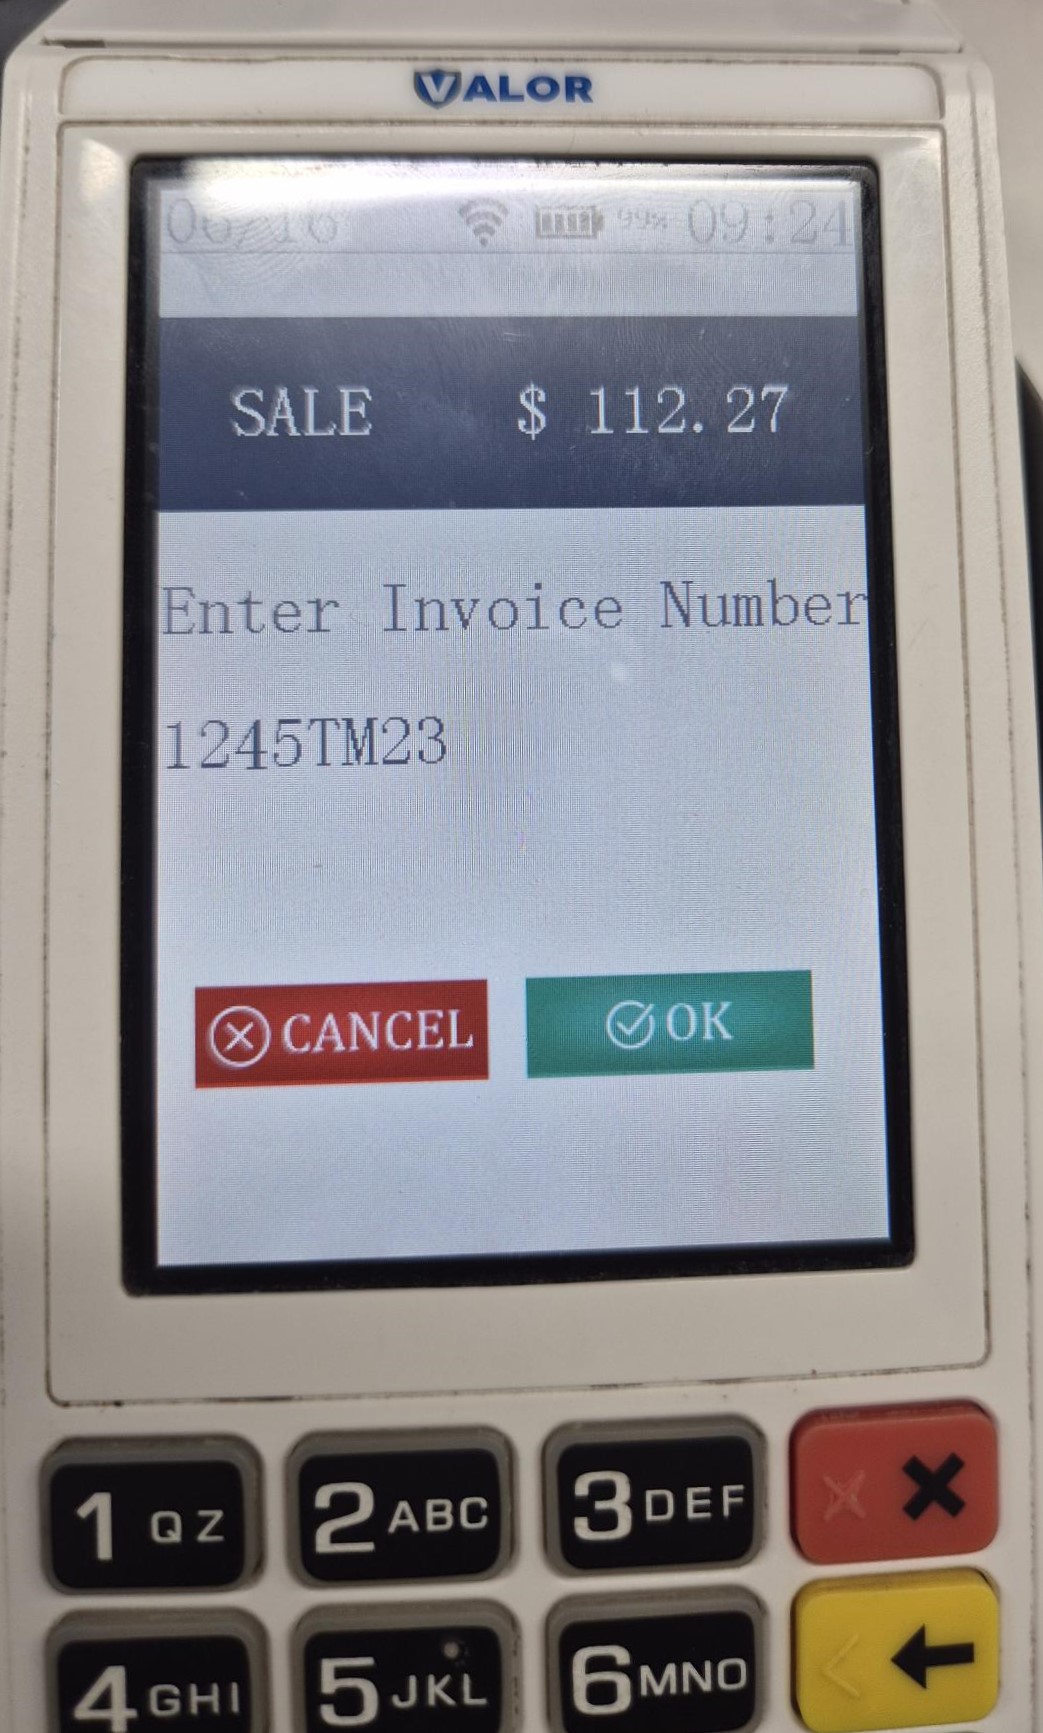
INVOICE NUMBER
We have two options for invoice number generation: one is Auto-generated, and the other is Manual. Additionally, the customer name needs to be configured in the EPI settings.
Conclusion
In conclusion, at Valor PayTech, we are committed to simplifying your financial management. We aim to set a benchmark experience for exceptional service. As businesses strive for efficiency and accuracy in their operations, the Valor Portal integration with QuickBooks stands as a valuable tool, empowering users to navigate the complexities of financial management with confidence.
