Unique Link Creation
To send the following to [email protected] on Shopify installation guide to retrieve the unique link
- Can you provide me with your merchants Shopify domain?
- Also, when the merchant is logged in to the Shopify admin portal, what do they see after this URL - admin.shopify.com/store/{Here}?
Installing the application
The installation process consists of general installation plus copying a JS code to store
settings.
- Login to your Shopify store admin.
- Paste the unique installation link into the address bar of your browser (provided to you
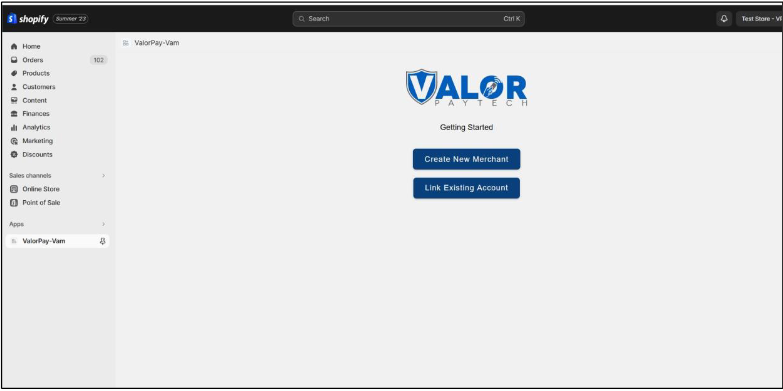
by ValorPay). - You will see the screen below.
- Click Install app.

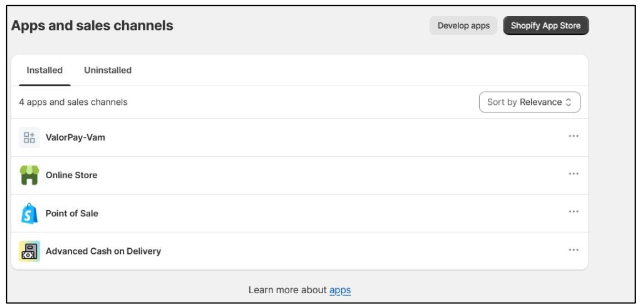
- After installation is complete, click on Apps in the left pane, select and open the
application.
- Land on the application dashboard.
Setting the additional JavaScript code
- In your store, click Settings -> Checkout
- Scroll down to find ‘Order status page'
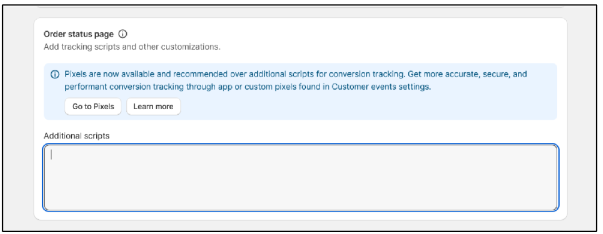
- Copy the following JavaScript code into the text box and click 'Save'
<script type="text/javascript">if("undefined"!=typeof Shopify&&void 0!==Shopify.checkout){history.pushState(null,null,window.location.href),history.back(),window.onpopstate=()=>history.forward();var e=location.href,t=document.title;document.title="Please wait";var a=document.createElement("div");a.setAttribute("id","tplDiv"),a.style.cssText="width: 100%;height: 100%;background: rgba(255,255,255,1);position: absolute;top: 0;left: 0;z-index: 9999;",document.body.appendChild(a);var r=document.createElement("div");function i(){var e=new XMLHttpRequest;e.onreadystatechange=function(){if(4==this.readyState&&200==this.status){var e=JSON.parse(this.responseText);"success"==e.status&&"valorpay"==e.PaymentGateway&&(null==e.FinancialStatus||""==e.FinancialStatus||null!=e.FinancialStatus&&"pending"==e.FinancialStatus.toLowerCase())?n():"success"==e.status&&"valorpay"==e.PaymentGateway?(document.title=t,document.getElementById("tplDiv").remove(),Shopify.Checkout.OrderStatus.addContentBox(null!=e.note?e.note:"")):(document.title=t,document.getElementById("tplDiv").remove())}},e.open("GET","https://shopify.valorpaytech.com/v1/getordernote?id="+Shopify.checkout.order_id,!0),e.send()}function n(){var i=new XMLHttpRequest;i.onreadystatechange=function(){if(4==this.readyState&&200==this.status){var i=JSON.parse(this.responseText);if("success"==i.status&&"valorpay"==i.gateway){document.title="Please wait while you are redirected to the ValorPayTech Payment Gateway Page.",a.appendChild(r);var n=new URL("https://shopify.valorpaytech.com/v1/payment/"),s=n.searchParams;s.append("id",Shopify.checkout.order_id),s.append("receipt_url",encodeURI(e)),location.href=n}else document.title=t,document.getElementById("tplDiv").remove()}},i.open("GET","https://shopify.valorpaytech.com/v1/getorder?id="+Shopify.checkout.order_id,!0),i.send()}r.setAttribute("id","tpl1Div"),r.innerHTML='<center><br /><br /><br /><img src="https://shopify.valorpaytech.com/loader.gif" /><br /><br /><h2>Please wait</h2><br /><h3>Please wait while you are redirected to the ValorPayTech Payment Gateway Page.</h3></center>',i()}</script>
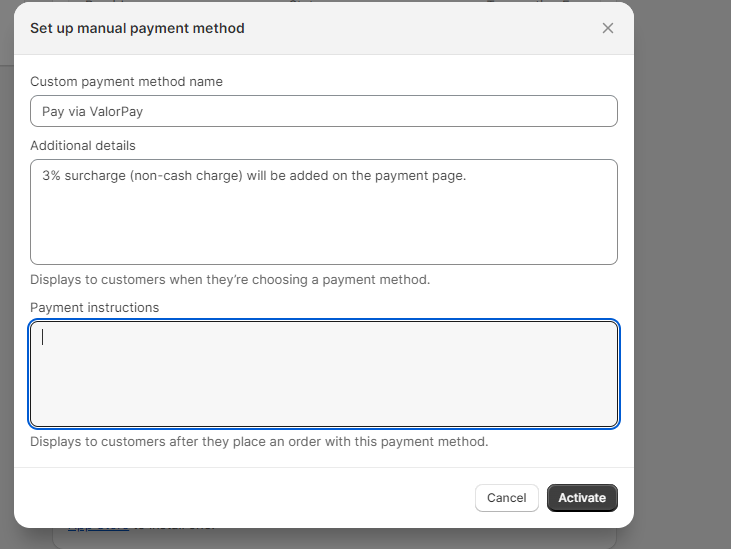
- Go to Settings -> Payments -> click Add manual payment method select Create a custom payment method
- Enter the custom payment method name and add the additional details, then click Activate
- The installation process is complete.
Setup the application using your ValorPay keys and start using the application.
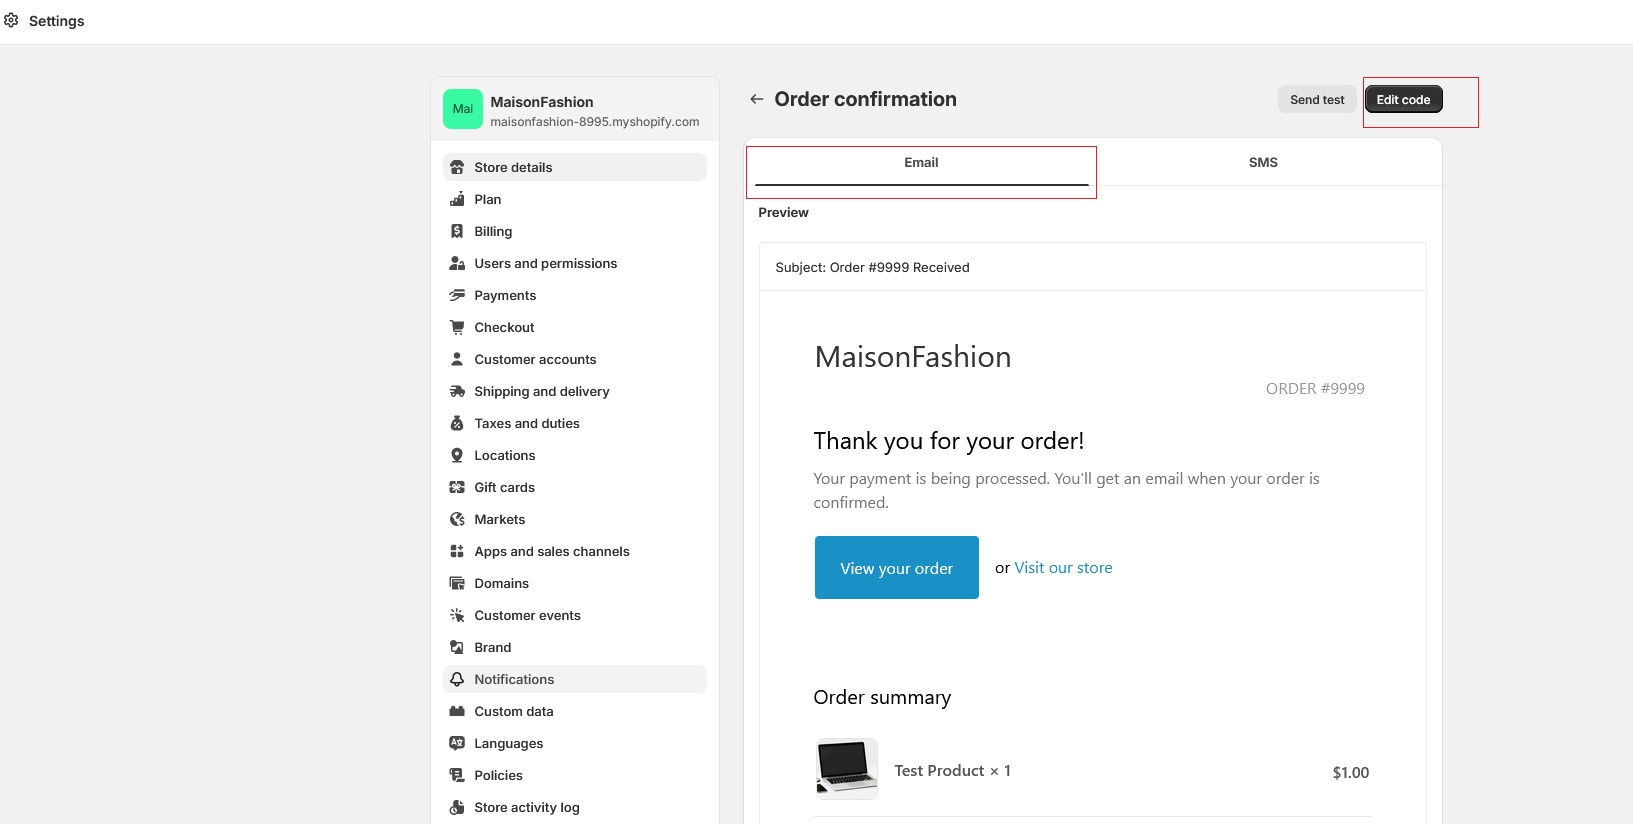
Change the Custom Message for Email Template
Go to Settings -> Notification -> Order Processing -> Order Confirmation -> Edit Code from Email template

To add the below code in Email Subject
Order {{name}} {% assign transaction_gateway = '' %} {% assign transaction_count = transactions | size %} {% if transaction_count > 0 %} {% for transaction in transactions %} {% assign transaction_gateway = transaction.gateway %} {% endfor %} {% endif %} {% if transaction_gateway|strstr:"ValorPay" %} Received {% else %} Confirmed {% endif %}
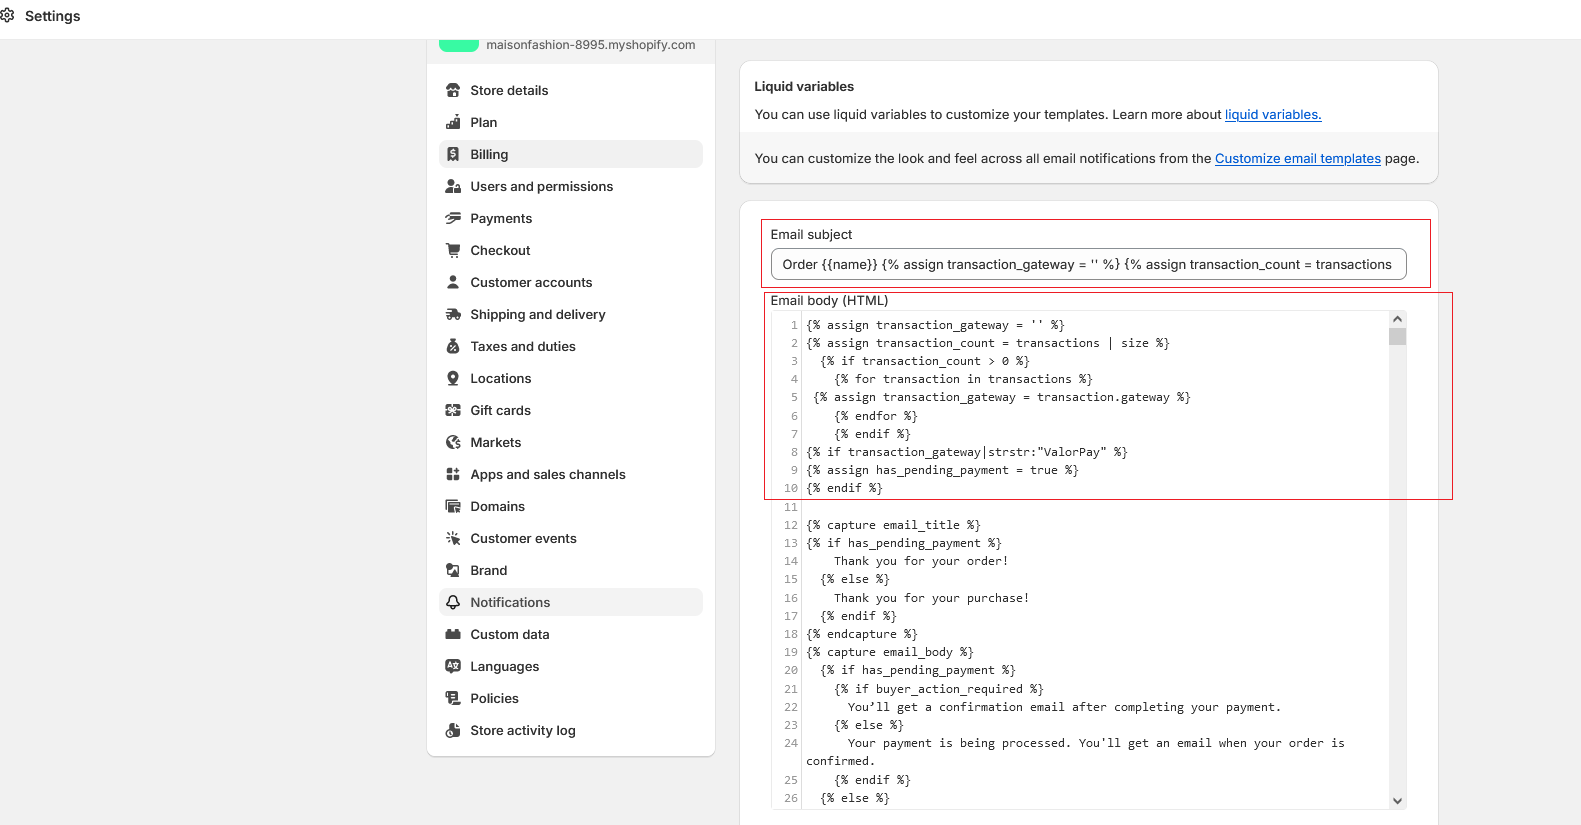
Add the below code in top of the Email Body
{% assign transaction_gateway = '' %}
{% assign transaction_count = transactions | size %}
  {% if transaction_count > 0 %}
    {% for transaction in transactions %}
 {% assign transaction_gateway = transaction.gateway %}
    {% endfor %}
    {% endif %}
{% if transaction_gateway|strstr:"ValorPay" %}
{% assign has_pending_payment = true %}
{% endif %}
To change the custom message from "Your order is currently being processed and will be fulfilled upon successful payment. If you've already made the payment, no further action needs to be made" instead of "Your payment is being processed. You'll get an email when your order is confirmed".
Generating API Keys
Objective
To perform any request on Valor virtual terminal, one should have the following credentials:
APP ID
- APP ID represents the merchant API; A merchant can create an APP ID using the Valor portal
APP KEY
- APP KEY represents the EPI of the merchant, technically a merchant can have only one APP ID but based on the count of the API KEY, a merchant can have several API KEYS
- Merchant can create their own API KEY using the Valor portal
EPI
- Basically EPI is an end point identifier, Identify the device on valor infrastructure, any devices including virtual terminal will be identified as an EPI, typically it's a 10 digit number starts with 2
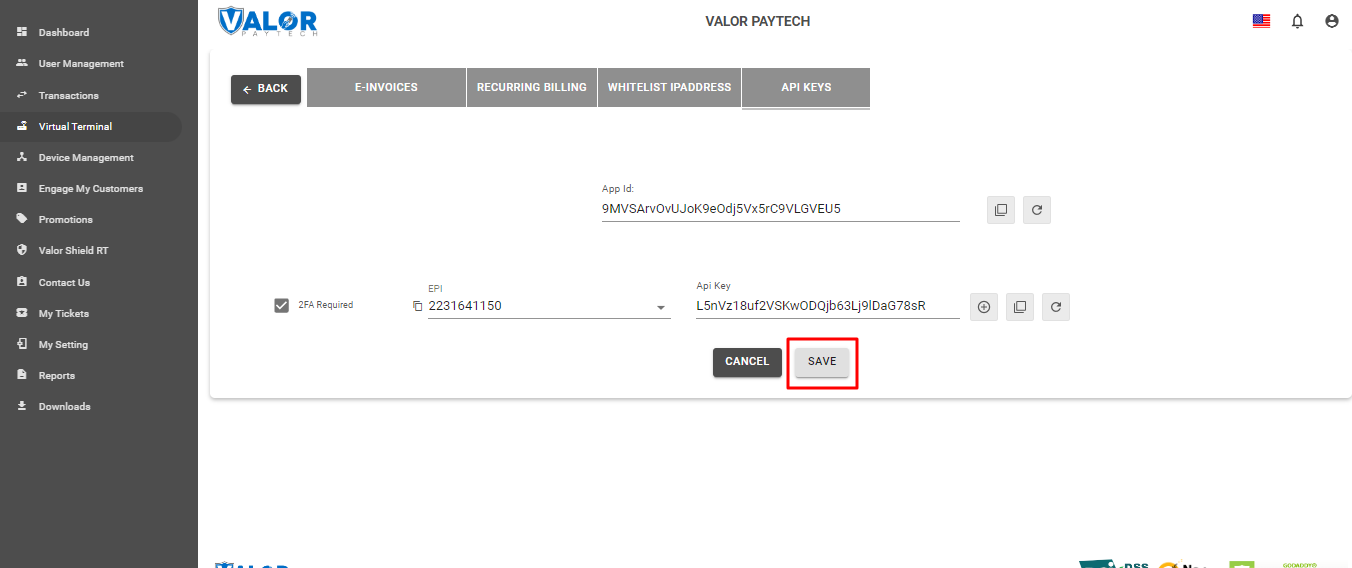
STEPS TO CREATE APP ID AND APP KEY
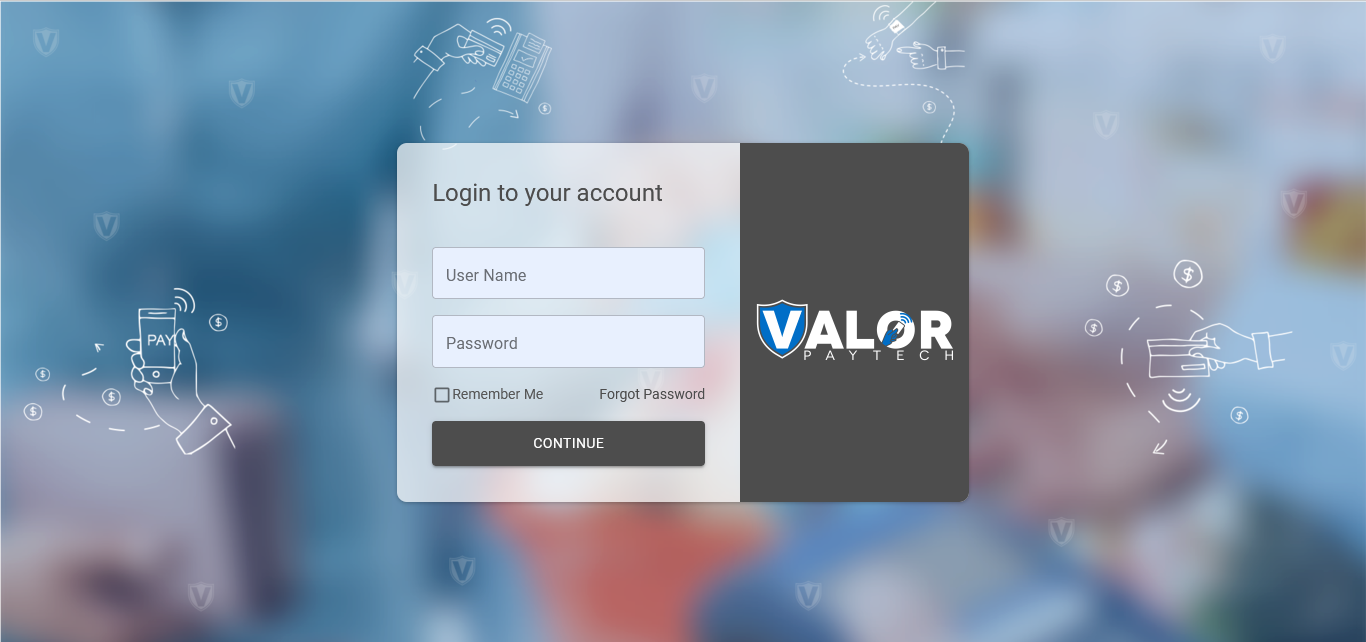
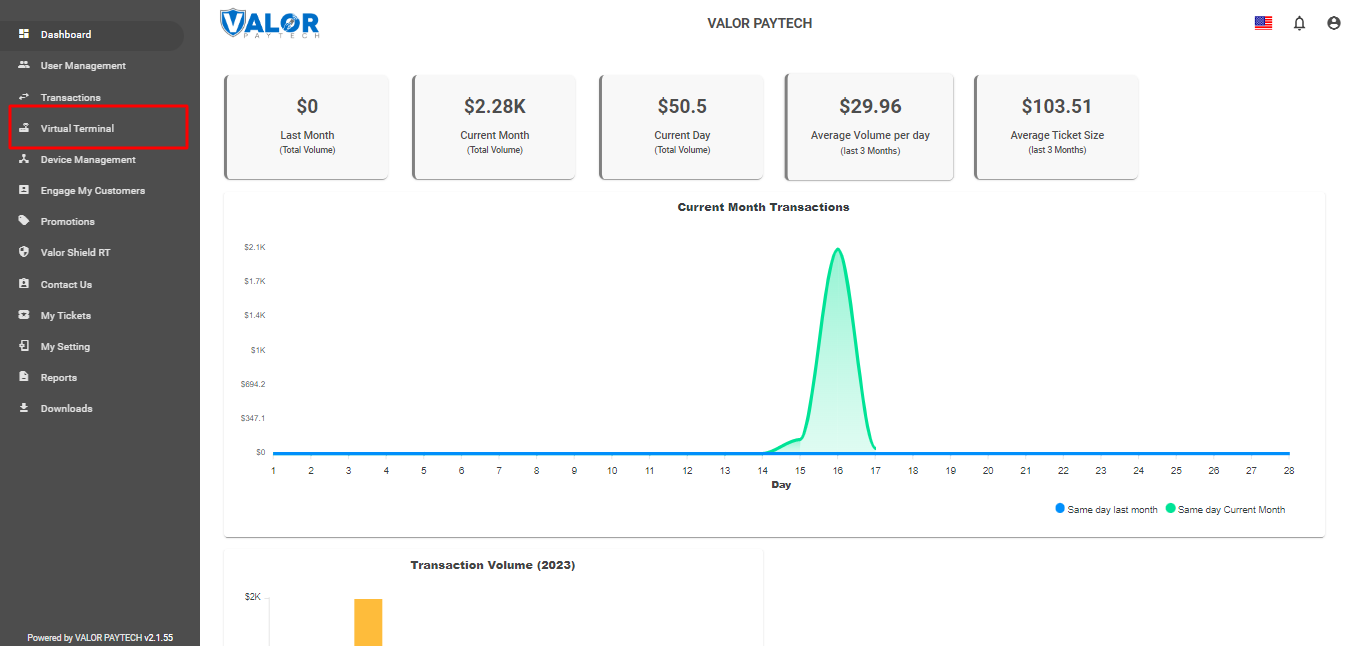
STEP 1 - Log Into The Valor Portal
STEP 2 - Click Virtual Terminal in menu
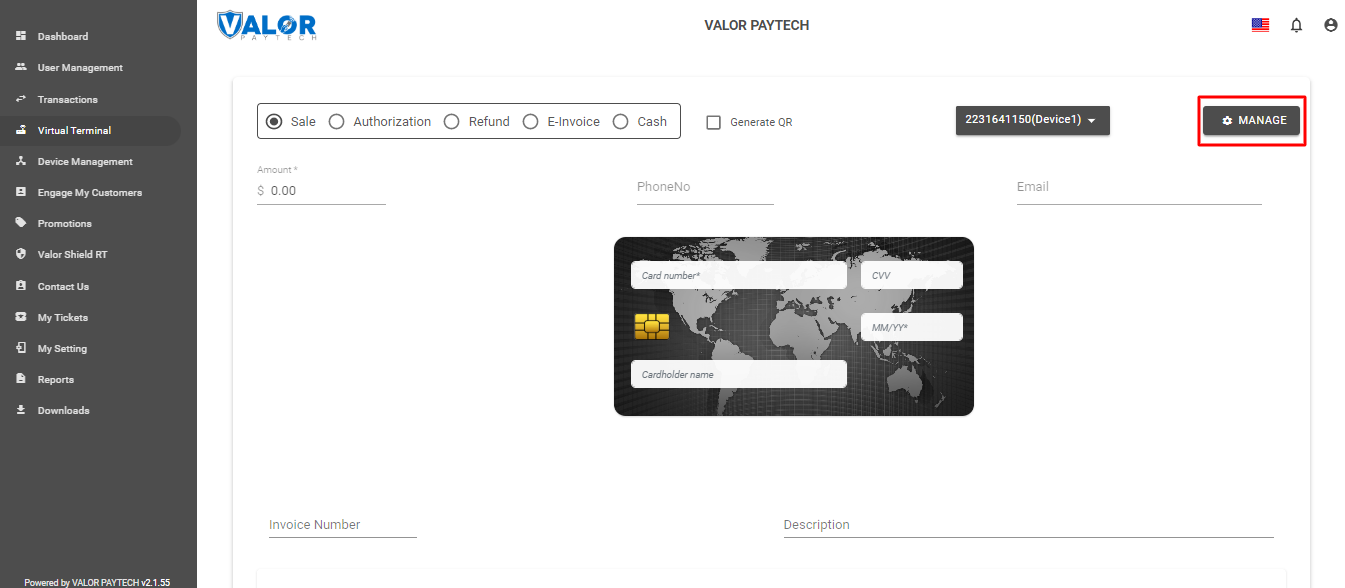
STEP 3 - Click Manage Button
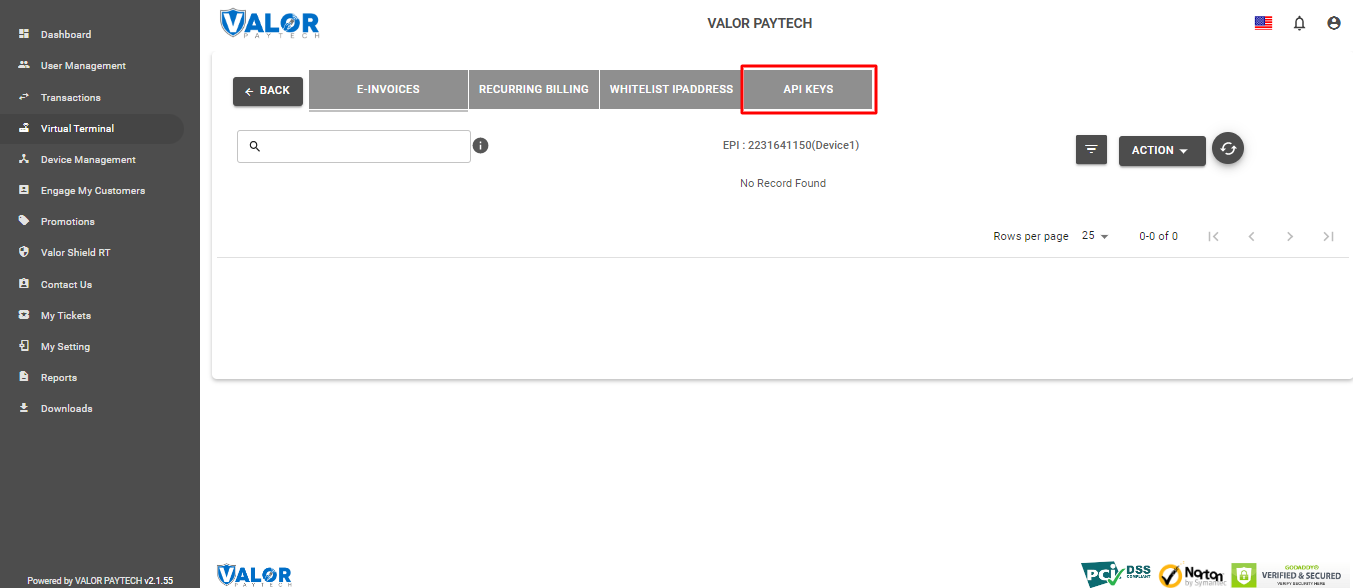
STEP 4 - Select API KEYS Tab
STEP 5 - Here you need to select the EPI to generate APP Key.
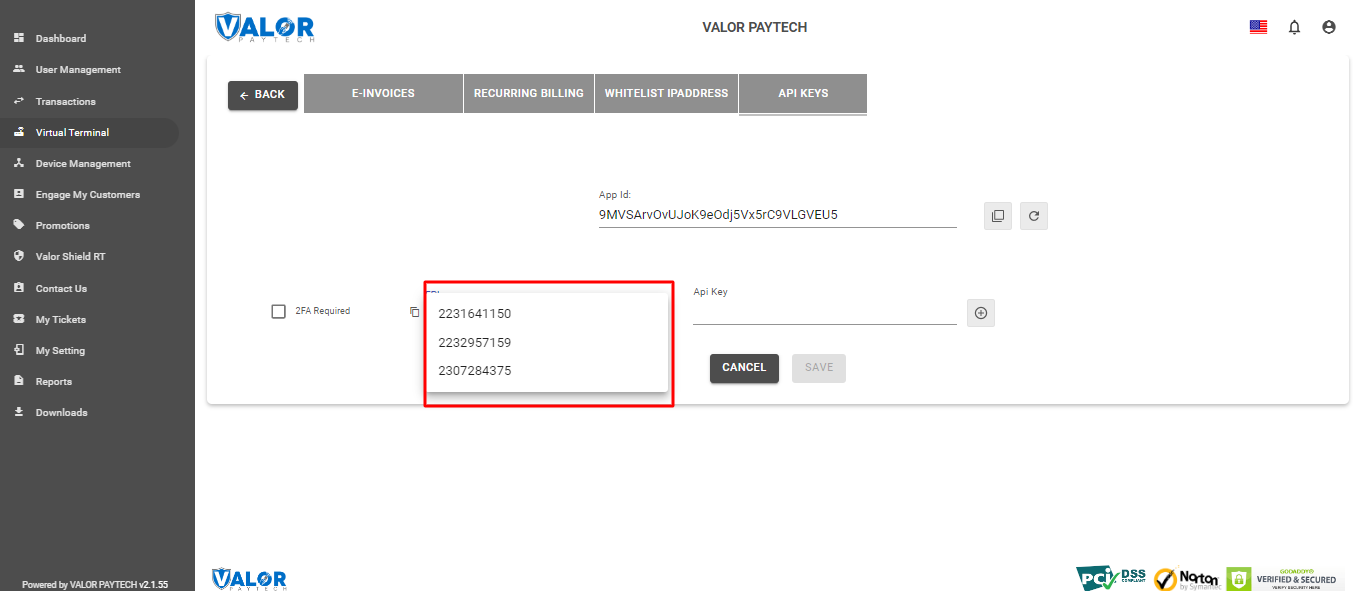
STEP 6 - Press Save after generating API Key.
Once you installed magento extension use this credentials in the payment gateway configuration.
Configuration
To configure the application, login to Shopify, move to Admin Home -> Apps -> ValorPay, where you can find various settings to configure the extension.
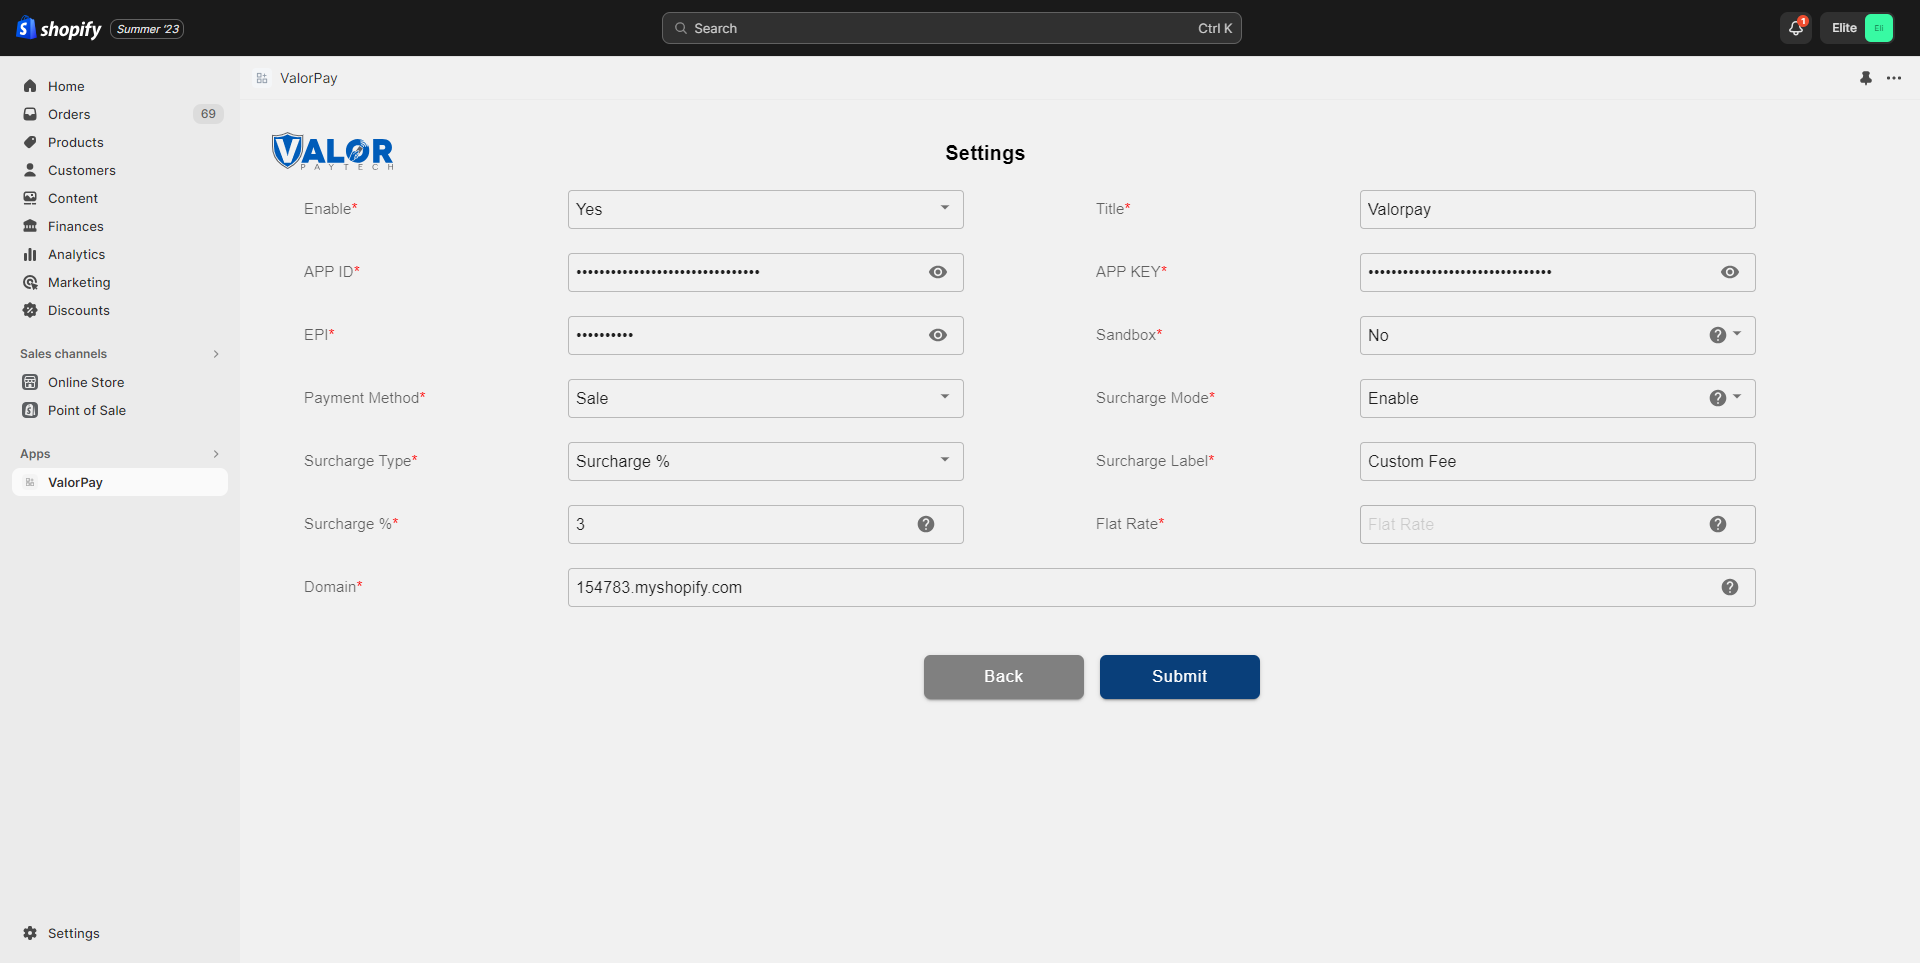
- Enable ValorPay: Yes or NoValorPay Payment Gateway for your BigCommerce store.
- Title: Enter Title for the ValorPay payment method to be shown in the frontend.
- Use Sandbox: Set No if Production Keys are set or Set Yes if Sandbox Keys are set then Live payments will not be taken.
- APP ID, APP KEY & EPI: Set Production Valor API keys or If Sandbox Yes, then Sandbox API keys.
Read here Generating API KEYS (E-Commerce) | Valor PayTech
- Payment Method: Select one of the payment methods for the payment capture.
- Sale: Authorizes and captures the order amount immediately.
- Auth Only: Authorizes and validates card for the order amount. The admin needs to manually capture the amount (by generating invoice using “Capture Online” option) within the authorization hold period.
- Surcharge Mode: Set Yes if you want all transactions on surcharge mode. Merchant must have a Surcharge MID for it to function.
- Surcharge Label
- Set Surcharge Type - Surcharge % or Flat Rate $
- Surcharge% - Percentage will apply only on enabling surcharge Indicator to true and Surcharge type is set to Surcharge %.
- Flat Rate $ - Flat rate will apply only on if Enable surcharge mode is true and Surcharge type is set to Flat Rate $
- AVS - The address verification service will add a text field to the checkout page based on the selected option.
- Domain: To set the store domain eg: store.myshopify.com. The domain name should be added in lowercase.
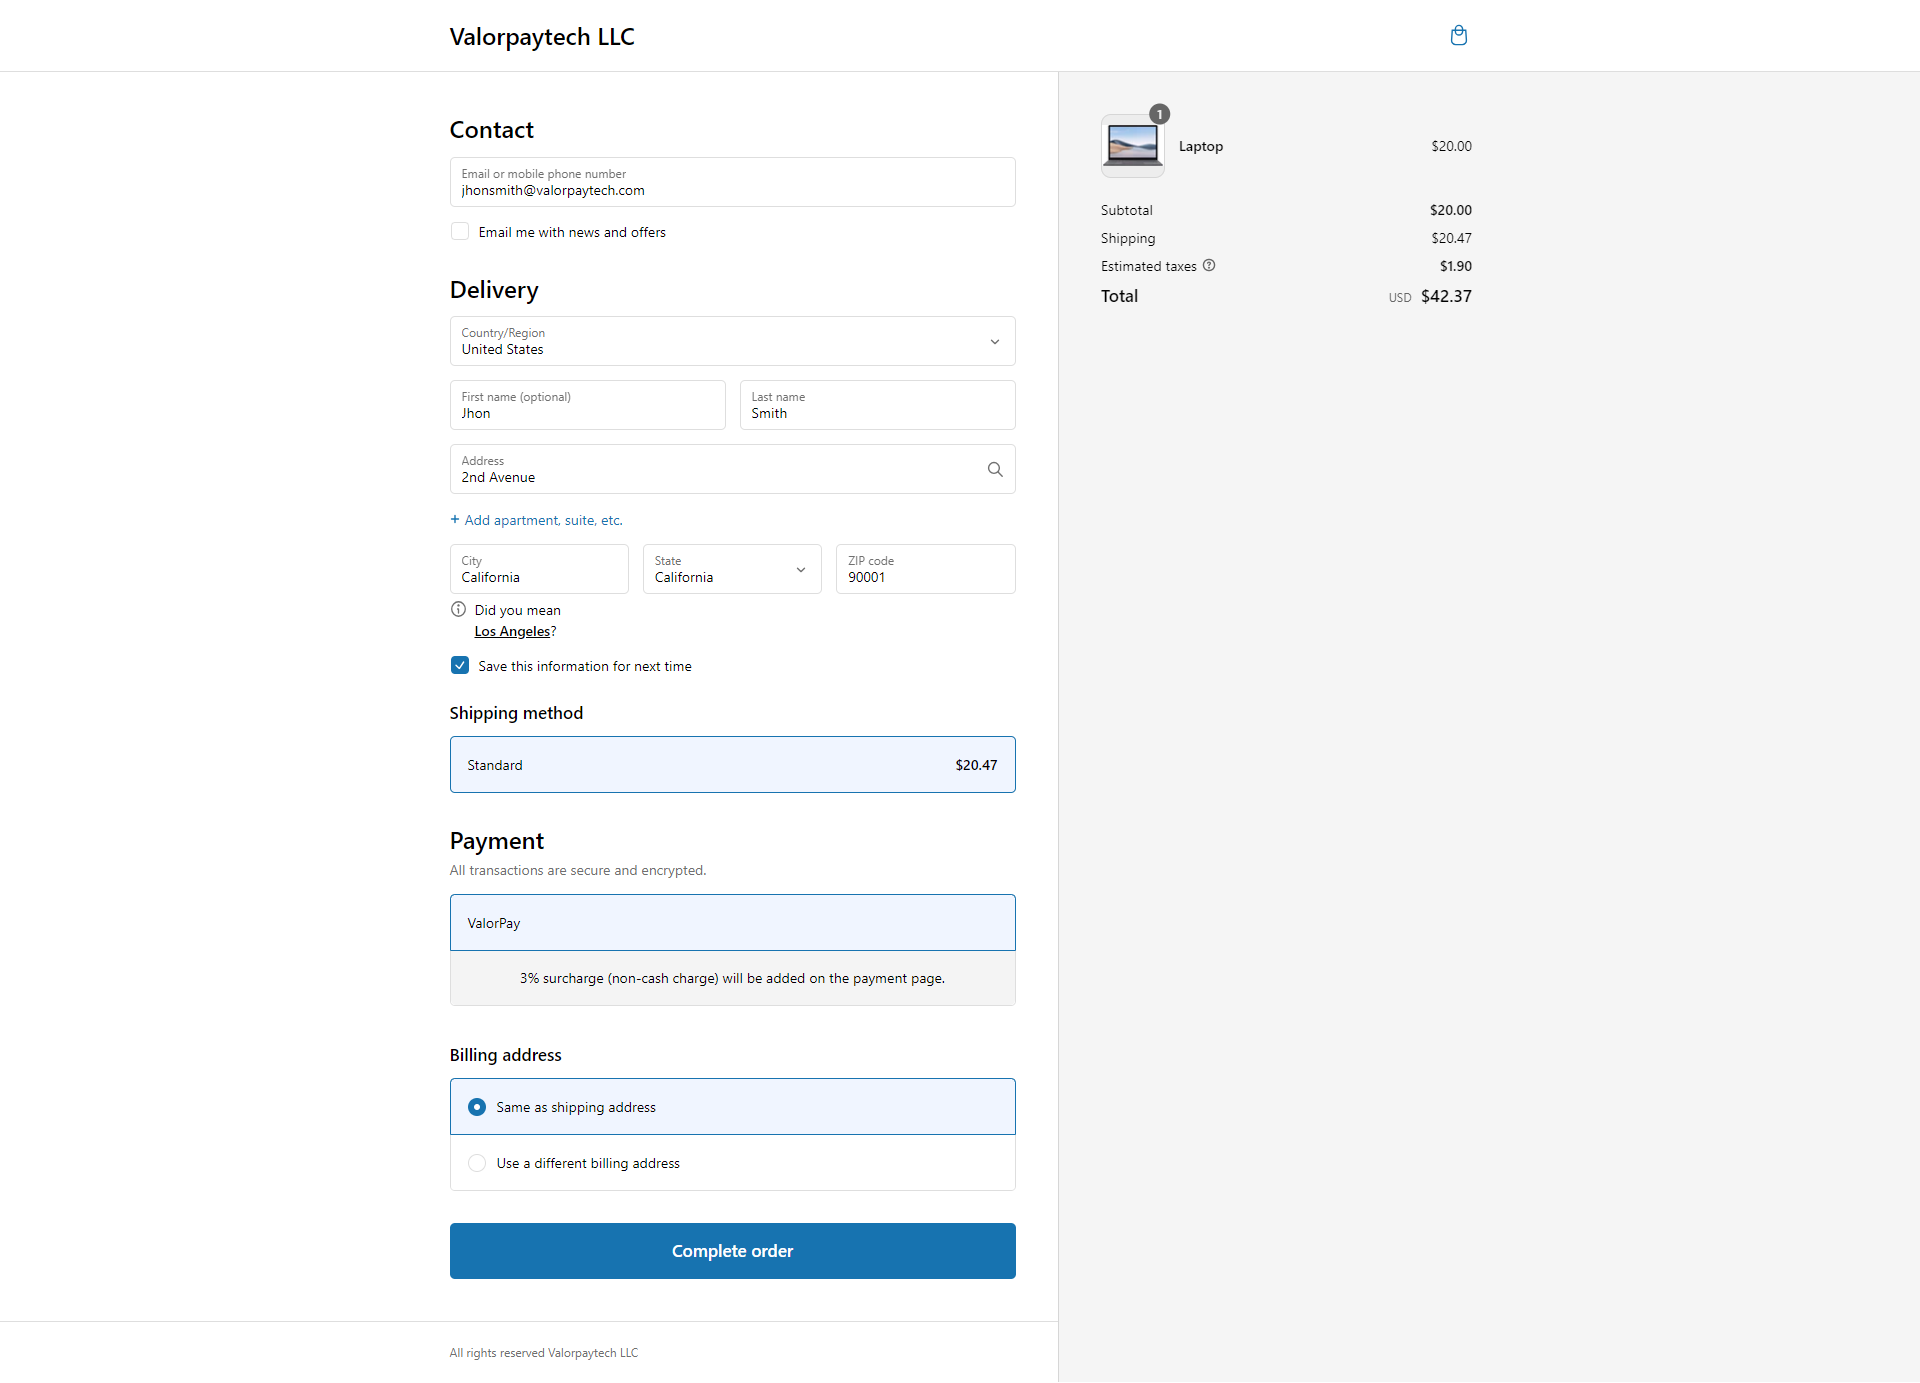
Checkout Process for the Buyer
- This is an example of how a customer will see the ValorPay payment method on your
store after you have enabled it. They will experience a quick and secure checkout with
their items.
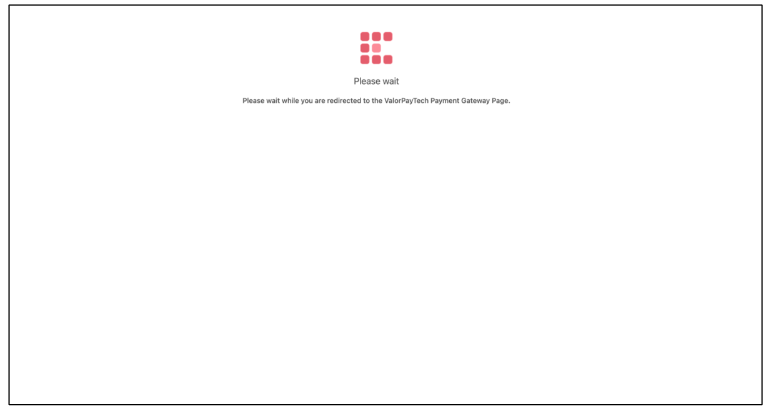
- The buyer will be redirected to ValorPay’s payment page.
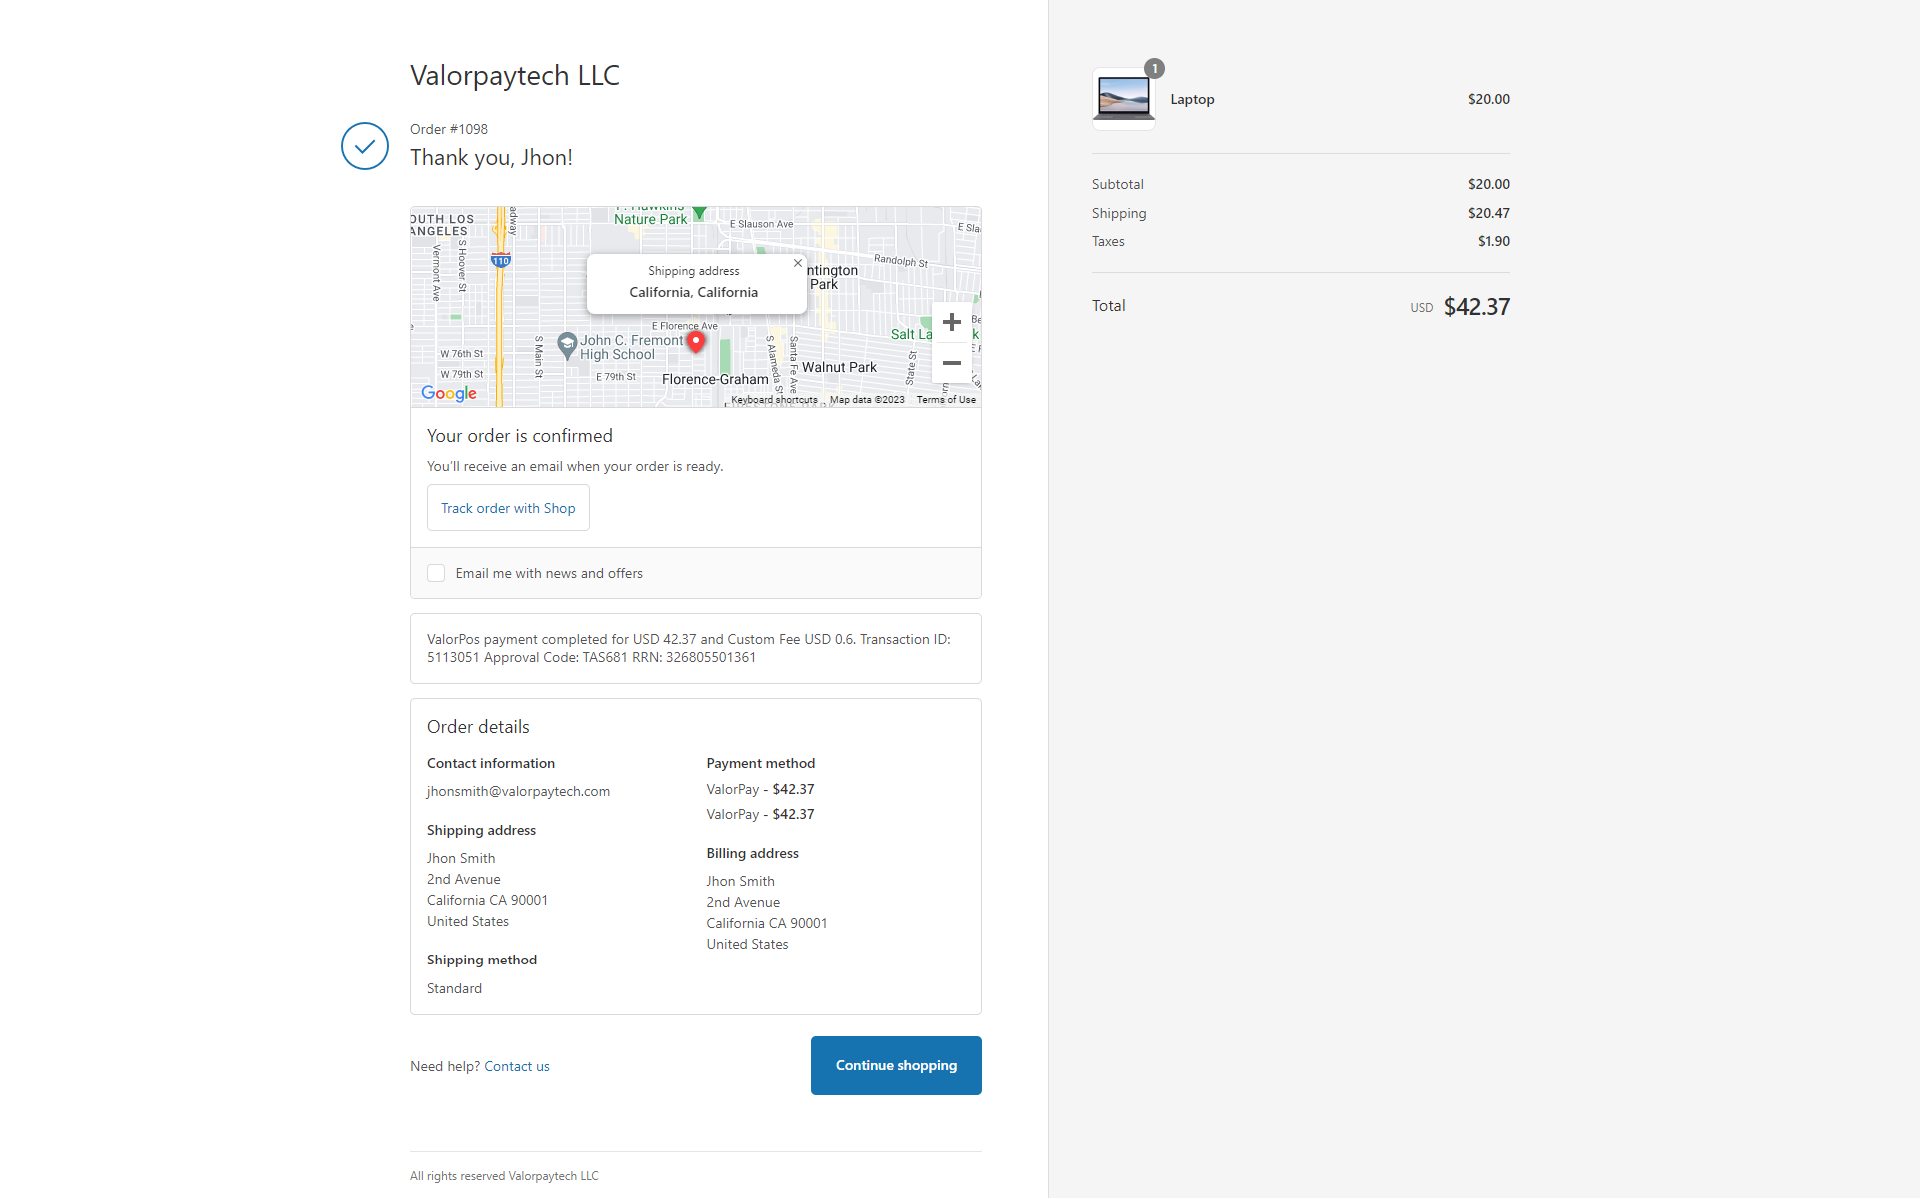
- Upon successful payment your order will be confirmed. The transaction details can be seen here.
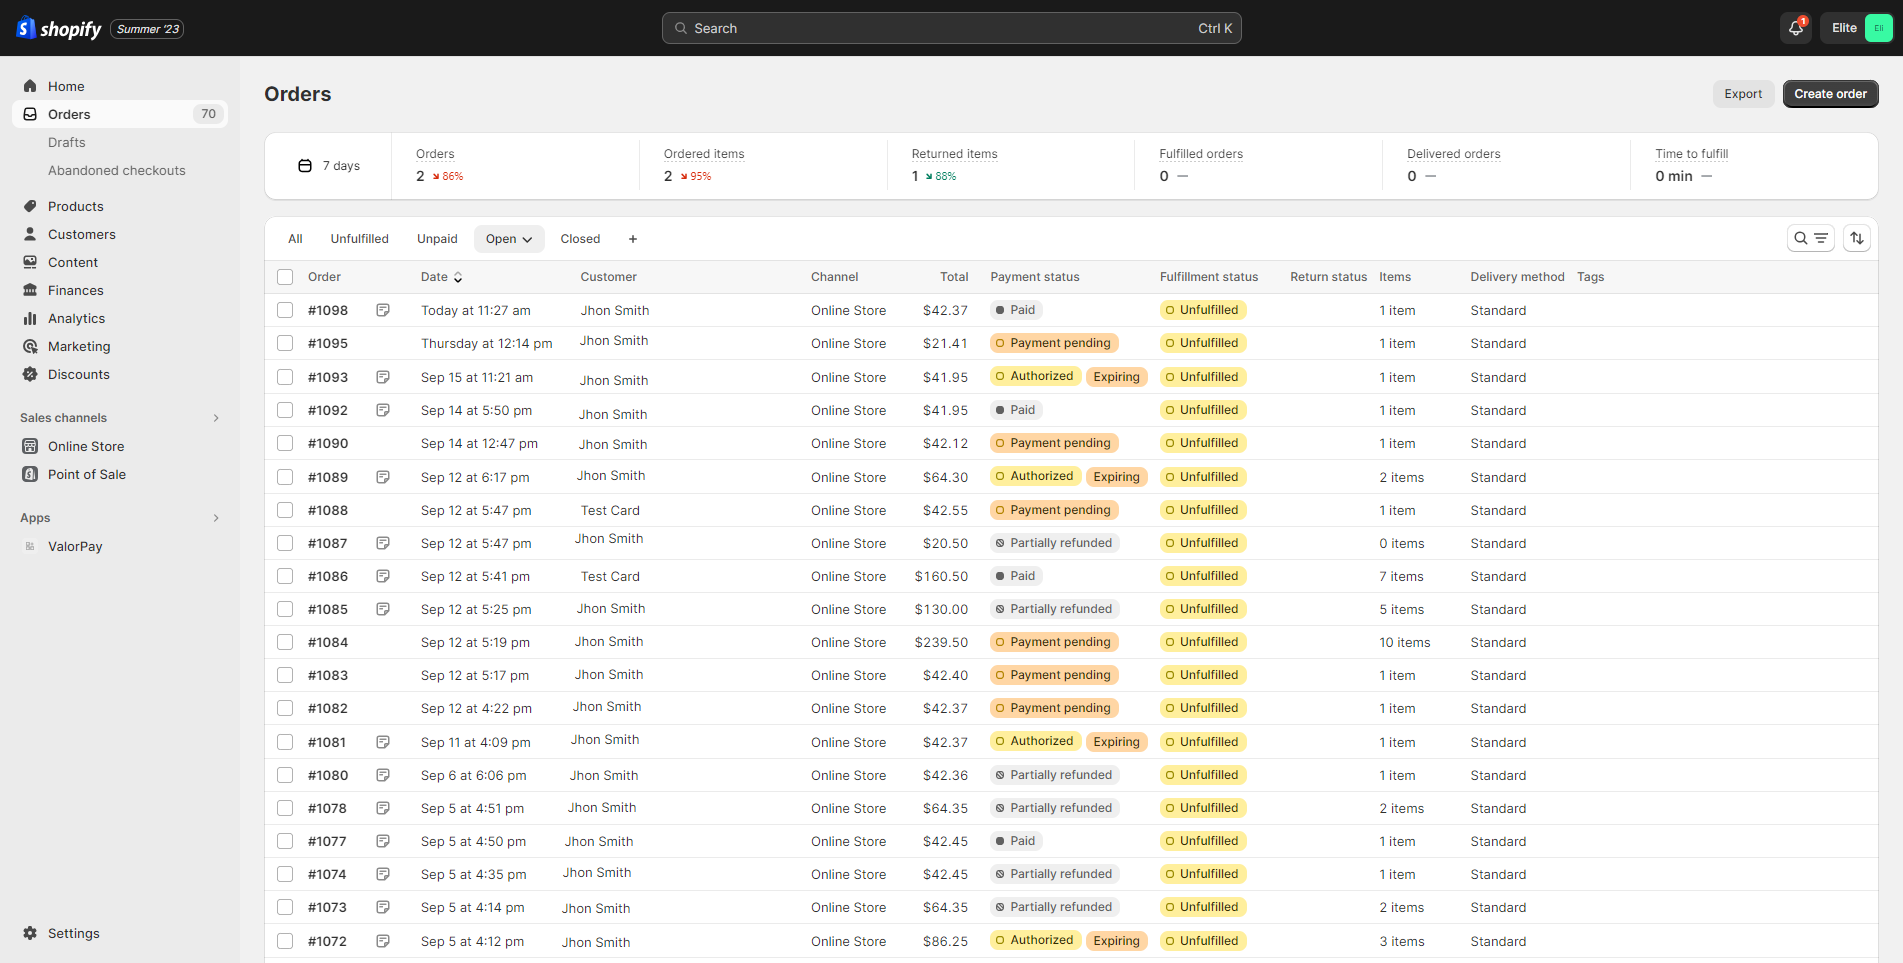
Order Details in the Shopify Admin
- The order will show in the Orders section of Shopify admin.
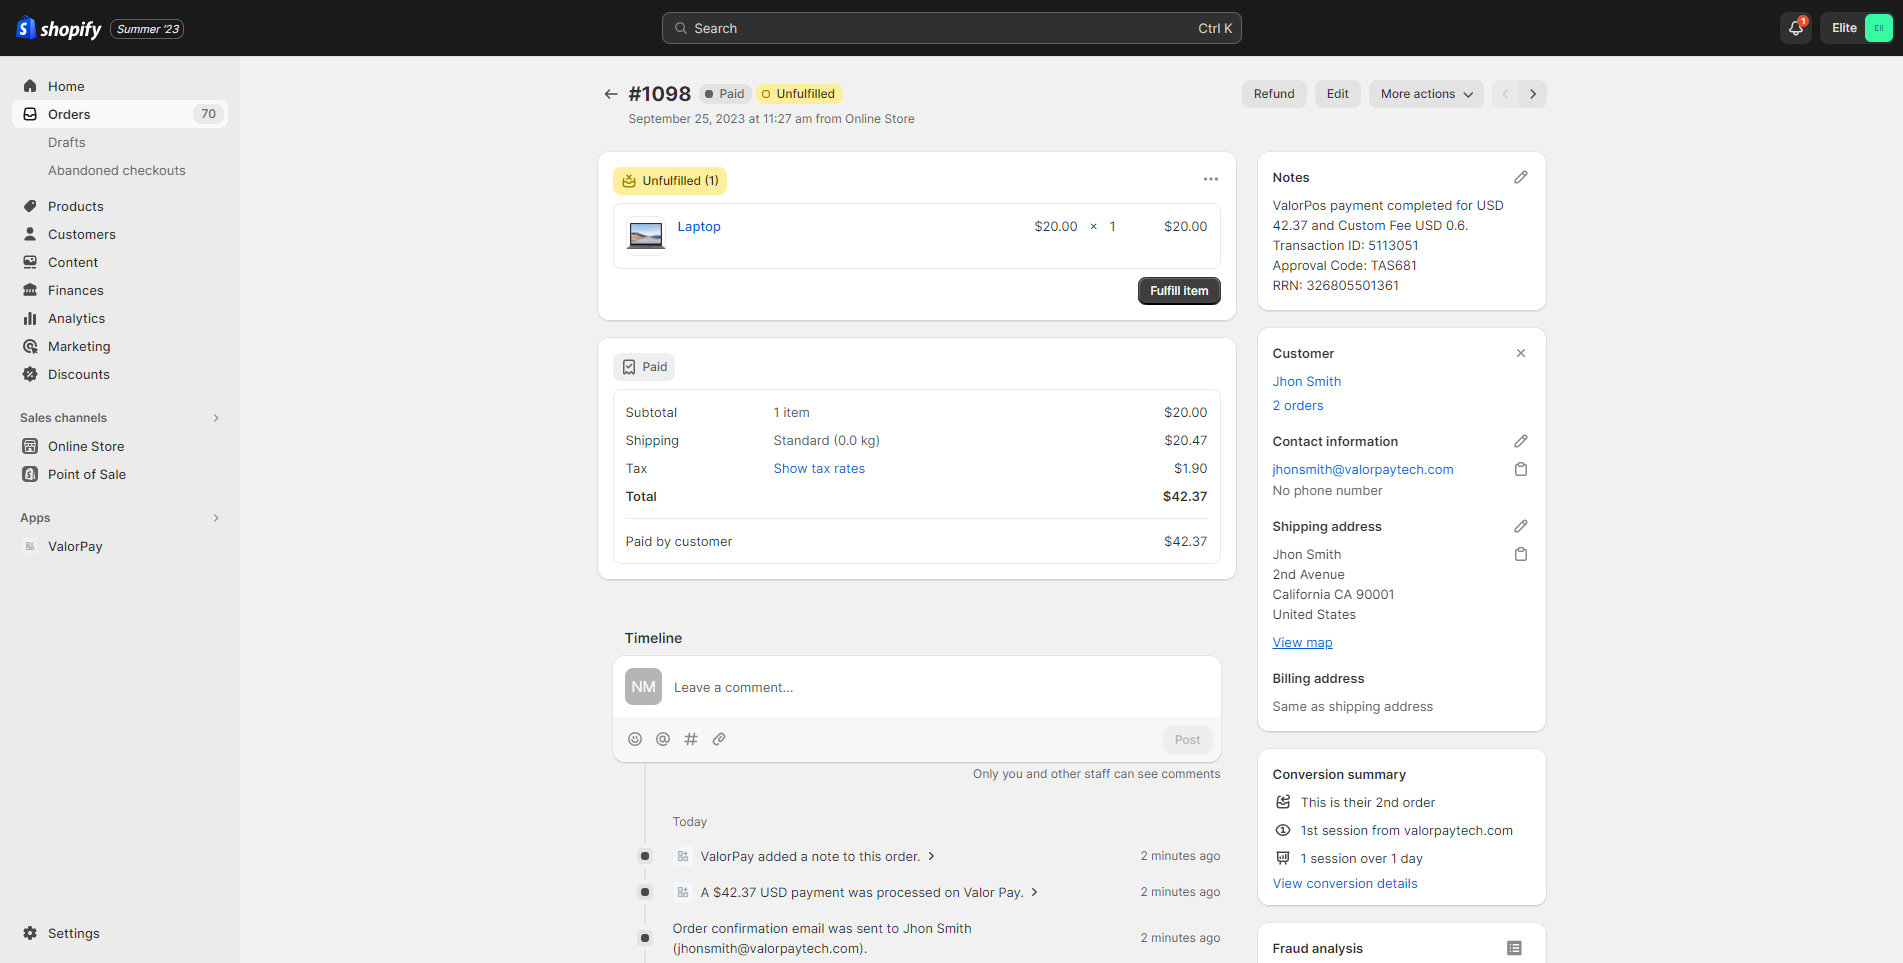
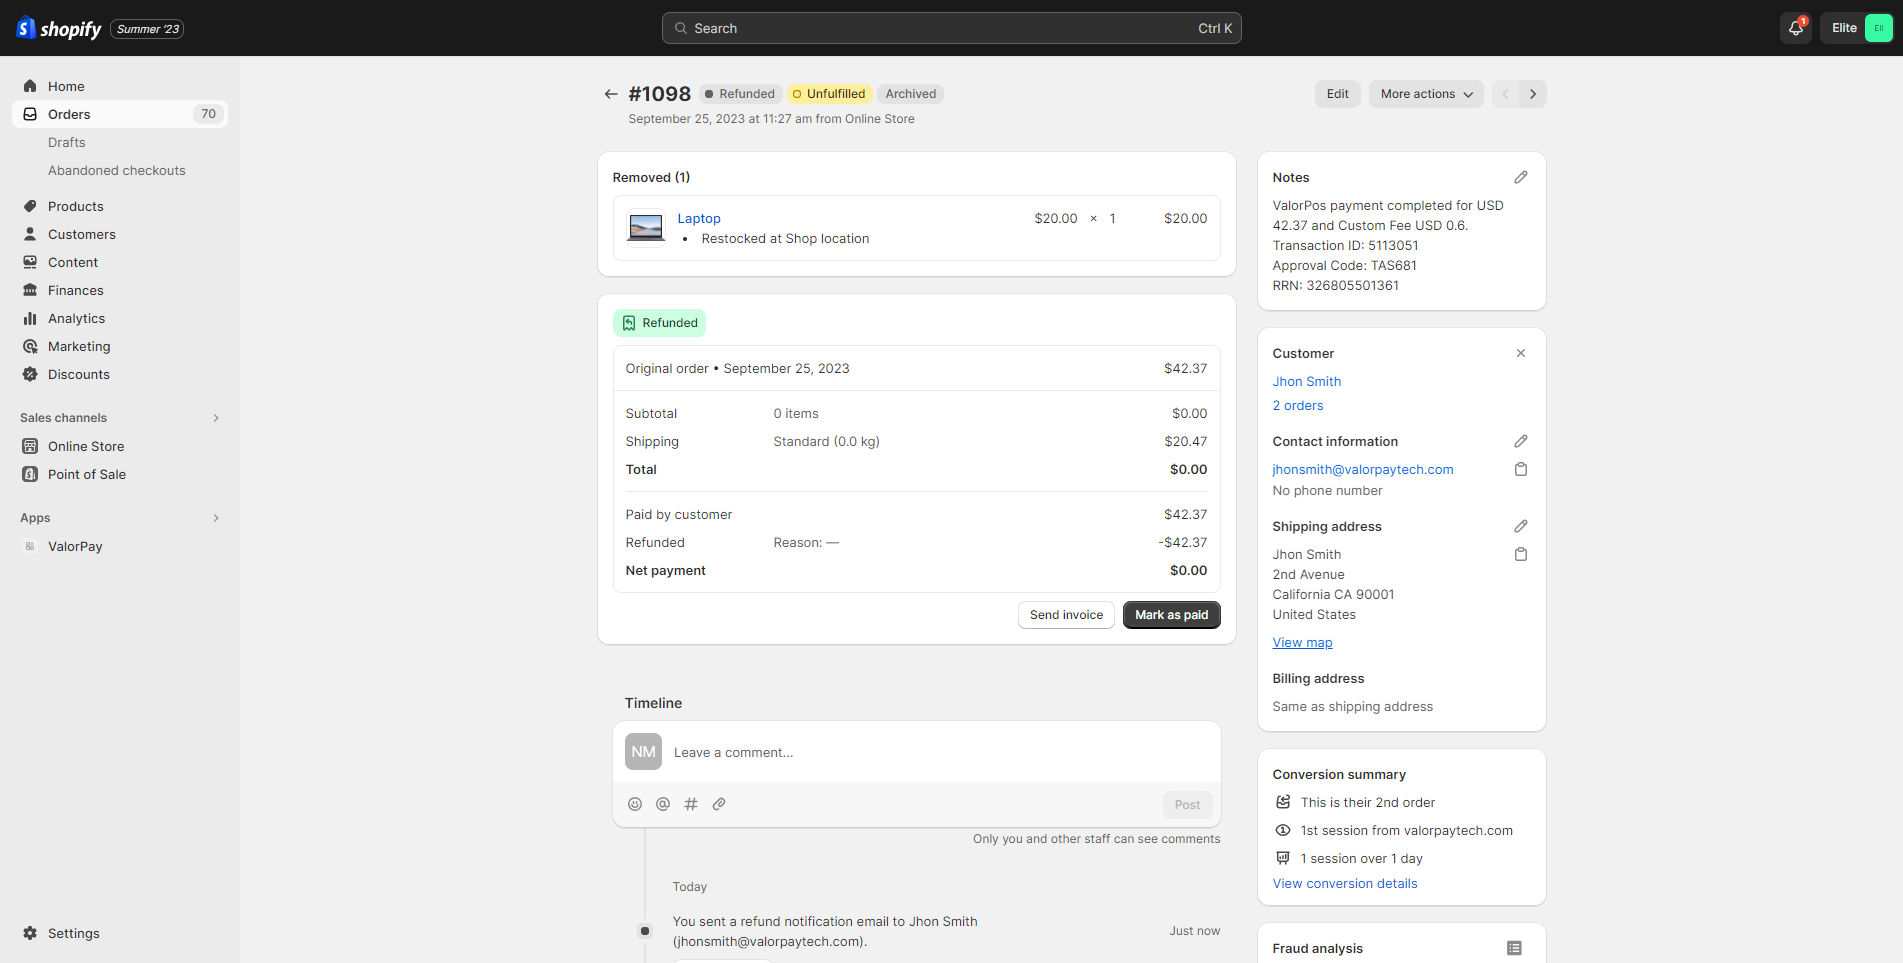
- View order details: Click on the order to view its details. Note the transaction details in the Notes section towards top right.

Refund process for Shopify Admin
Refund process for Shopify Admin an order can be marked for refund following which it will appear on the ‘Refund Order’ page of the ValorPay application. Admin can pay for refund orders using ValorPay payment gateway from the application.
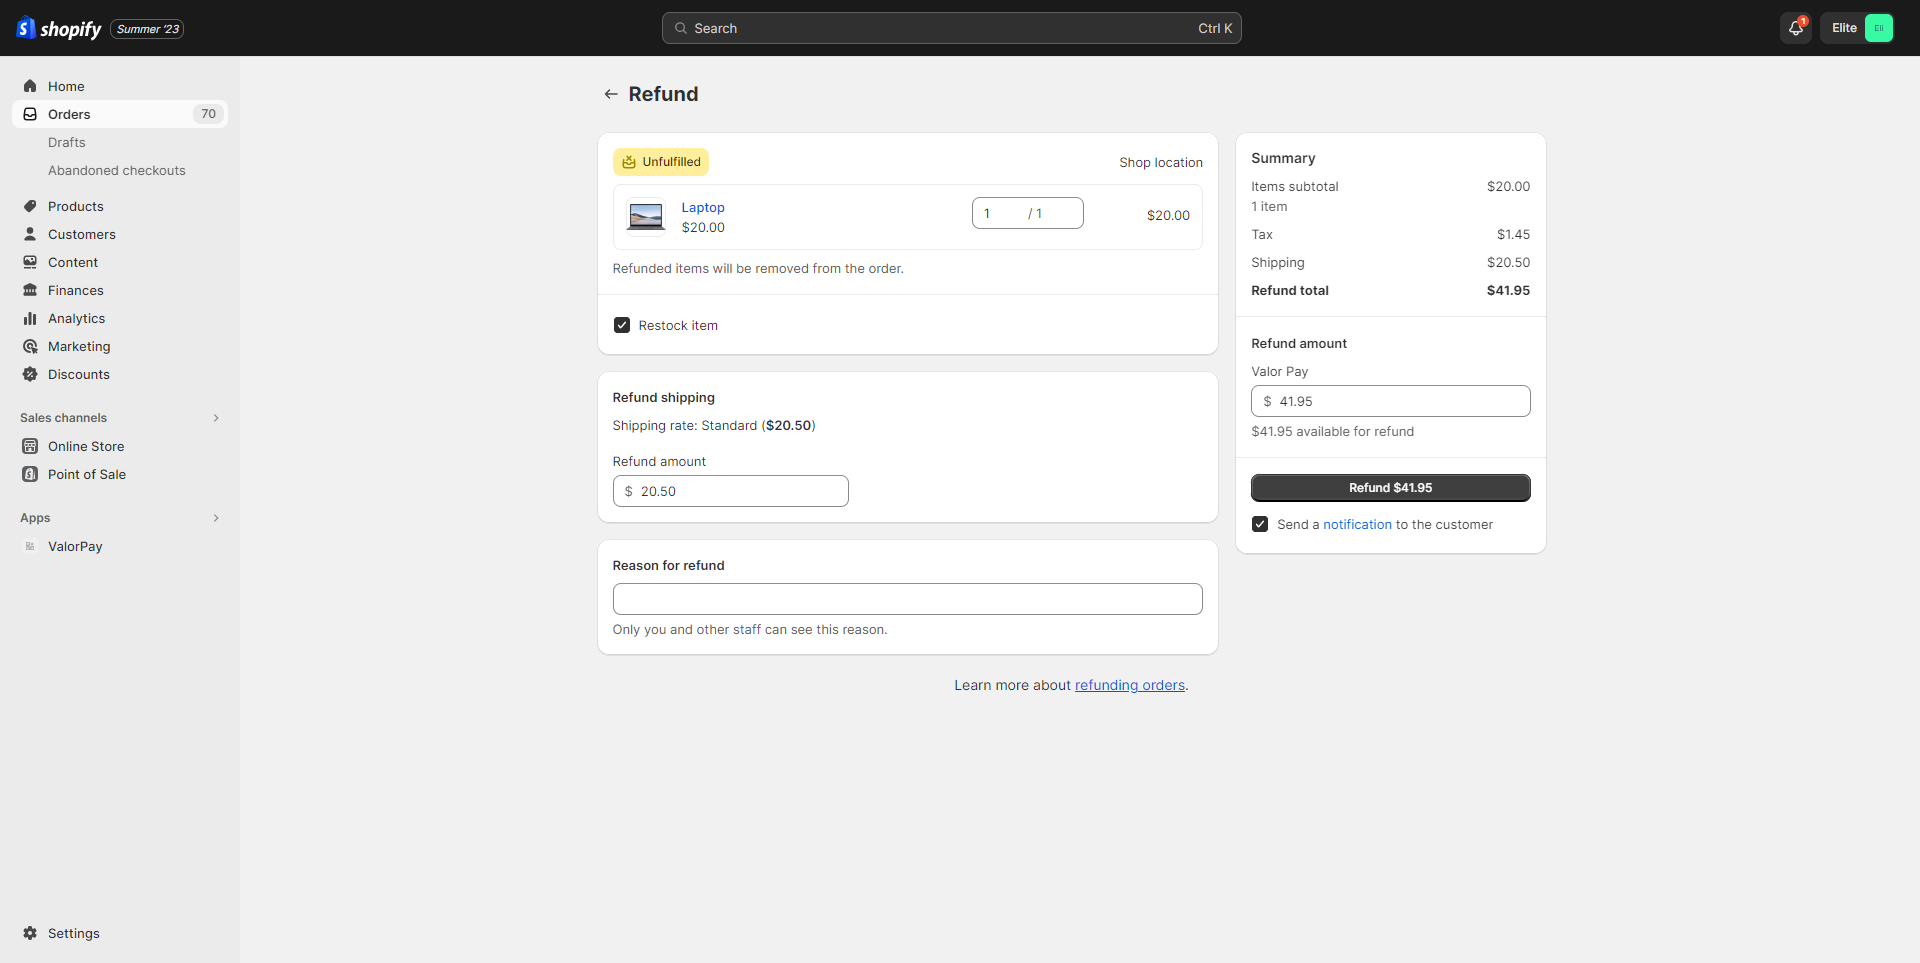
- Open an order, click on ‘Refund’.
- Enter details for the refund and click on ‘Refund’. (highlighted) If full amount is refunded, then the status will be changed to Refunded, if a part of total amount is refunded, the status will be set to ‘Partially Refunded’
- The order has been marked for a refund. This refund order will now be visible on the ‘Refund Order’ page on the ValorPay application. (Note that the amount is not refunded yet. It needs to be refunded from the ValorPay application.)
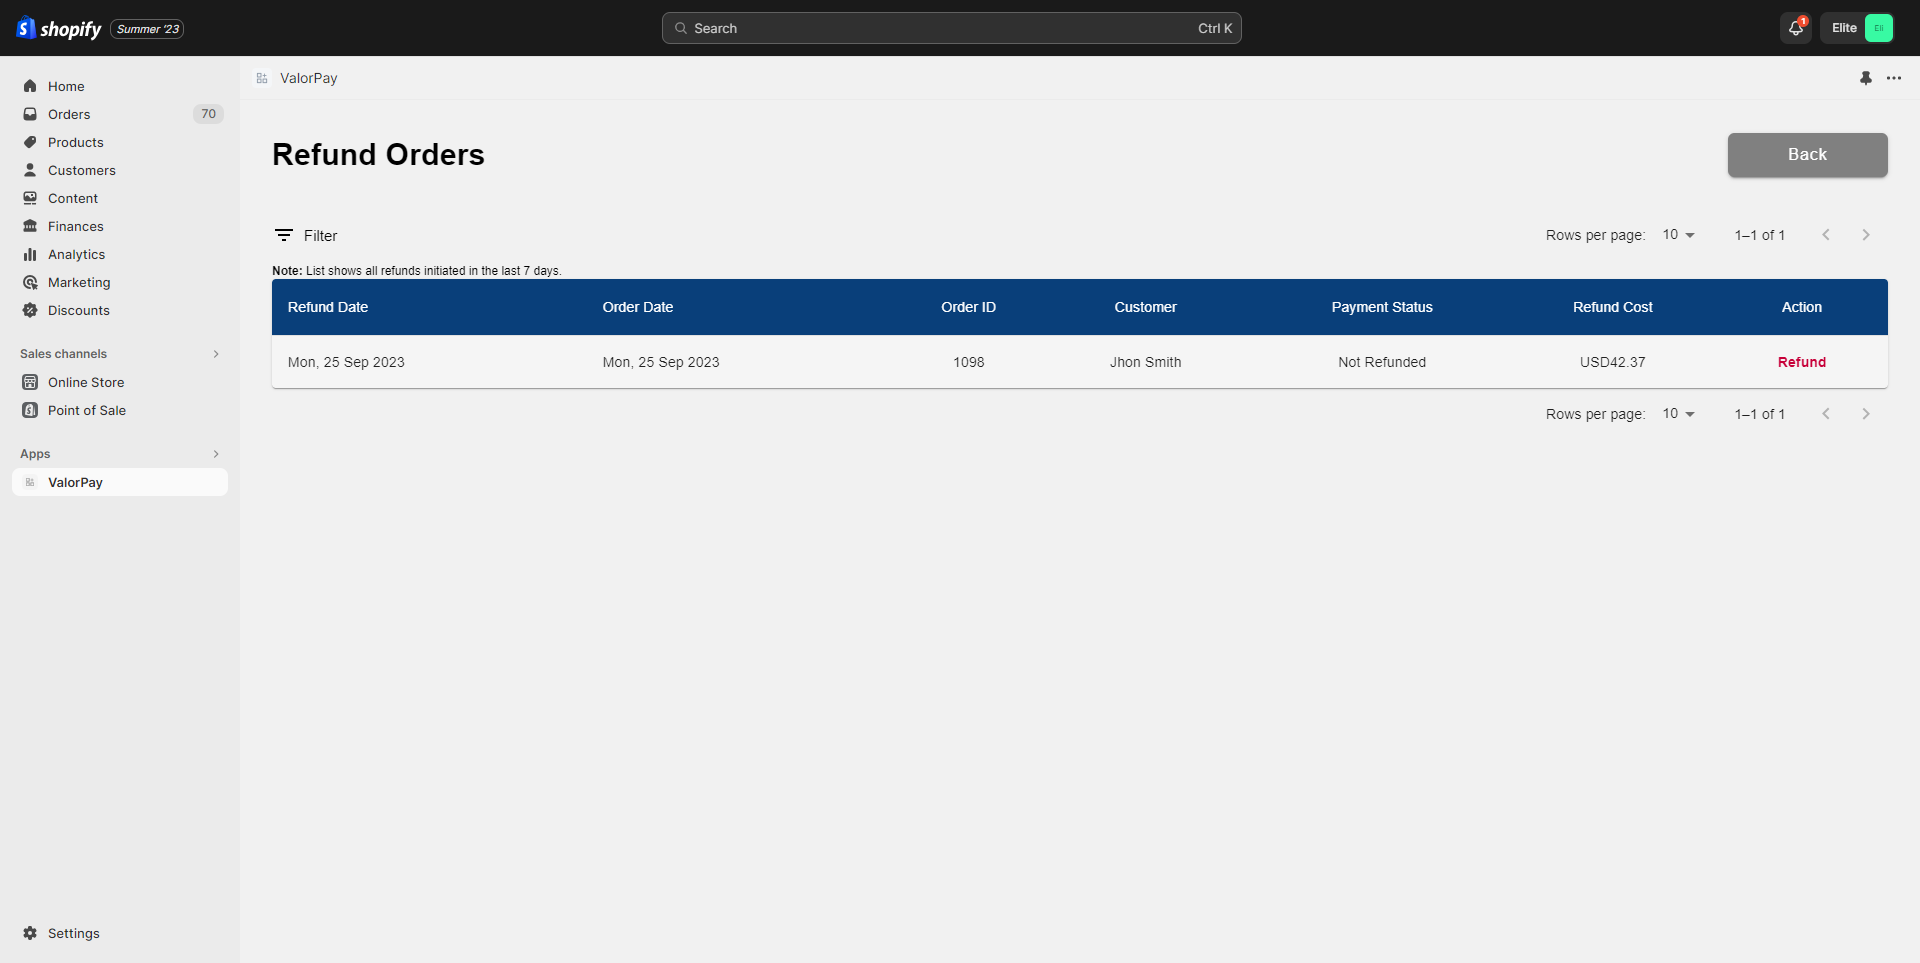
- Open Valor Pay Application -> Click on Refund Orders Locate the order by Order ID and click ‘Refund’. (highlighted) By default, this list only shows orders that have been marked for refund or refunded in the last seven days. To see orders for any duration, click on ‘Filter’ and select the desired duration.
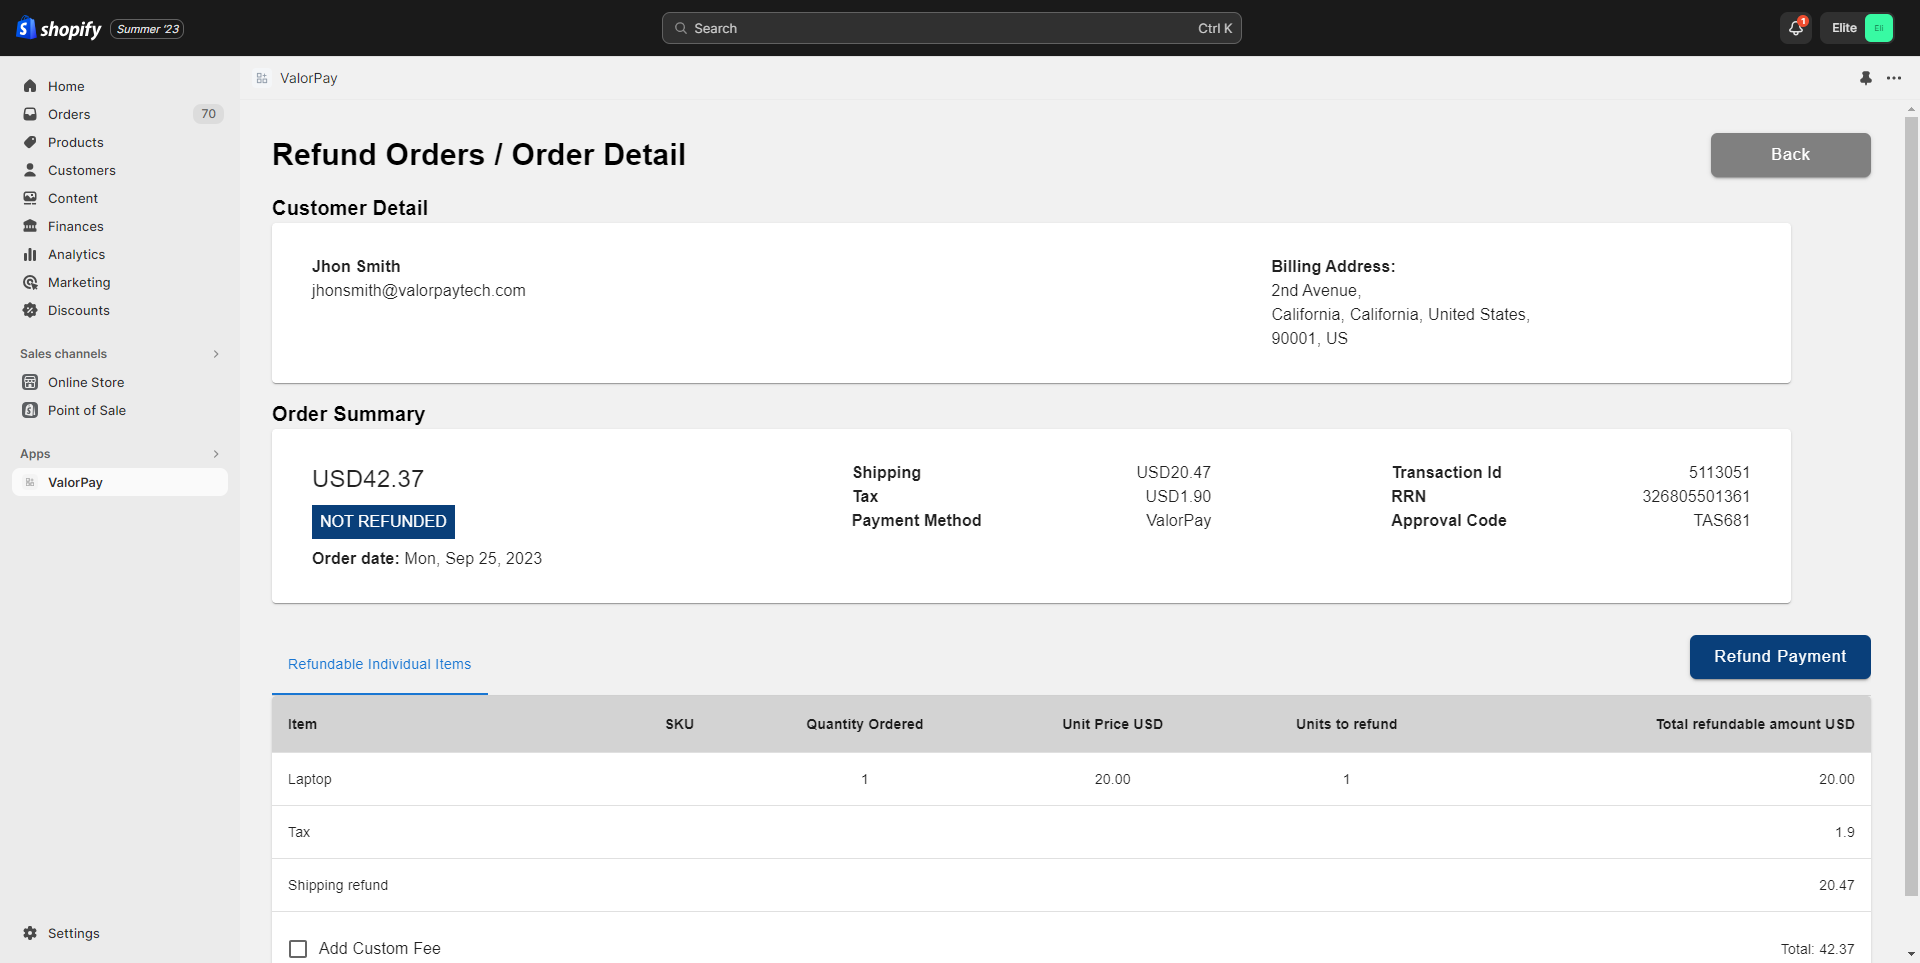
- Verify the refund details including amount. If you wish to refund any custom fees, it can be done using the Add checkbox on the bottom left.
- Click on ‘Refund Payment’. Enter the OTP registered on your registered mobile phone and email address.
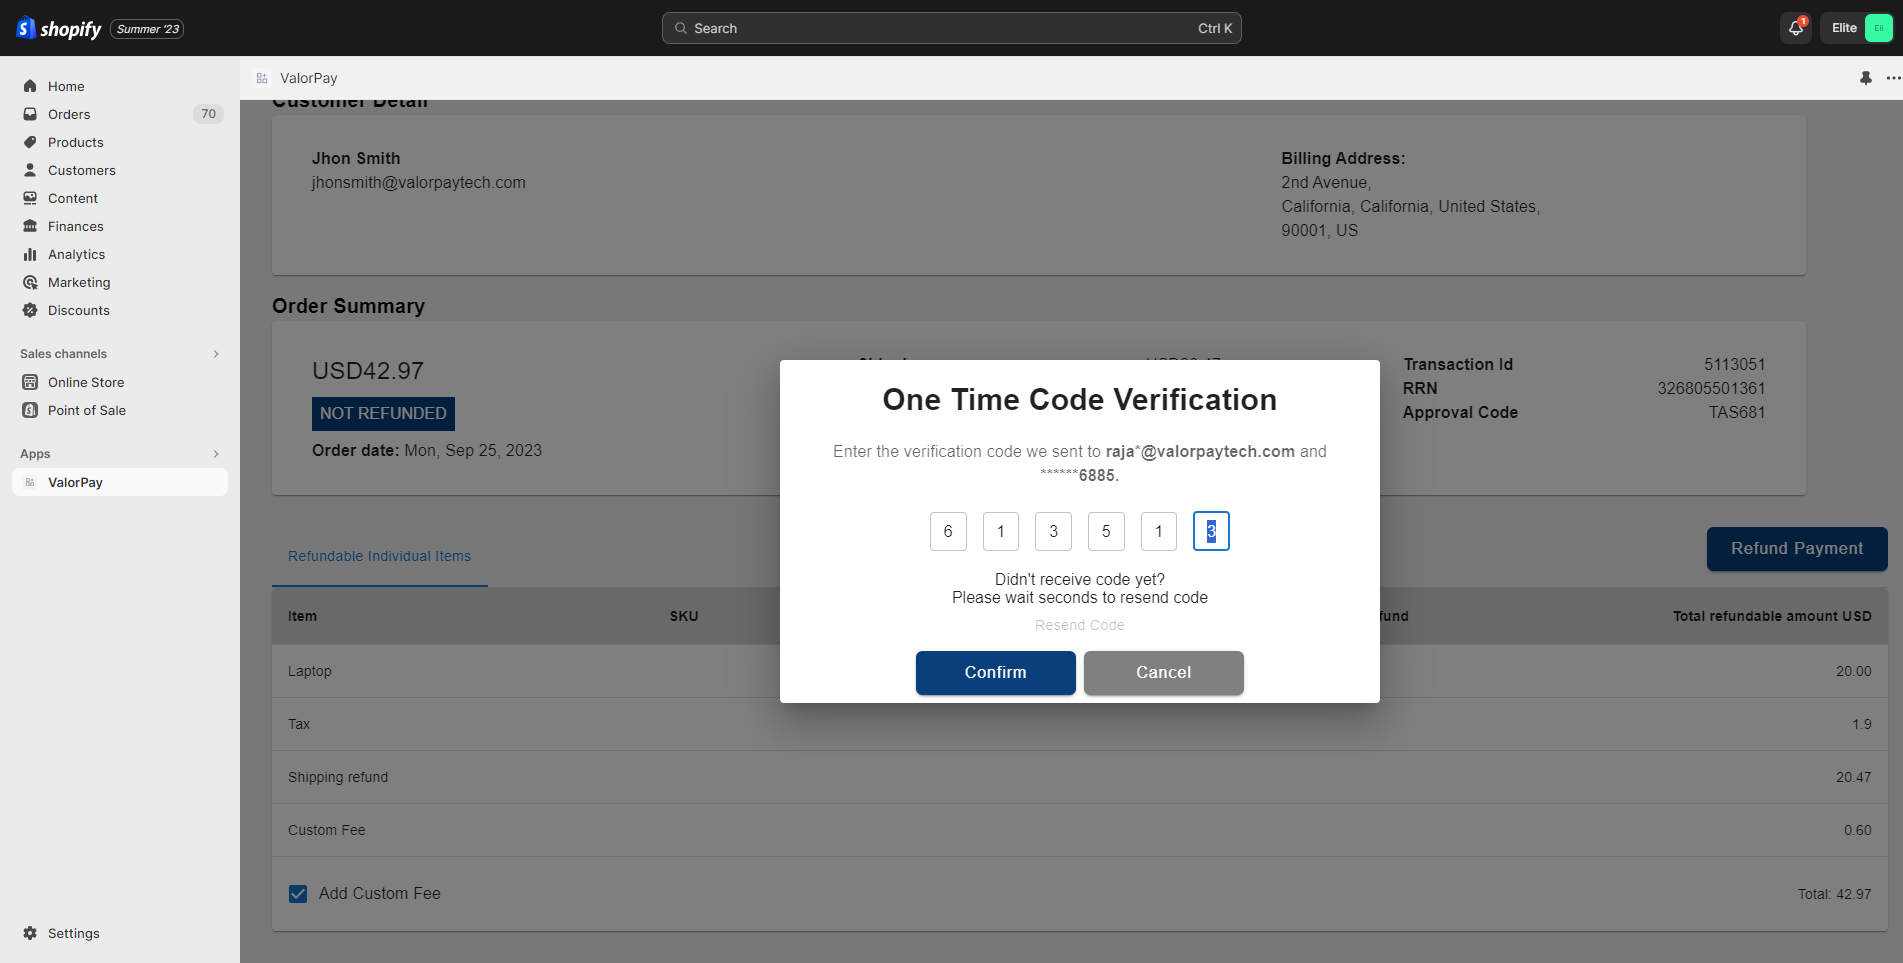
- The Refund payment is successfully completed.
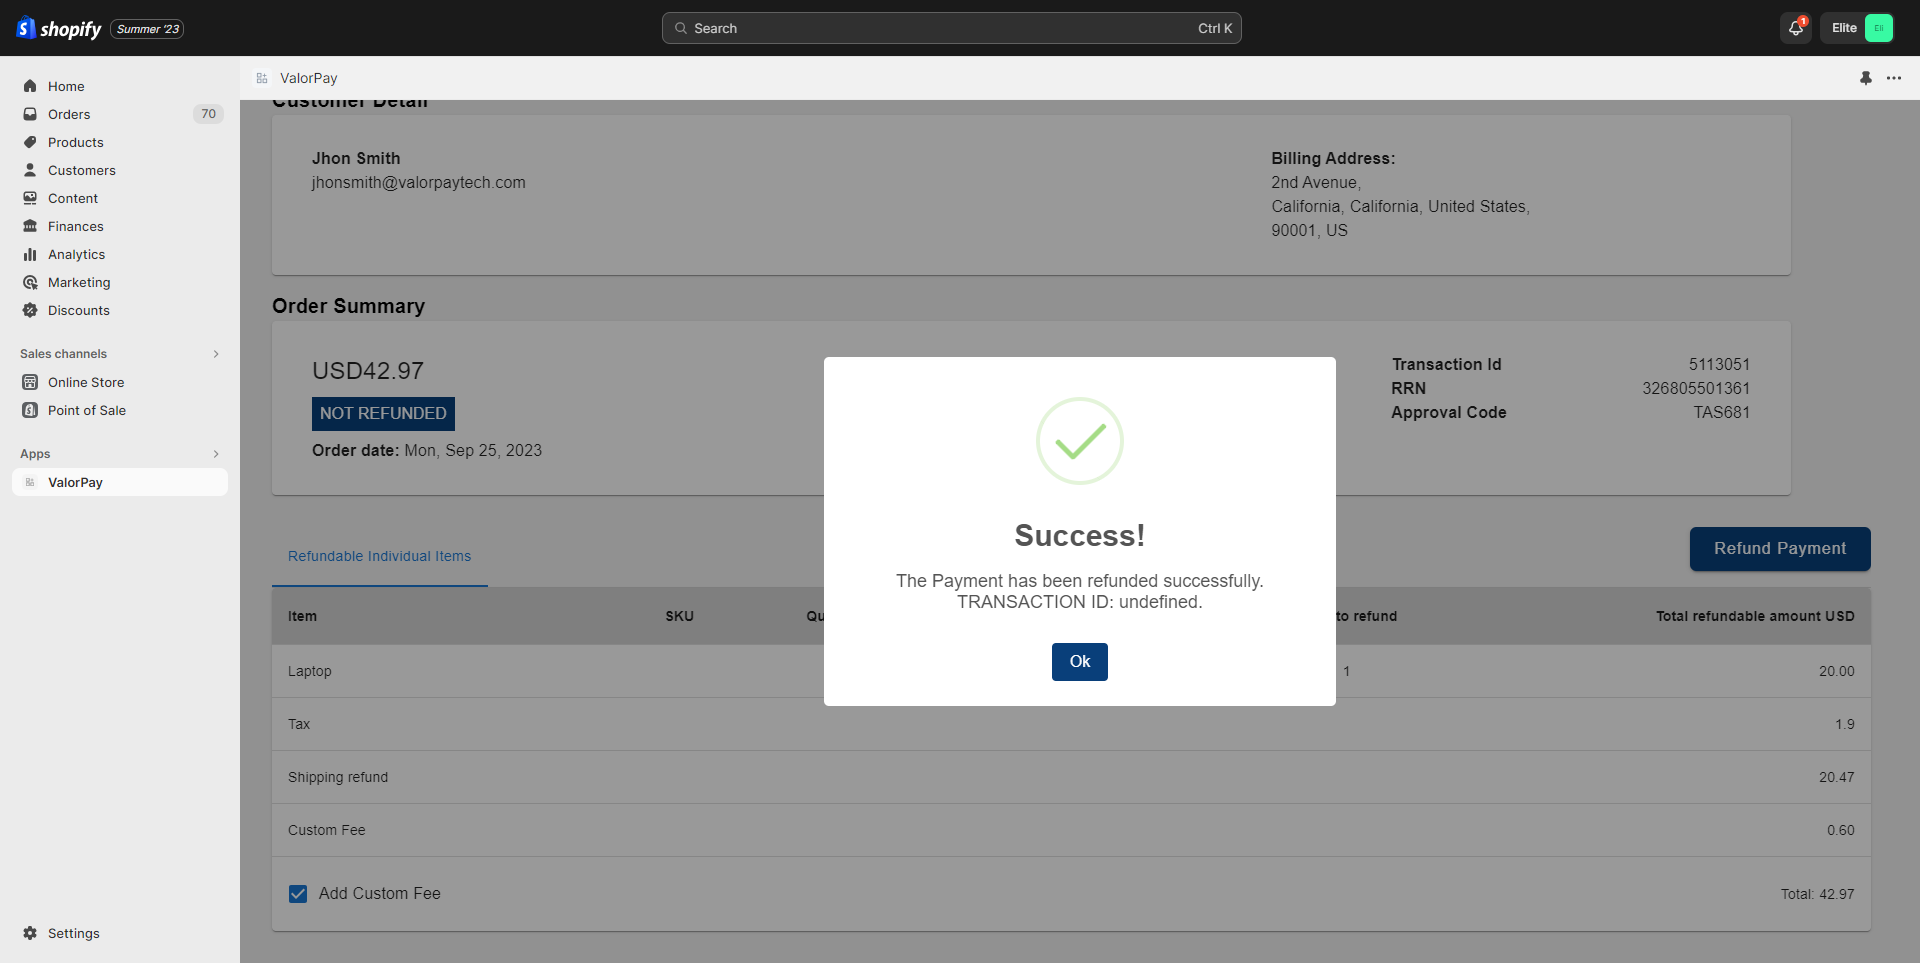
- Locate the confirmation & details of the refund payment at the bottom of the page.
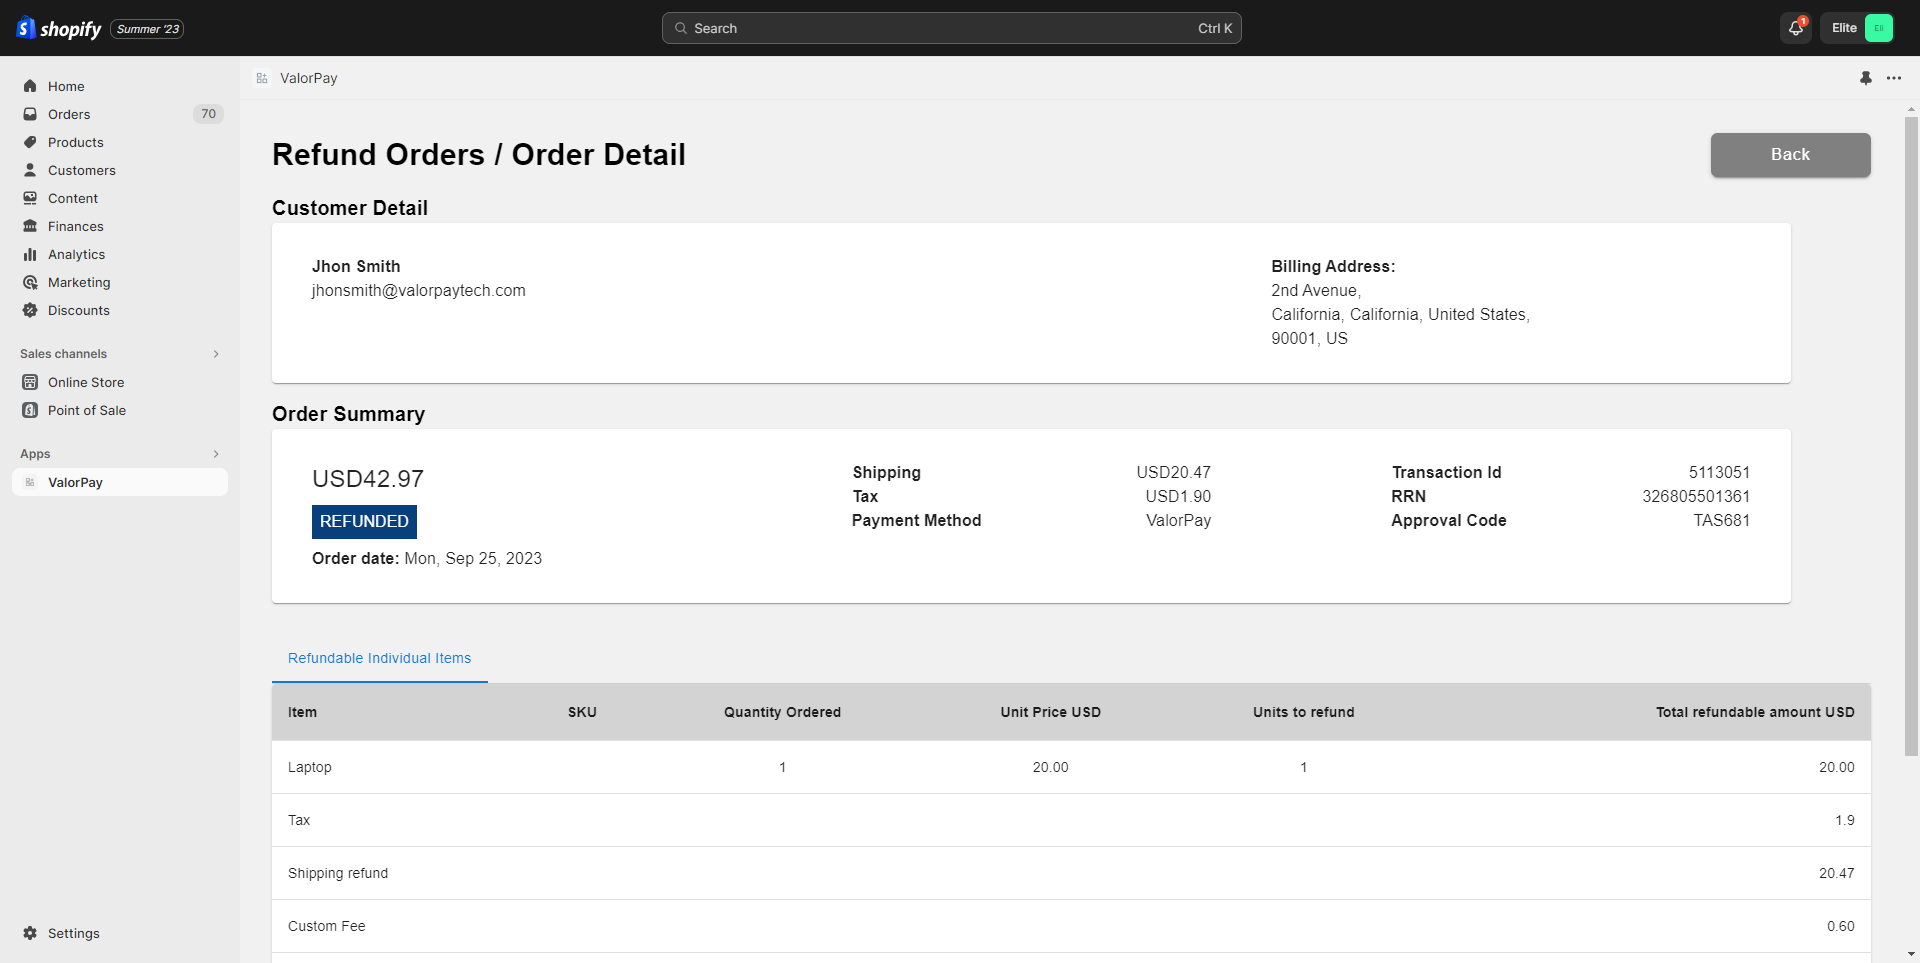
- To view the refund details anytime in future, click on ‘View’ on the ‘Refund Order’ page.

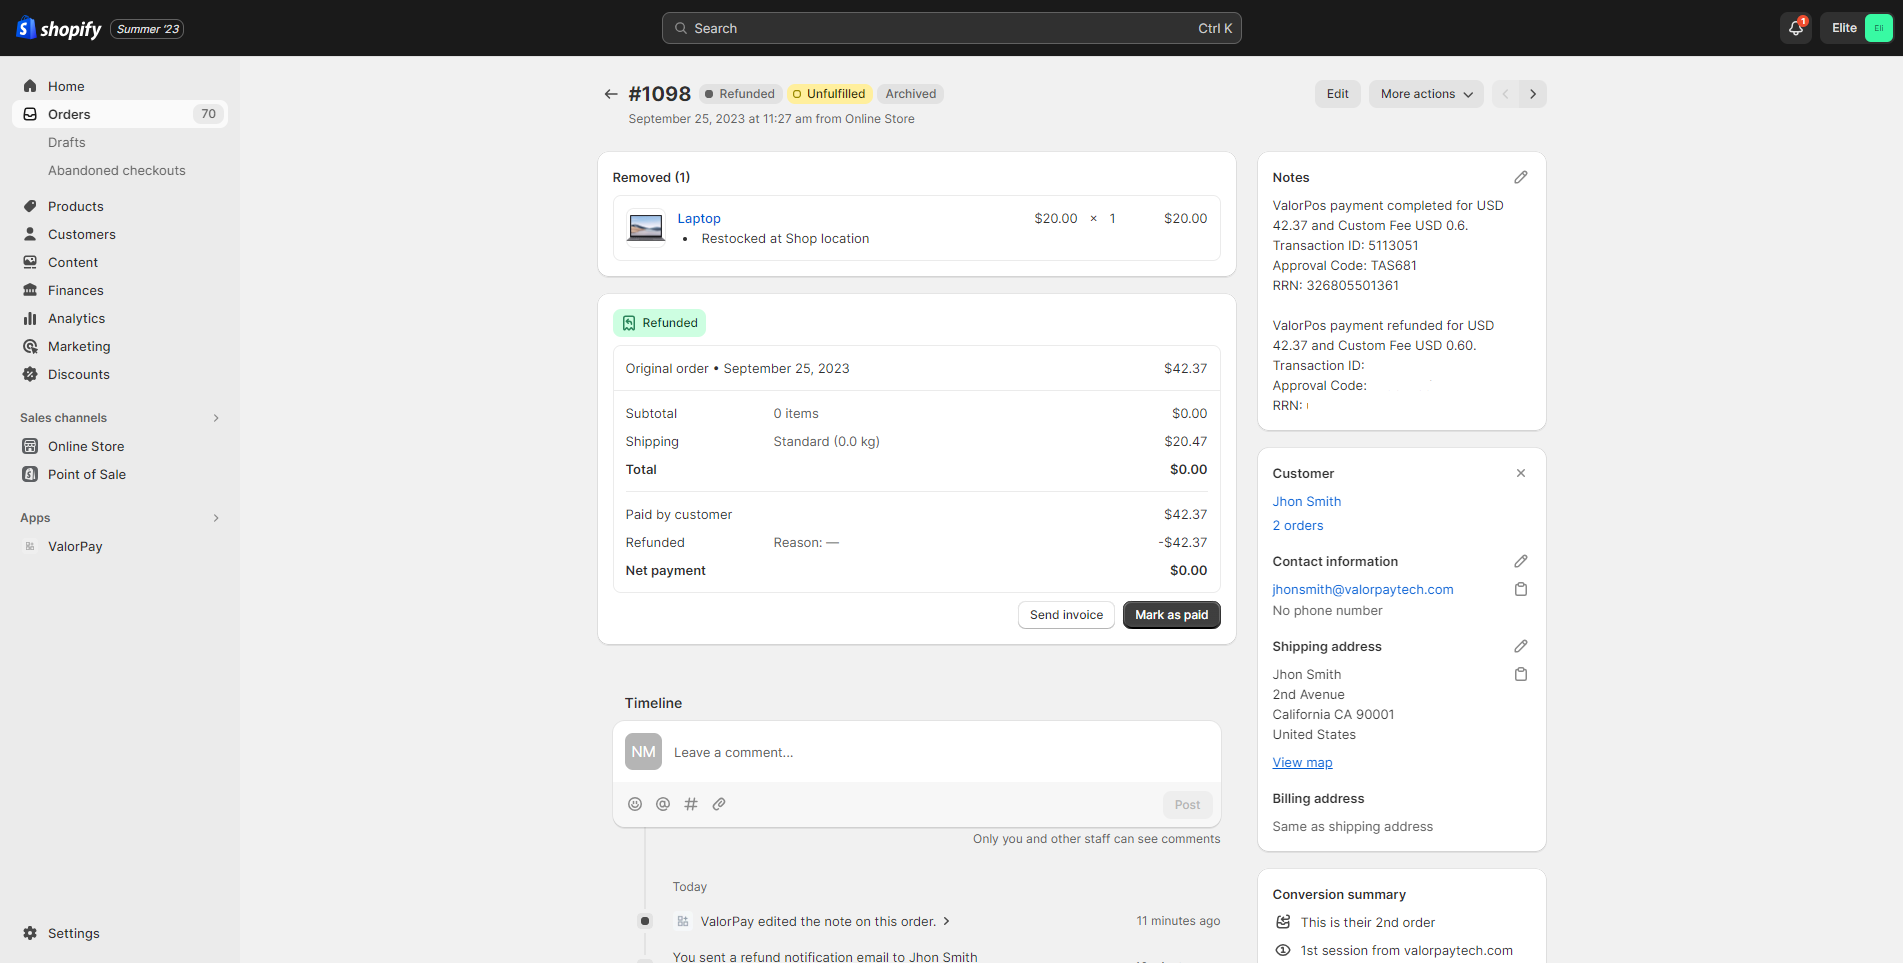
- Another confirmation can be viewed in the Shopify order details, in the Notes section towards top right. A note for the refund transaction appears here. (Note: There is no need to click ‘Mark as paid’ button.)
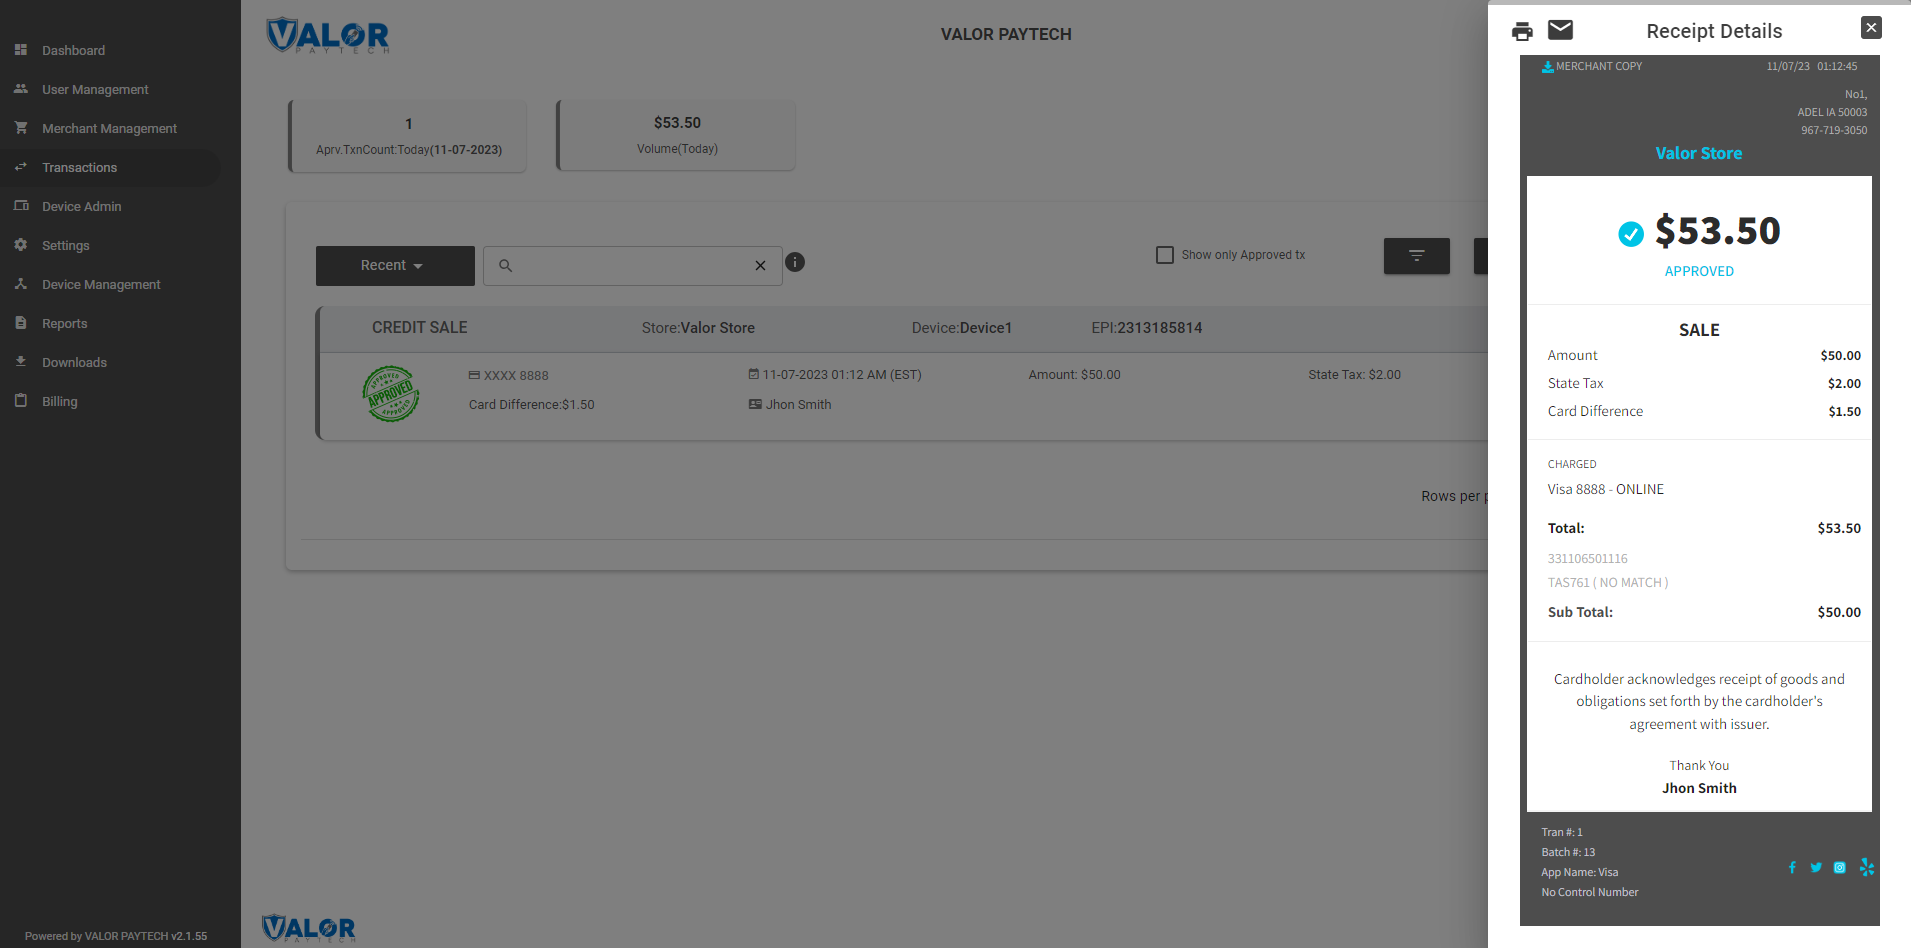
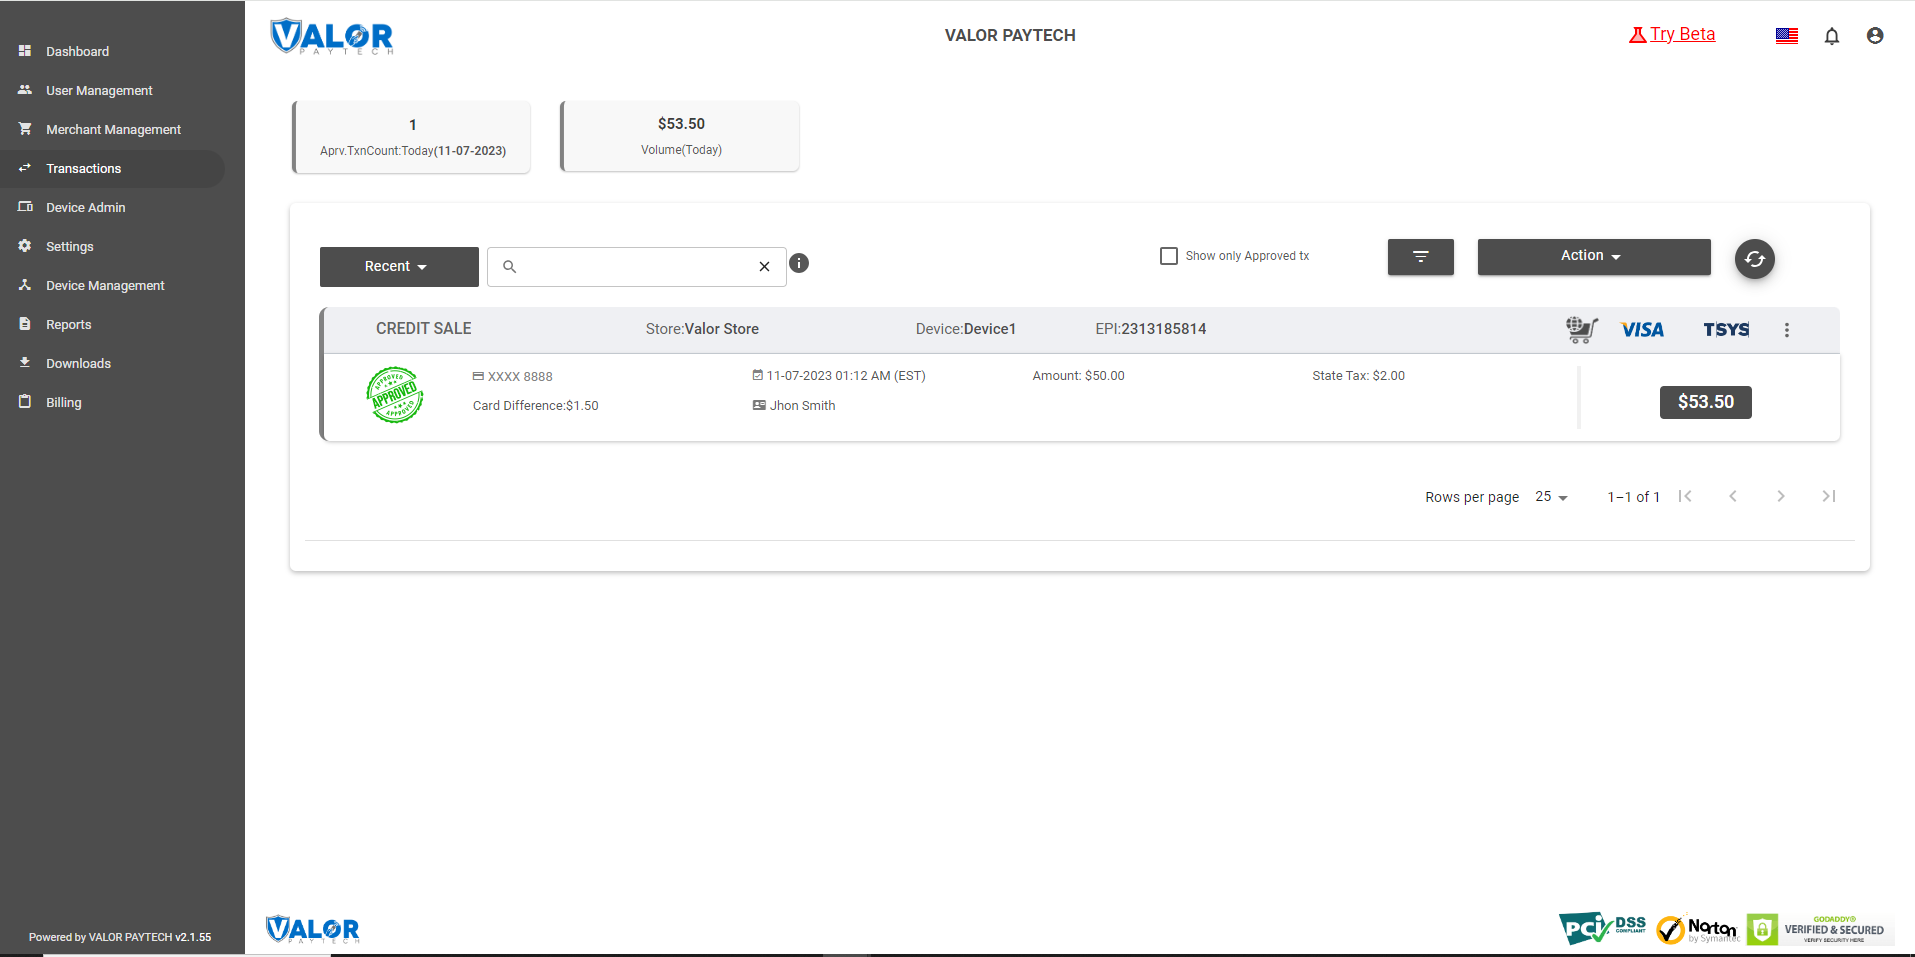
Click Transactions in the left menu. You should see the most recent order on top.
You can also click on View Receipt again to confirm that the sale is now completed. Use the print icon on top to take a print of the receipt.