OsCommerce
OsCommerce is a ecommerce platform that provides software as a service services to retailers. A payment gateway is a merchant service provided by an ecommerce application service provider that authorizes credit card or direct payment processing.
Generating API Keys
Objective
To perform any request on Valor virtual terminal, one should have the following credentials:
API ID (APP ID)
- API ID represents the merchant API; A merchant can create an API ID using the Valor portal
API KEY (APP KEY)
- API KEY represents the EPI of the merchant, technically a merchant can have only one API ID but based on the count of the API KEY, a merchant can have several API KEYS
- Merchant can create their own API KEY using the Valor portal
EPI
- Basically EPI is an end point identifier, Identify the device on valor infrastructure, any devices including virtual terminal will be identified as an EPI, typically it's a 10 digit number starts with 2
STEPS TO CREATE API ID AND API KEY
STEP 1 - Log Into The Valor Portal

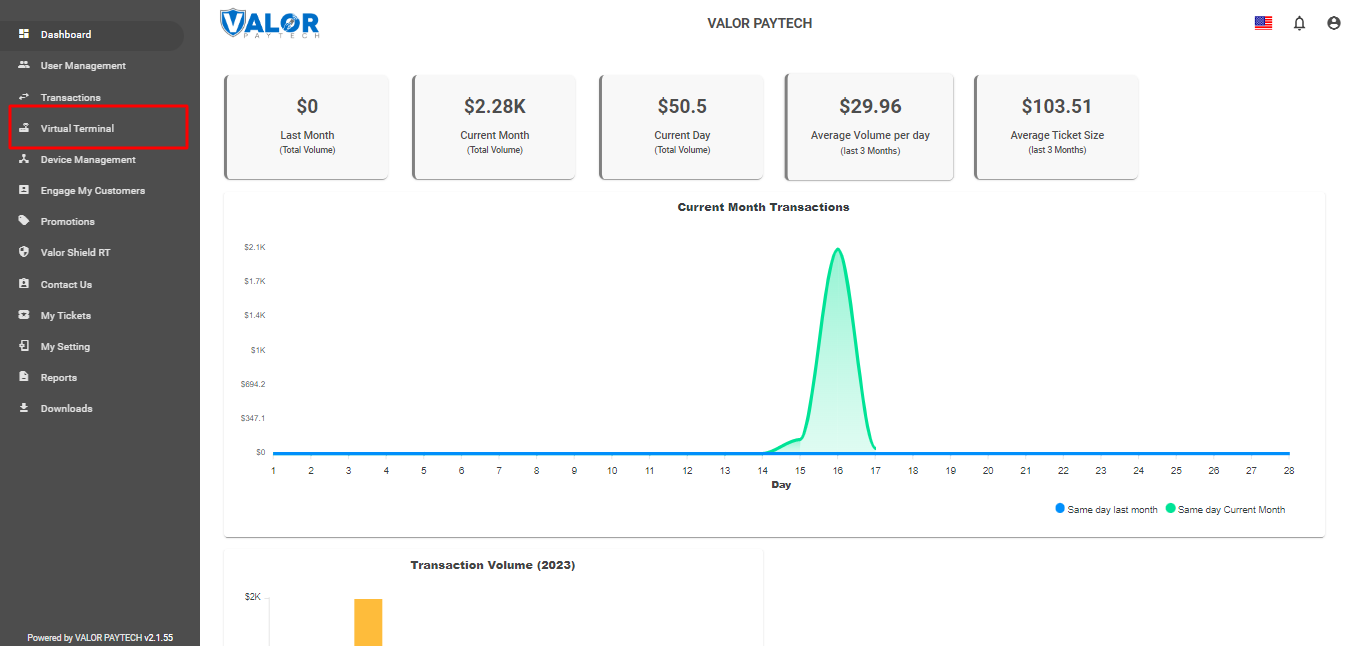
STEP 2 - Click Virtual Terminal in menu
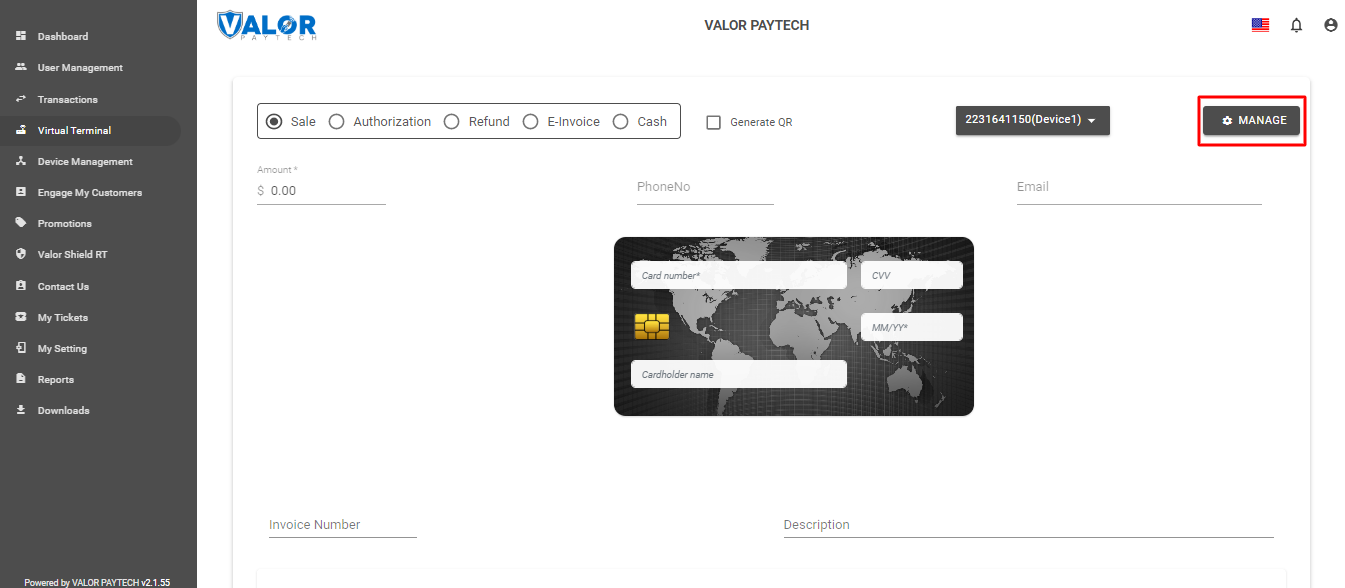
STEP 3 - Click Manage Button
STEP 4 - Select API KEYS Tab
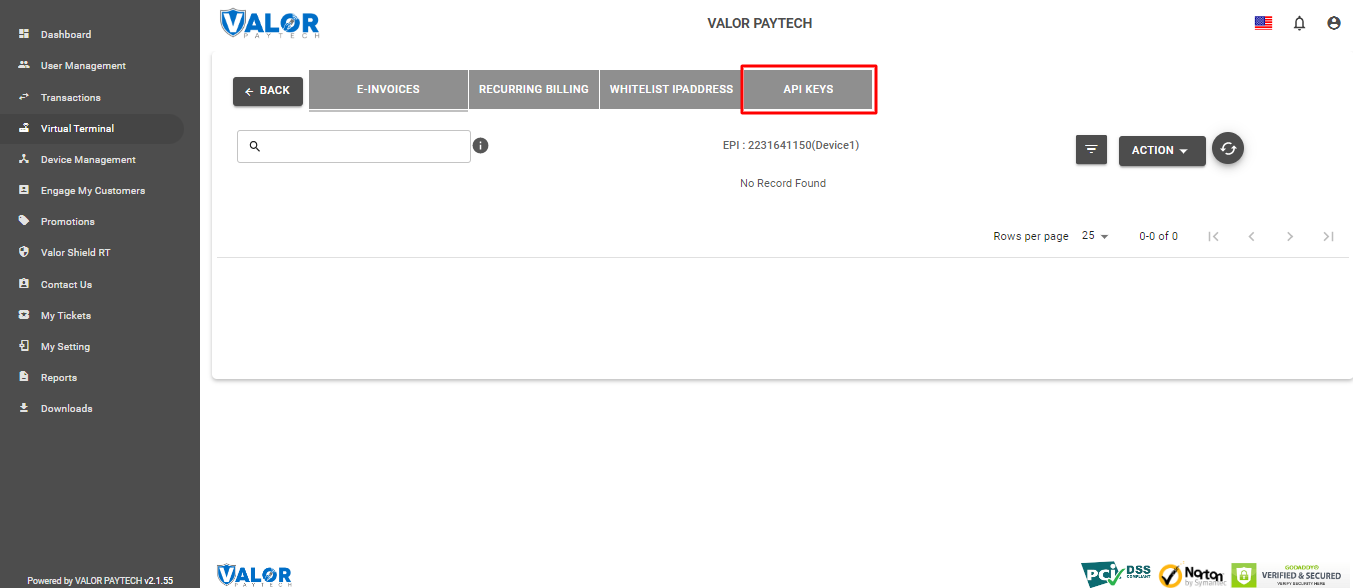
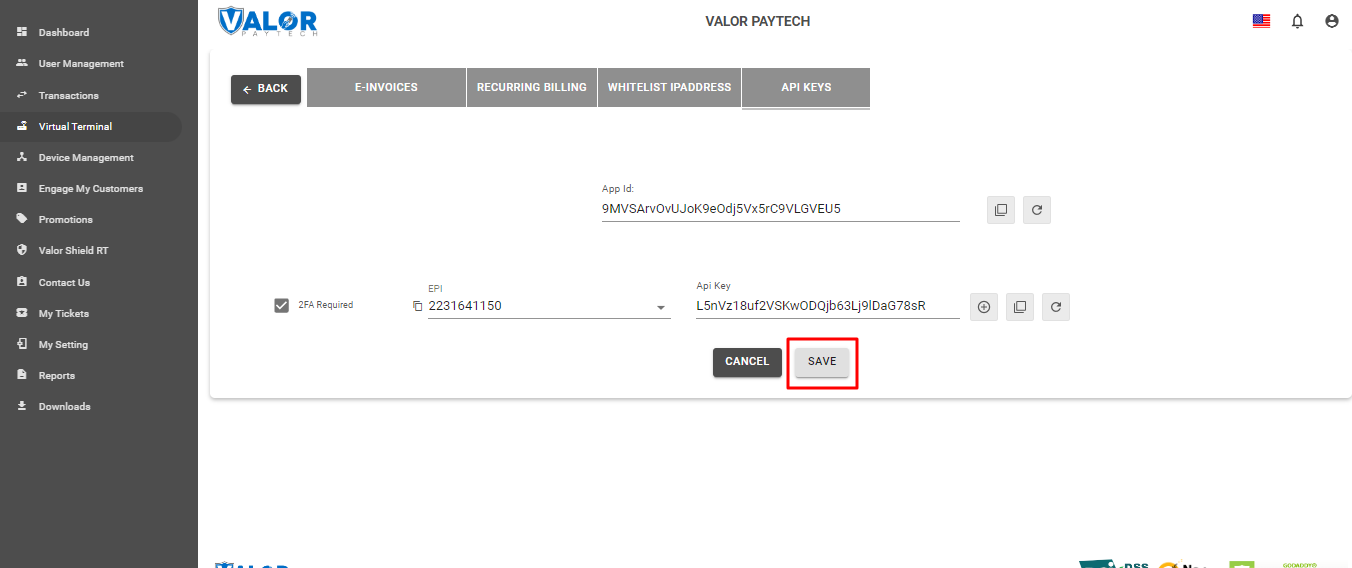
STEP 5 - Here you need to select the EPI to generate API Key.
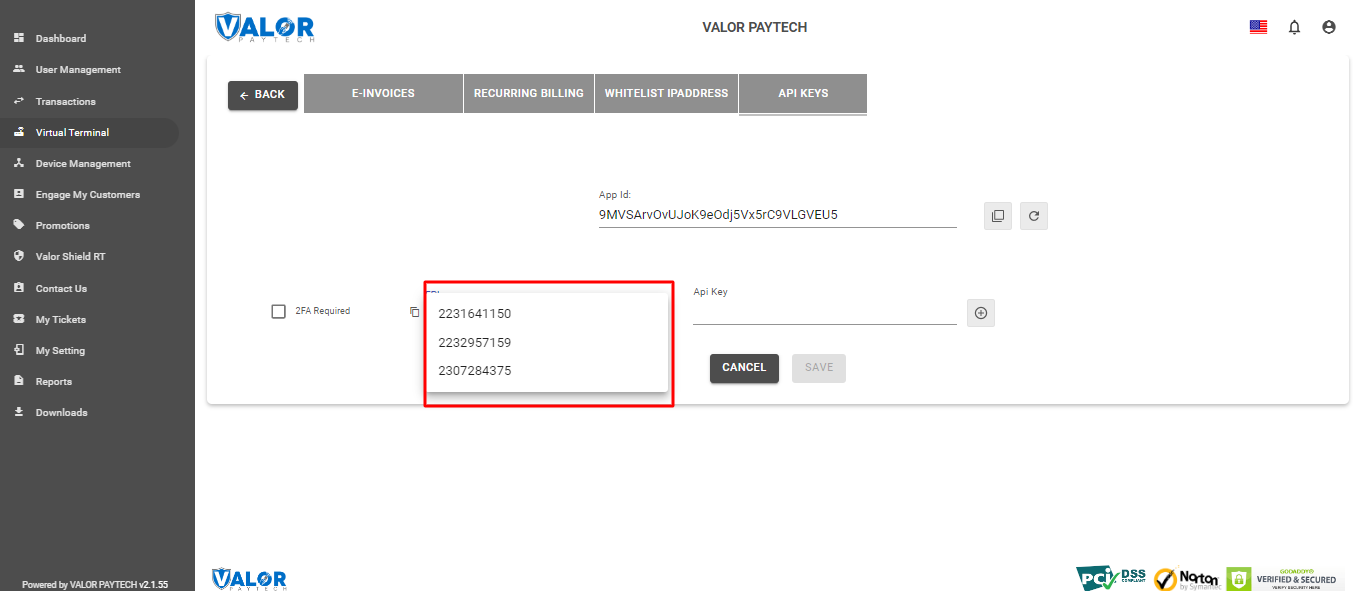
STEP 6 - Press Save after generating API Key.
Once you installed magento extension use this credentials in the payment gateway configuration.
Module Installation
This is a Payment Module for OsCommerce v4, that gives you the ability to process payments through payment service providers running on ValorPayTech platform.
Installation (App Shop / Local Storage)
- Download the payment module from Github for using this link: https://github.com/ValorPay/plugin-oscommerce/archive/refs/heads/main.zip
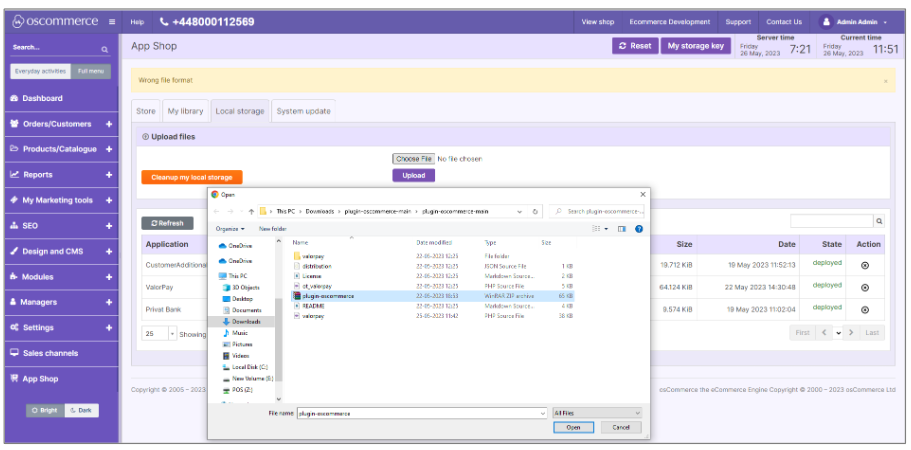
- Navigate to plugin-oscommerce-main\plugin-oscommerce-main folder then pack its contents and give zip file name plugin-oscommerce.zip.
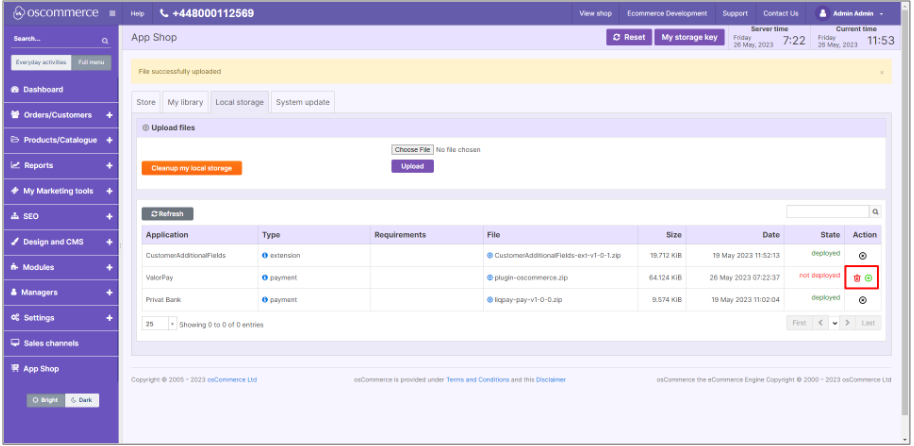
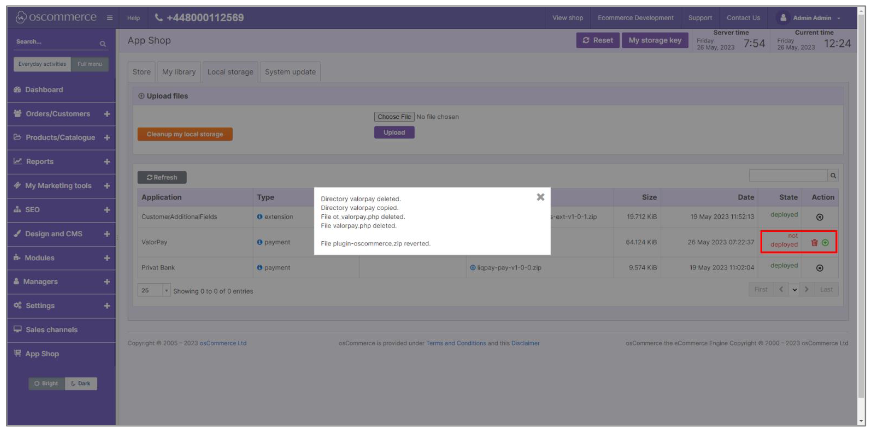
- Upload plugin-oscommerce.zip to App Shop / Local Storage
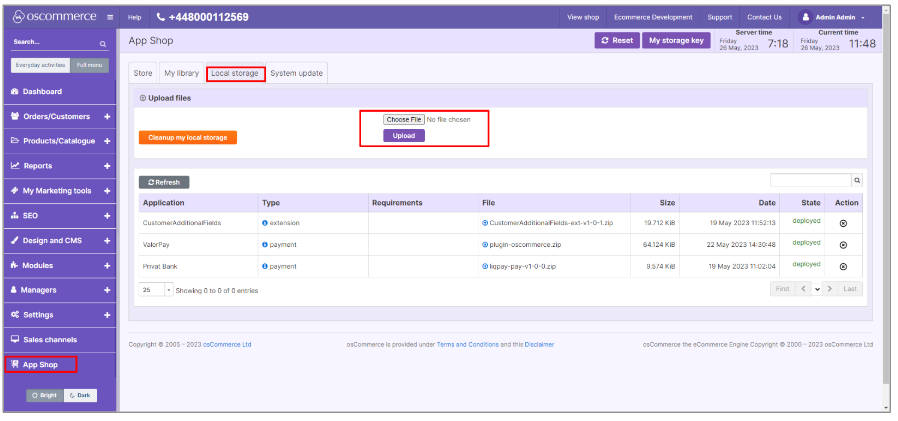
- To select the module zip file in local storage and upload it.
- Click + sign in Action column to Install module from there.
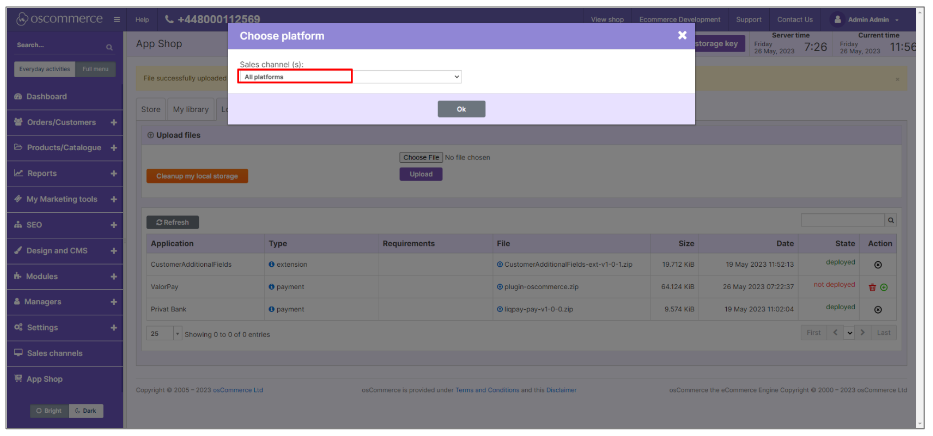
- To chose the sales channel platform.
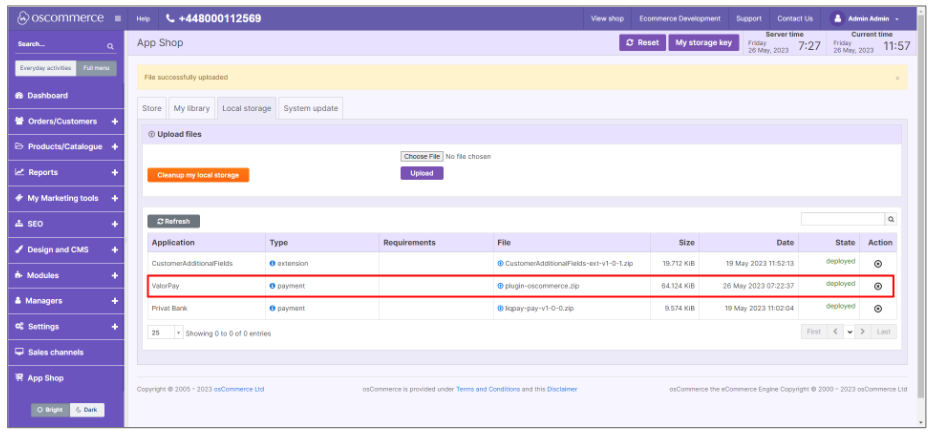
- Finally, module has been installed in App shop.
Manual Installation
- Download the payment module from Github for using this link: https://github.com/ValorPay/plugin-oscommerce/archive/refs/heads/main.zip
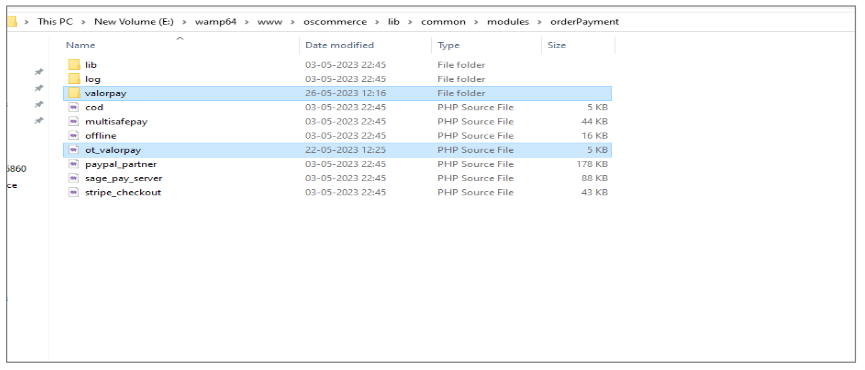
- Navigate the project folder lib\common\modules\orderPayment and upload unpack contents from plugin-oscommerce-main\plugin-oscommerce-main there.
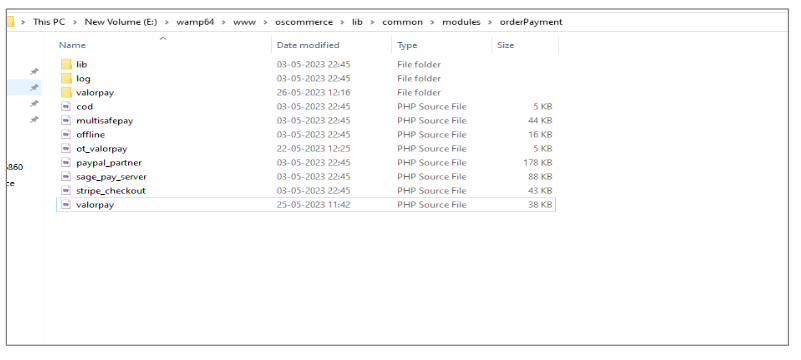
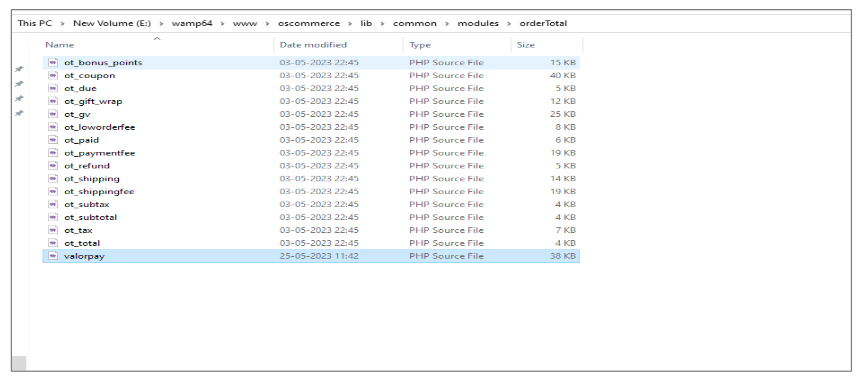
- Move file ot_valorpay.php from lib\common\modules\orderPaymentto lib\common\modules\orderTotal.
Module Deletion
- Go to App Shop / Local Storage delete module from there.
- For manual navigate folder lib\common\modules\orderPayment delete valorpay folder and file from there.
- Go to lib\common\modules\orderTotal delete ot_valorpay.php from there.
Configuration
- To configure the module, login to osCommerce admin panel, go to Modules -> Payment -> Online
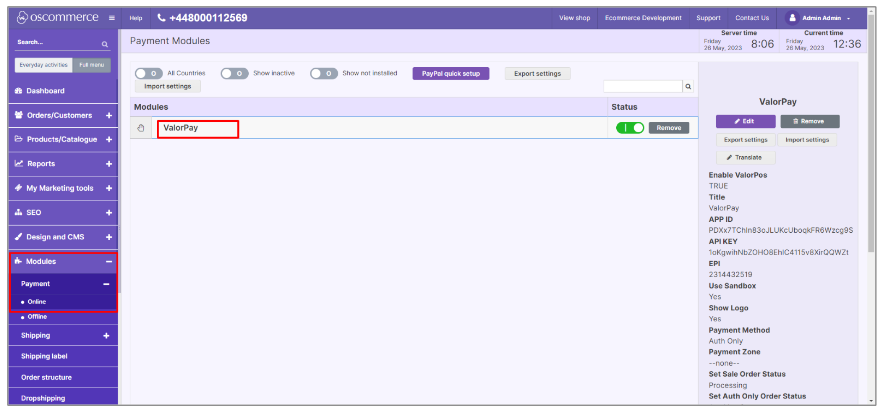
- Check the Payment Module Panel ValorPay is visible in the list of installed Payment Methods.
- Click to ValorPay Payment Methods and click the button Edit under the right-side panel to expand the available settings.
- Set Enable ValorPos to Yes, set the correct credentials, select your preferred payment method and additional settings and click Update.

-
Title: Enter Title for the ValorPay payment method to be shown in the frontend.
-
Use Sandbox: If Sandbox is checked Yes, payments will not be processed.
-
Show Logo: Set Yes to show logo at checkout page or Set No to show only title while selecting payment method.
-
APP ID, APP KEY & EPI: Set Production Valor API keys or If Sandbox Yes, then Sandbox API keys Read here Generating API KEYS (E-Commerce) | Valor PayTech
-
Set Sale Order Status: Set the status of an order upon a successful payment e.g., Processing or Suspected Fraud
-
Set Auth Only Order Status: Set the status of orders made with this payment module to set Awaiting for Payment for auth transaction.
-
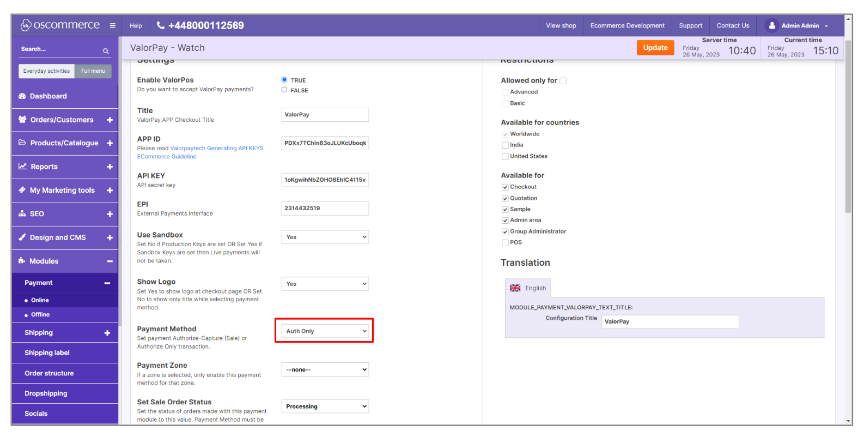
Payment Method: Select one of the payment methods for the payment capture.
-
Sale: Authorizes and captures the order amount immediately.
-
Auth Only: Authorizes and validates card for the order amount. The admin needs to manually capture the amount (by generating invoice using Capture Online option) within the authorization hold period.
-
Payment Zone: Select All World or Specific countries to allow payments using Valor Payment.
-
Surcharge Mode: Set Yes if you want all transactions on surcharge mode. Merchant must have a Surcharge MID for it to function.
-> Set Surcharge Type – Surcharge % or Flat Rate $
-> Next go to Modules -> Order structure
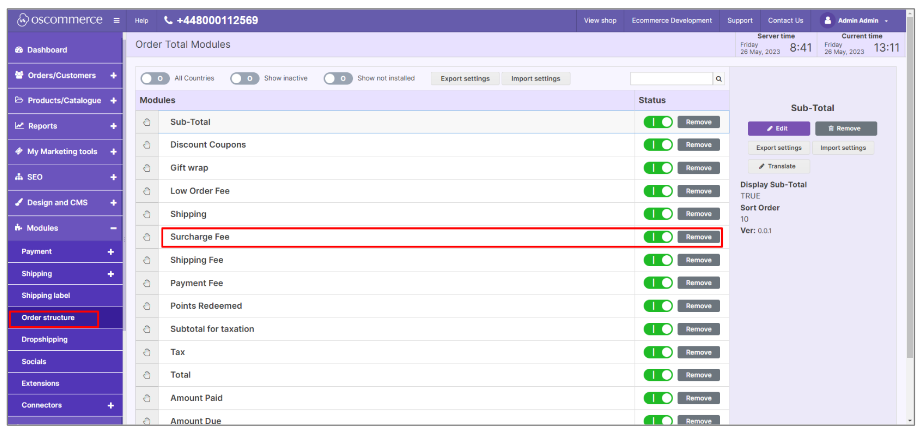
-
-> Click to Surcharge Fee and click the button Edit under the right-side panel to expand the available settings
-> Set Display Surcharge Fee to Yes, Sort Order and click Update
-> AVS - The address verification service will add a text field to the checkout page based on the above option.
-> Surcharge Label
-> Surcharge % - Percentage will apply only on enabling on surcharge Indicator to true and Surcharge type is set for Surcharge %
-> Flat Rate $ - Flat rate will apply only on if Enable surcharge mode is true and Surcharge type is set to Flat Rate $
-> Accepted Cards: Select the card types to be accepted for payments from customers.
-> Finally Scroll up and select Update the configuration
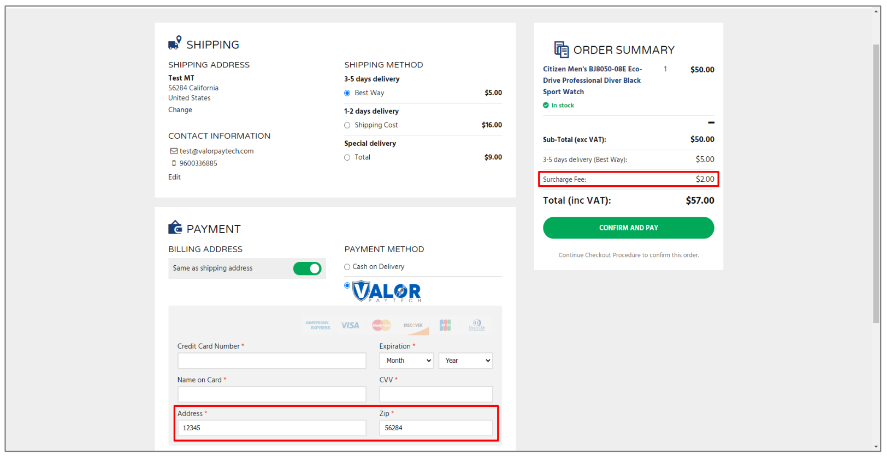
ValorPay Payment Method - Frontend
Once the module is configured, it can be seen enabled in the frontend. Simply add products to cart and check out, you will see the Valor Payment Gateway method enabled. Select it, enter the card details, and click Place Order to finish payment and place the order successfully.
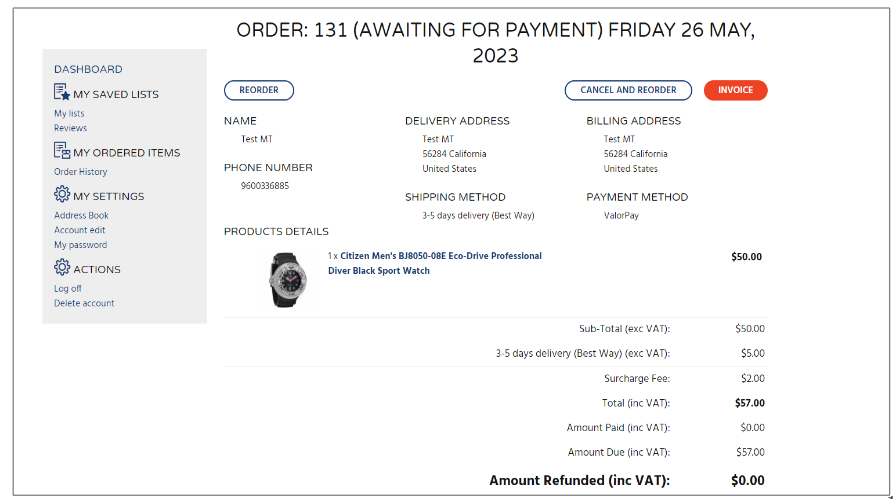
Valor Payment Details in My Account Section
Once an order is placed, the Valor payment details can be seen here: My Account (top right) -> My Ordered Items.
Valor Payment Method for Refund Order
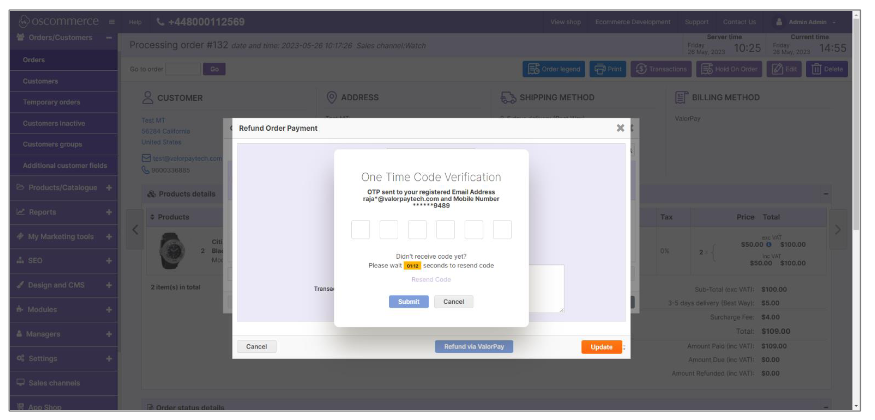
- It will send an OTP to the admin's email and mobile number as mentioned in ValorPay Merchant Panel. Enter the OTP and the refund request will be processed at ValorPay Gateway, and the response will be sent to store.
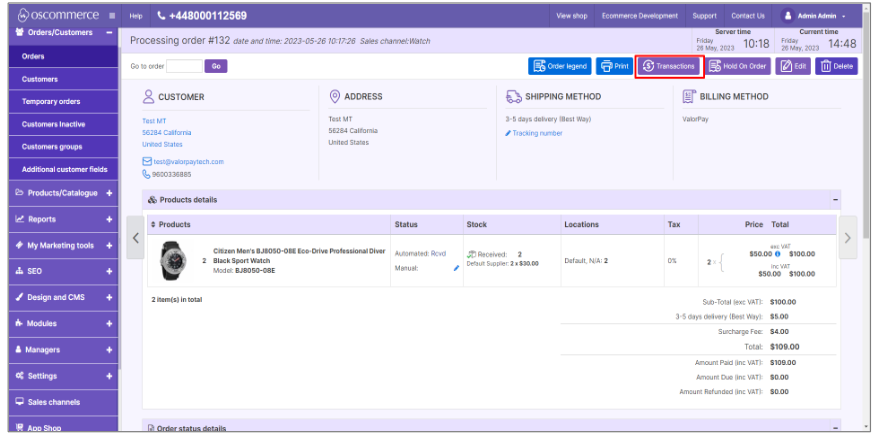
- To refund order via ValorPay Gateway, go to Orders and Edit the order to click the Transactions and select the action column Edit Add Refund Info.
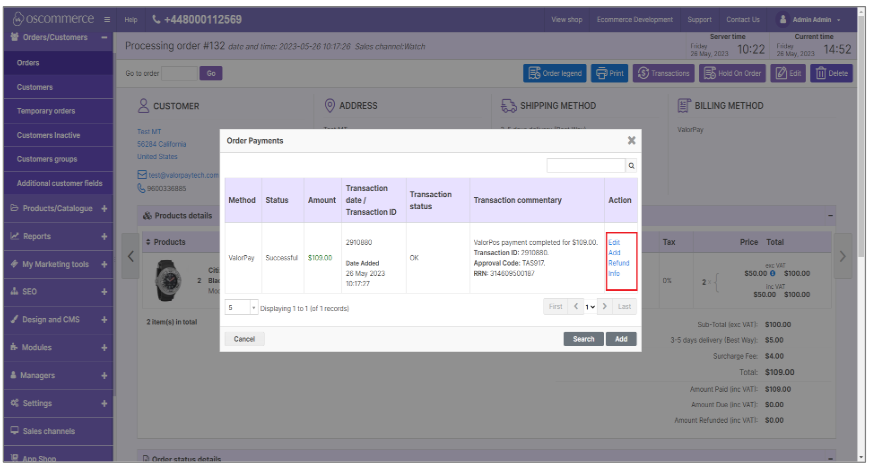
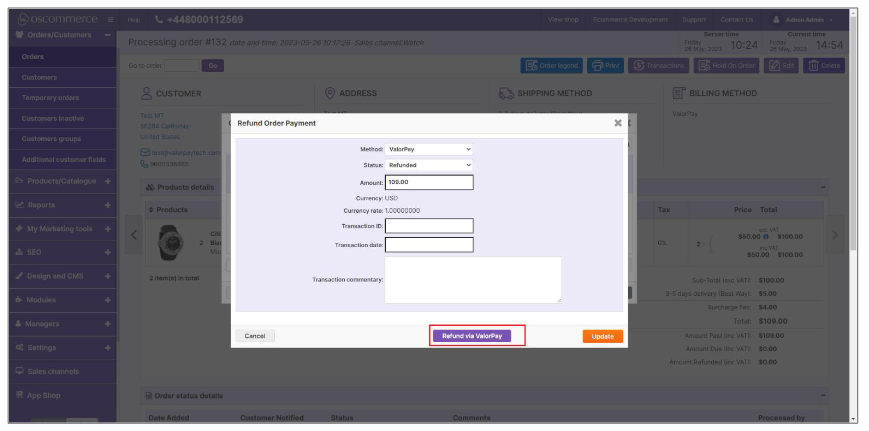
- To select Refund via Valorpay
- Enter the One Time Code received on your registered email address and phone number.
- Finally Refund payment has been successfully completed.
Capturing ‘Auth Only’ Transactions Using ValorPay Merchant Portal
- Select ‘Payment Method’ as ‘Auth Only’ if you wish to take only authorization of payment from the customer and deduct it later as per your business arrangement.
- Remember, this will apply to all the orders that customers place on your store.
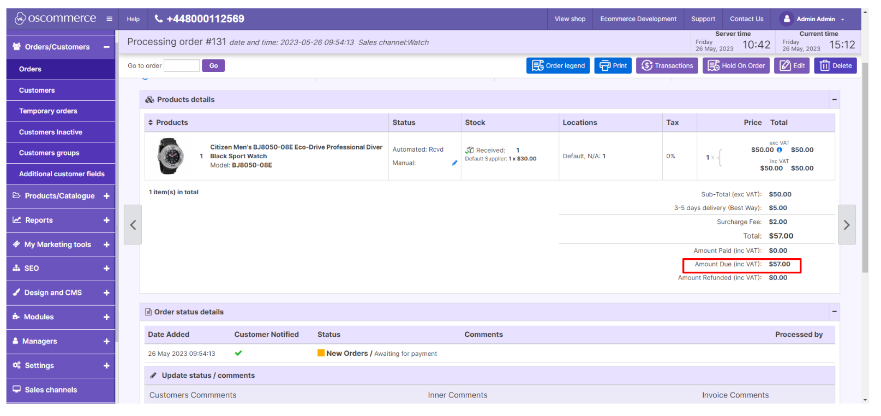
- Order amount showing in Amount Due to the Auth transaction
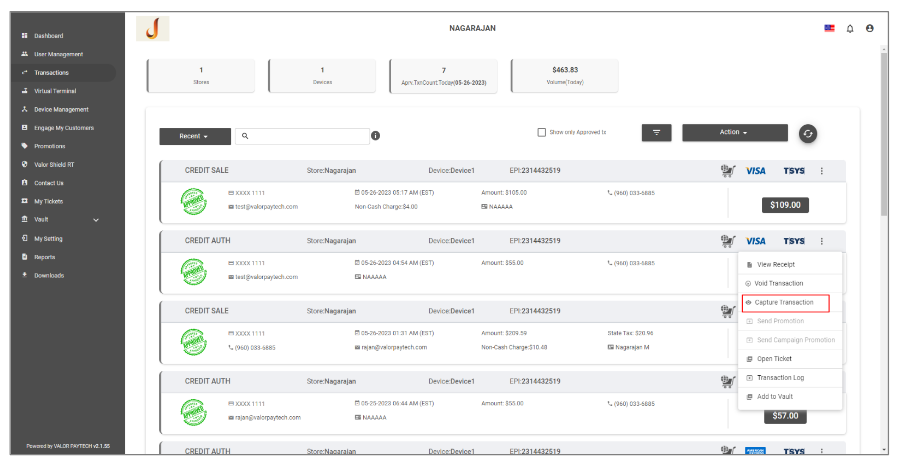
- Click ‘Transactions’ in the left menu. You should see the most recent order on top
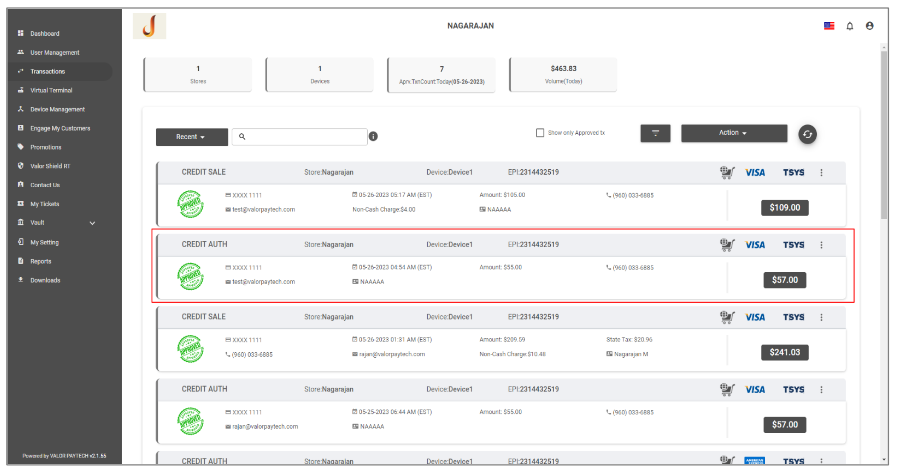
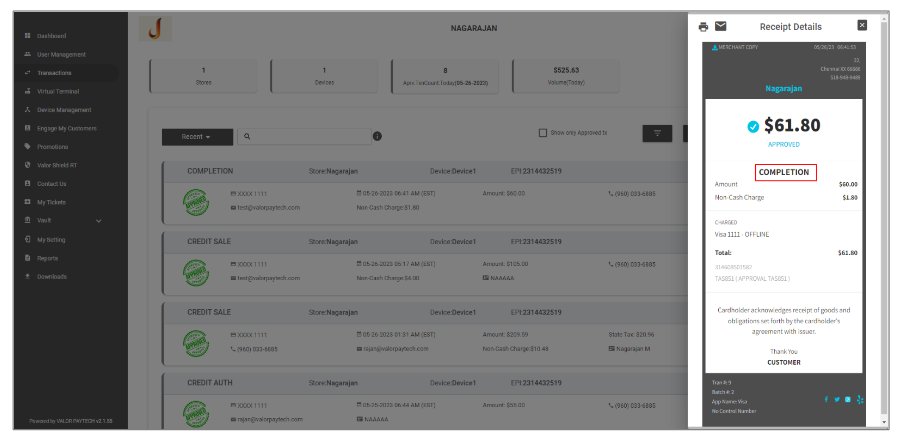
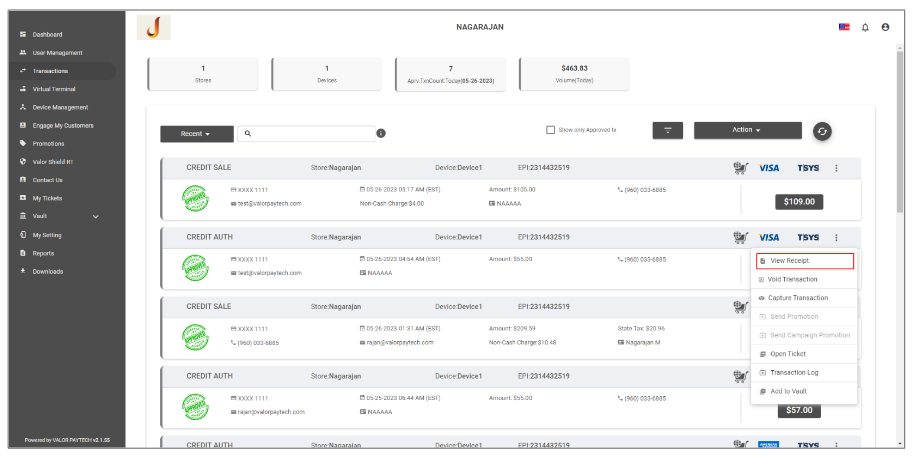
- The header ‘CREDIT AUTH’ suggests that this is an ‘Auth Only’ transaction. ‘CREDIT SALE’ indicates an order which is fully paid for. You can also click on ‘View Receipt’ if you wish to confirm what type of order it is; Author Sale.
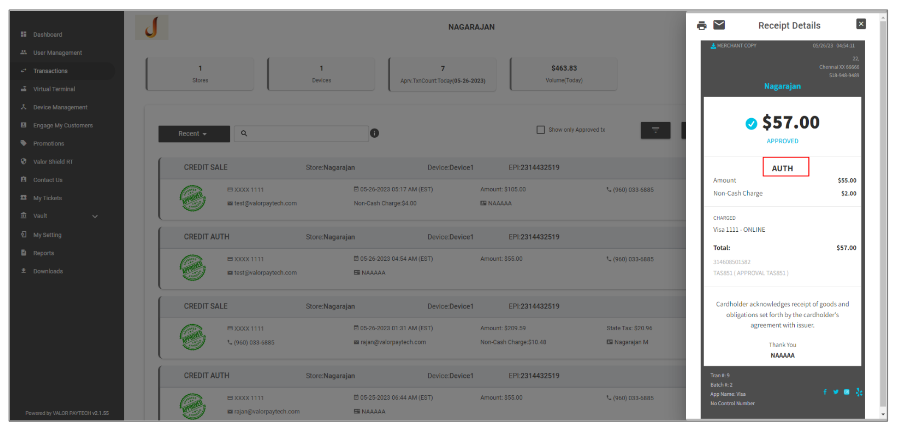
- ‘AUTH’ indicates and confirms that this transaction is ‘Auth Only’.
- To collect payment against this authorisation, click on the vertical ellipsis button and click ‘Capture Transaction'.
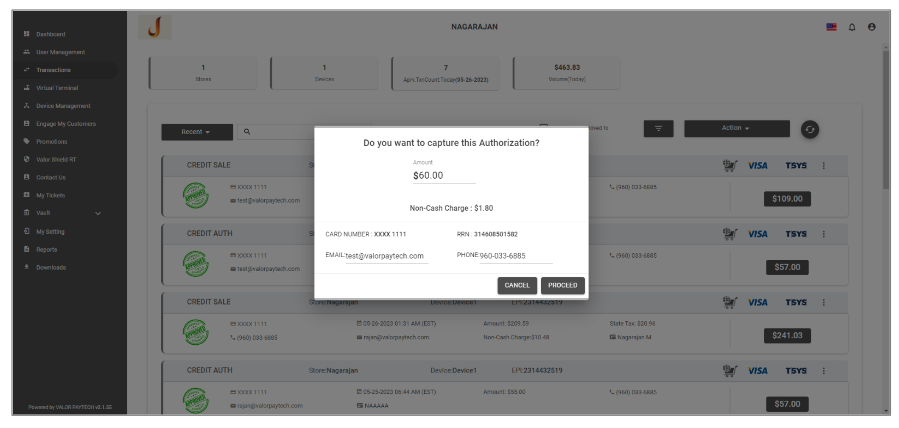
- Confirm the amount and click ‘Proceed’.
- The transaction is approved and successfully completed.
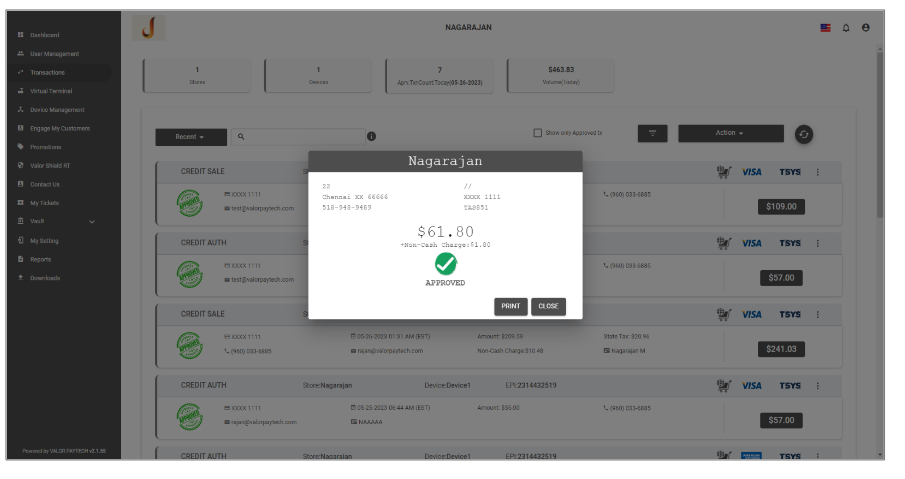
- The header now reads ‘COMPLETION’. You can also click on ‘View Receipt’ again to confirm that the sale is now completed. Use the print icon on top to take a print of the receipt.