Magento
Magento is an open-source e-commerce platform written in PHP. It uses multiple other PHP frameworks such as Laminas and Symfony. Magento source code is distributed under Open Software License v3.0. Magento was acquired by Adobe Inc in May 2018 for $1.68 billion.
Generating API Keys
Objective
To perform any request on Valor virtual terminal, one should have the following credentials:
APP ID
- APP ID represents the merchant API; A merchant can create an APP ID using the Valor portal
APP KEY
- APP KEY represents the EPI of the merchant, technically a merchant can have only one APP ID but based on the count of the API KEY, a merchant can have several API KEYS
- Merchant can create their own API KEY using the Valor portal
EPI
- Basically EPI is an end point identifier, Identify the device on valor infrastructure, any devices including virtual terminal will be identified as an EPI, typically it's a 10 digit number starts with 2
STEPS TO CREATE APP ID AND APP KEY
STEP 1 - Log Into The Valor Portal

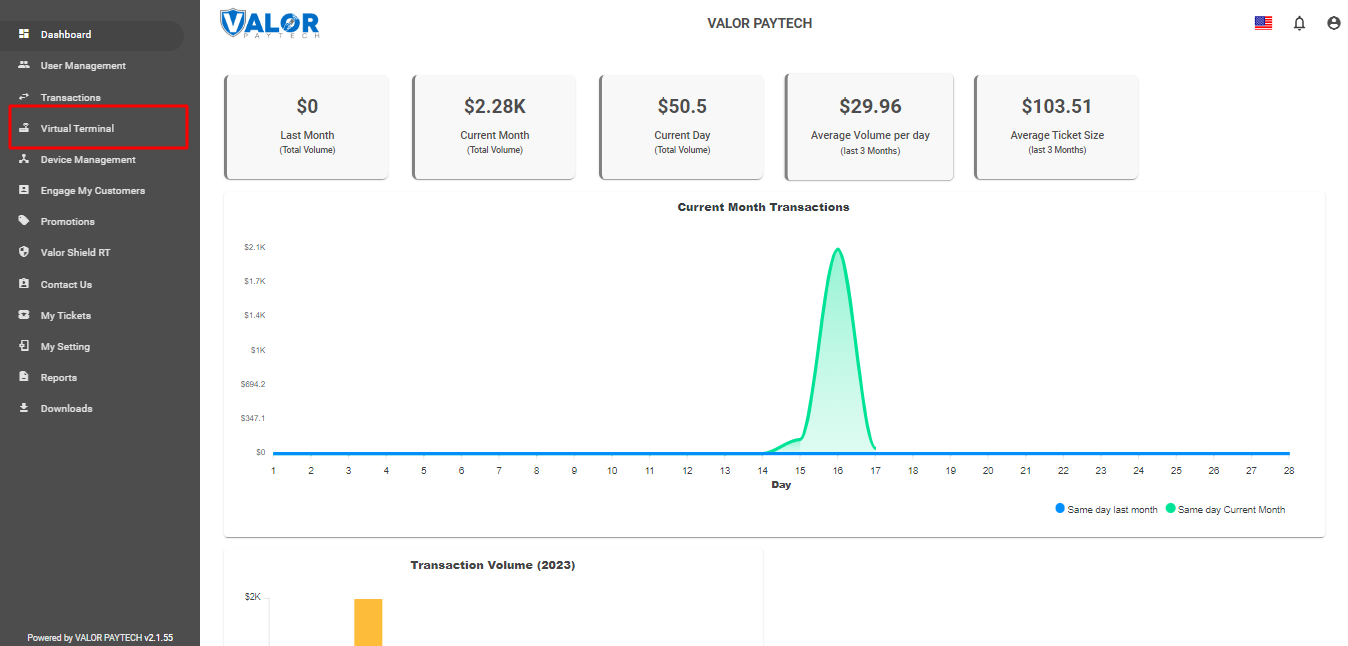
STEP 2 - Click Virtual Terminal in menu
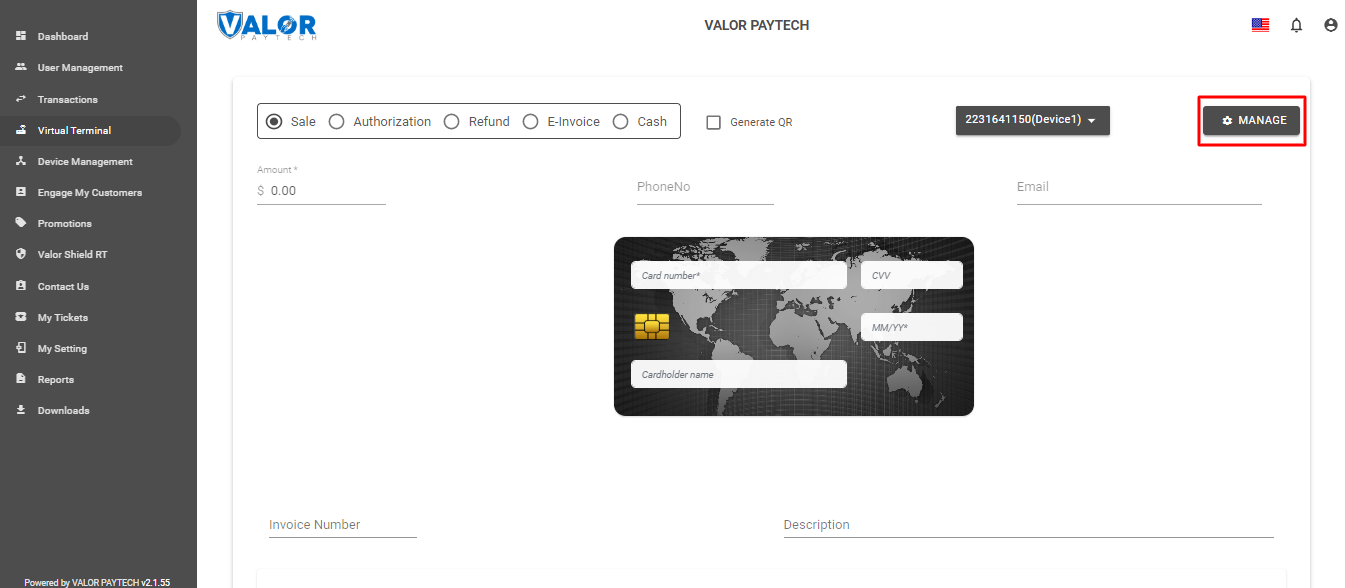
STEP 3 - Click Manage Button
STEP 4 - Select API KEYS Tab
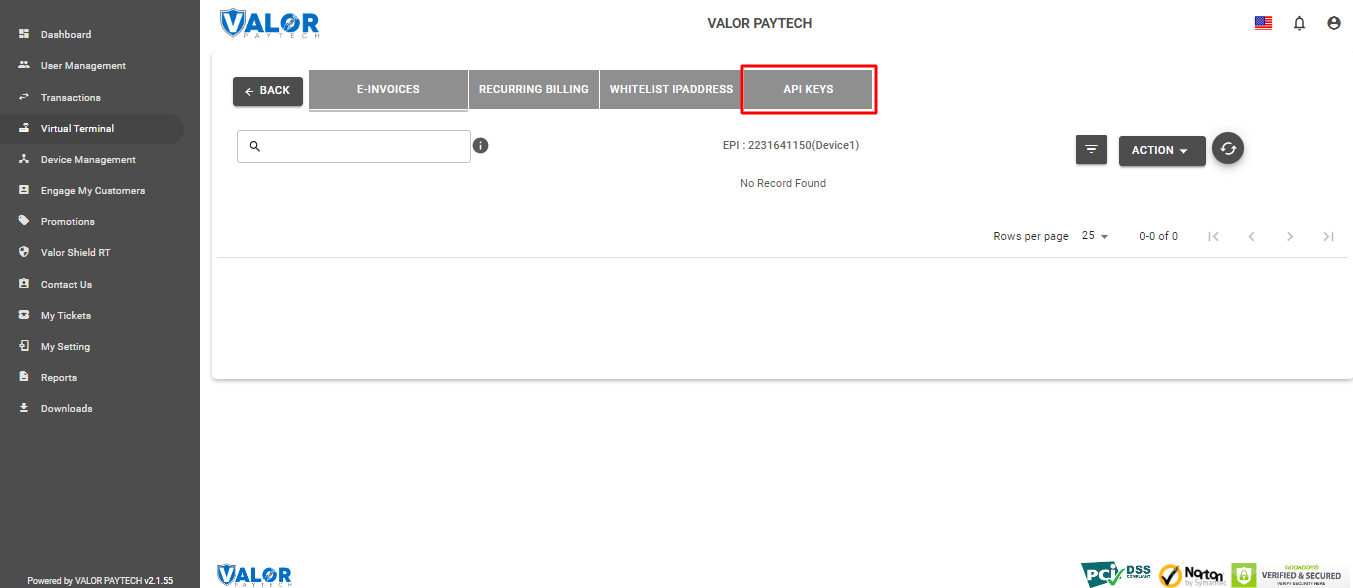
STEP 5 - Here you need to select the EPI to generate API Key.
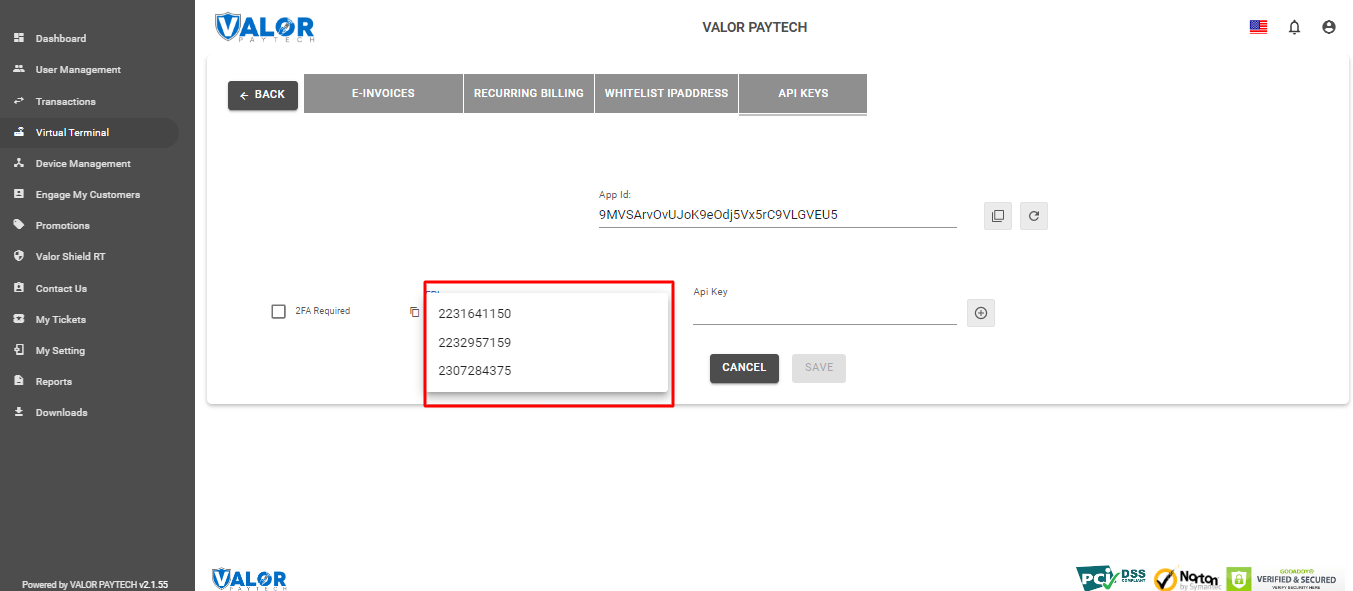
STEP 6 - Enter these keys to the settings tab of the ValorPay application, choose your settings and click ‘Submit’
Once you installed Magento extension use this credentials in the payment gateway configuration.
Extension Installation
Install module from Magento Marketplace run the following command in Magento 2 root folder to install Valorpay
- composer require valorpaytech/plugin-magento
Insert your Public Key and Private Key into the Username and Password required for ValorPay Authentication.
Go through the link below to get Public and Private Keys click here.
Manual Installation
Download the ValorPay_CardPay module from Github You can either clone or download the module using this link: click here
Copy the downloaded app folder into -> project folder/app/code/
To verify that the extension is installed properly, run the command:
- php bin/magento module:status ValorPay_CardPay
Final Steps - Run the following commands in Magento 2 root folder
- php bin/magento module:enable ValorPay_CardPay
- php bin/magento setup:upgrade
- php bin/magento setup:di:compile
- php bin/magento setup:static-content:deploy -f
- php bin/magento cache:flush
Configuration
To configure the extension, log into Magento 2, move to - Stores -> Configuration -> Sales -> Payment Methods -> Other Payment Methods -> ValorPay, where you can find various settings to configure the extension.
- Enable ValorPos: Enable or disable ValorPay Payment Gateway extension.
- Title: Enter Title for the ValorPay payment method to be shown in the frontend.
- Use Sandbox: If Sandbox is checked Yes, payments will not be processed.
- Show Logo: Set Yes to show logo at checkout page OR Set No to show only title while selecting payment method.
- New Order Status: Set the status of an order upon a successful payment e.g., Processing or Suspected Fraud. You can also check Use System Value to use default setting for Magento 2.
- APP ID, APP KEY & EPI: Set Production Valor API keys or If Sandbox Yes, then Sandbox API keys
- Read here Generating API KEYS (E-Commerce) | Valor PayTech click here
- Payment Method: Select one of the payment methods for the payment capture.
- Sale: Authorizes and captures the order amount immediately.
- Auth Only: Authorizes and validates card for the order amount. The admin needs to manually capture the amount (by generating invoice using Capture Online option) within the authorization hold period.
Country-specific Settings:
- Payment from Applicable Countries: Select All Allowed Countries or Specific Countries to allow payments using Valor Payment.
- Payment from Selected Countries: If you have set "Specific Countries" from the above option, select the countries to allow payments from.
- Surcharge Mode: Set Yes if you want all transactions on surcharge mode. Merchant must have a Surcharge MID for it to function.
- Set Surcharge Type – Surcharge % or Flat Rate $
- AVS - The address verification service will add a text field to the checkout page based on the above option.
- Surcharge Label
- Surcharge % - Percentage will apply only on enabling on surcharge Indicator to true and Surcharge type is set for Surcharge %
- Flat Rate $ - Flat rate will apply only on if Enable surcharge mode is true and Surcharge type is set to Flat Rate $
- Accepted Cards: Select the card types to be accepted for payments from customers.
Finally Scroll up and select Save the configuration
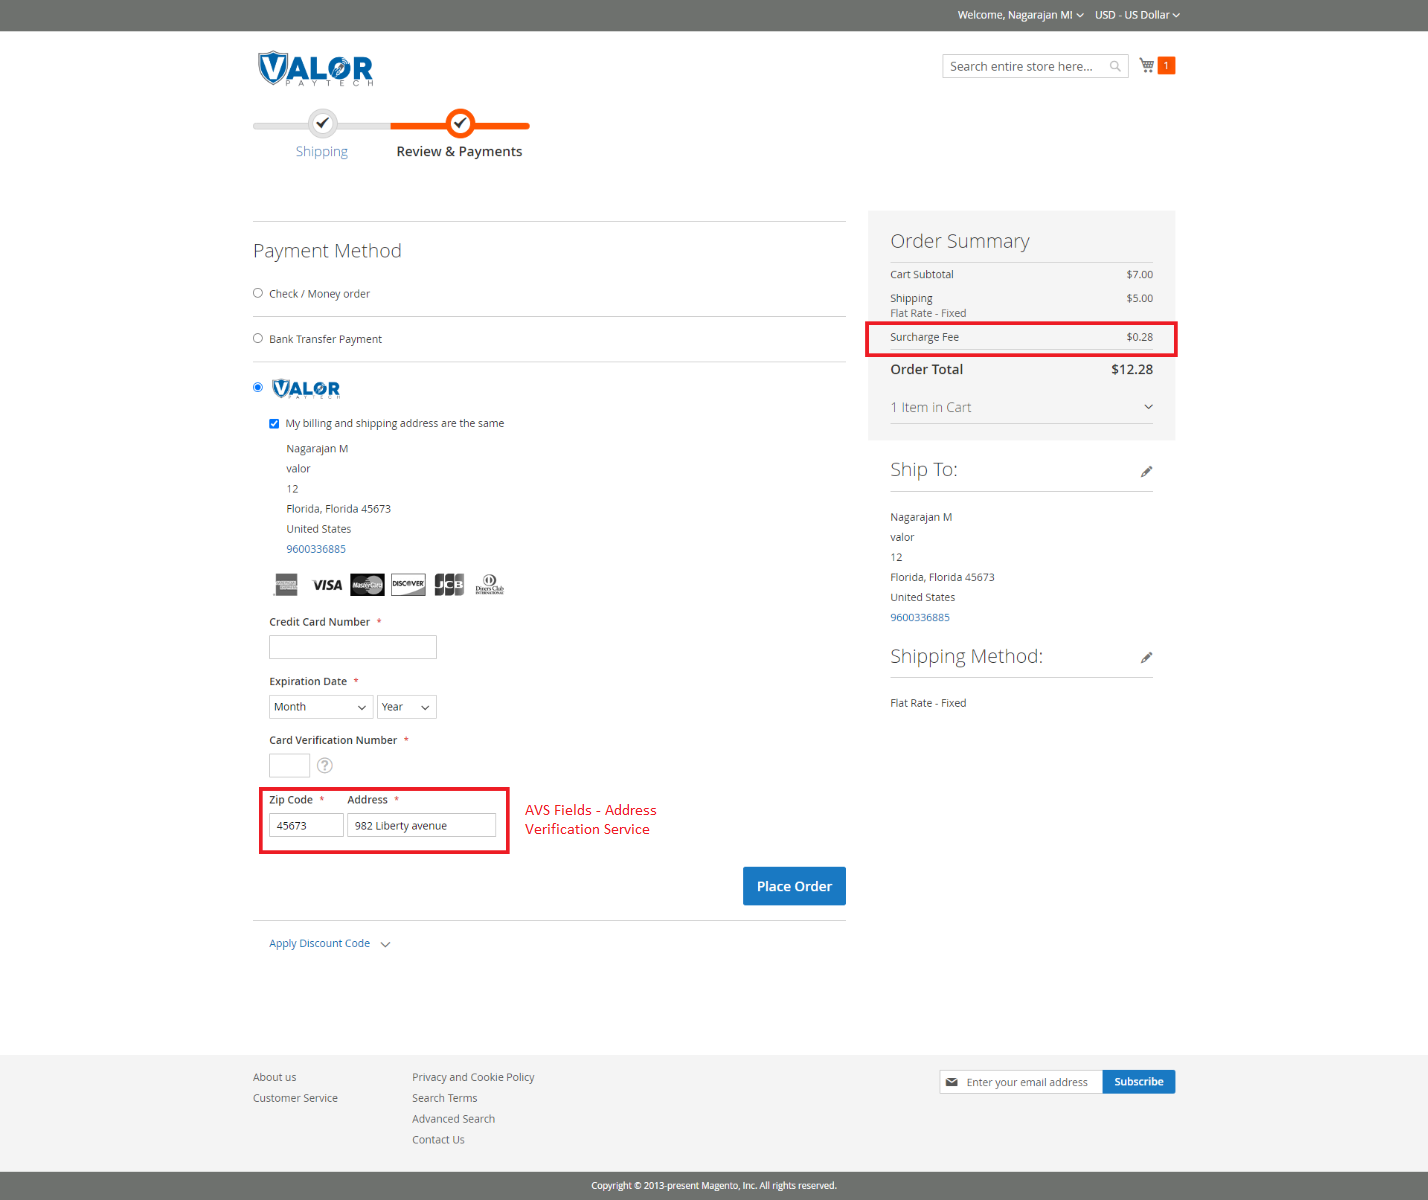
Valor Payment Method - Frontend
Once the extension is configured, it can be seen enabled in the frontend. Simply add products to cart and check out, you will see the Valor Payment Gateway method enabled. Select it, enter the card details, and click Place Order to finish payment and place the order successfully.
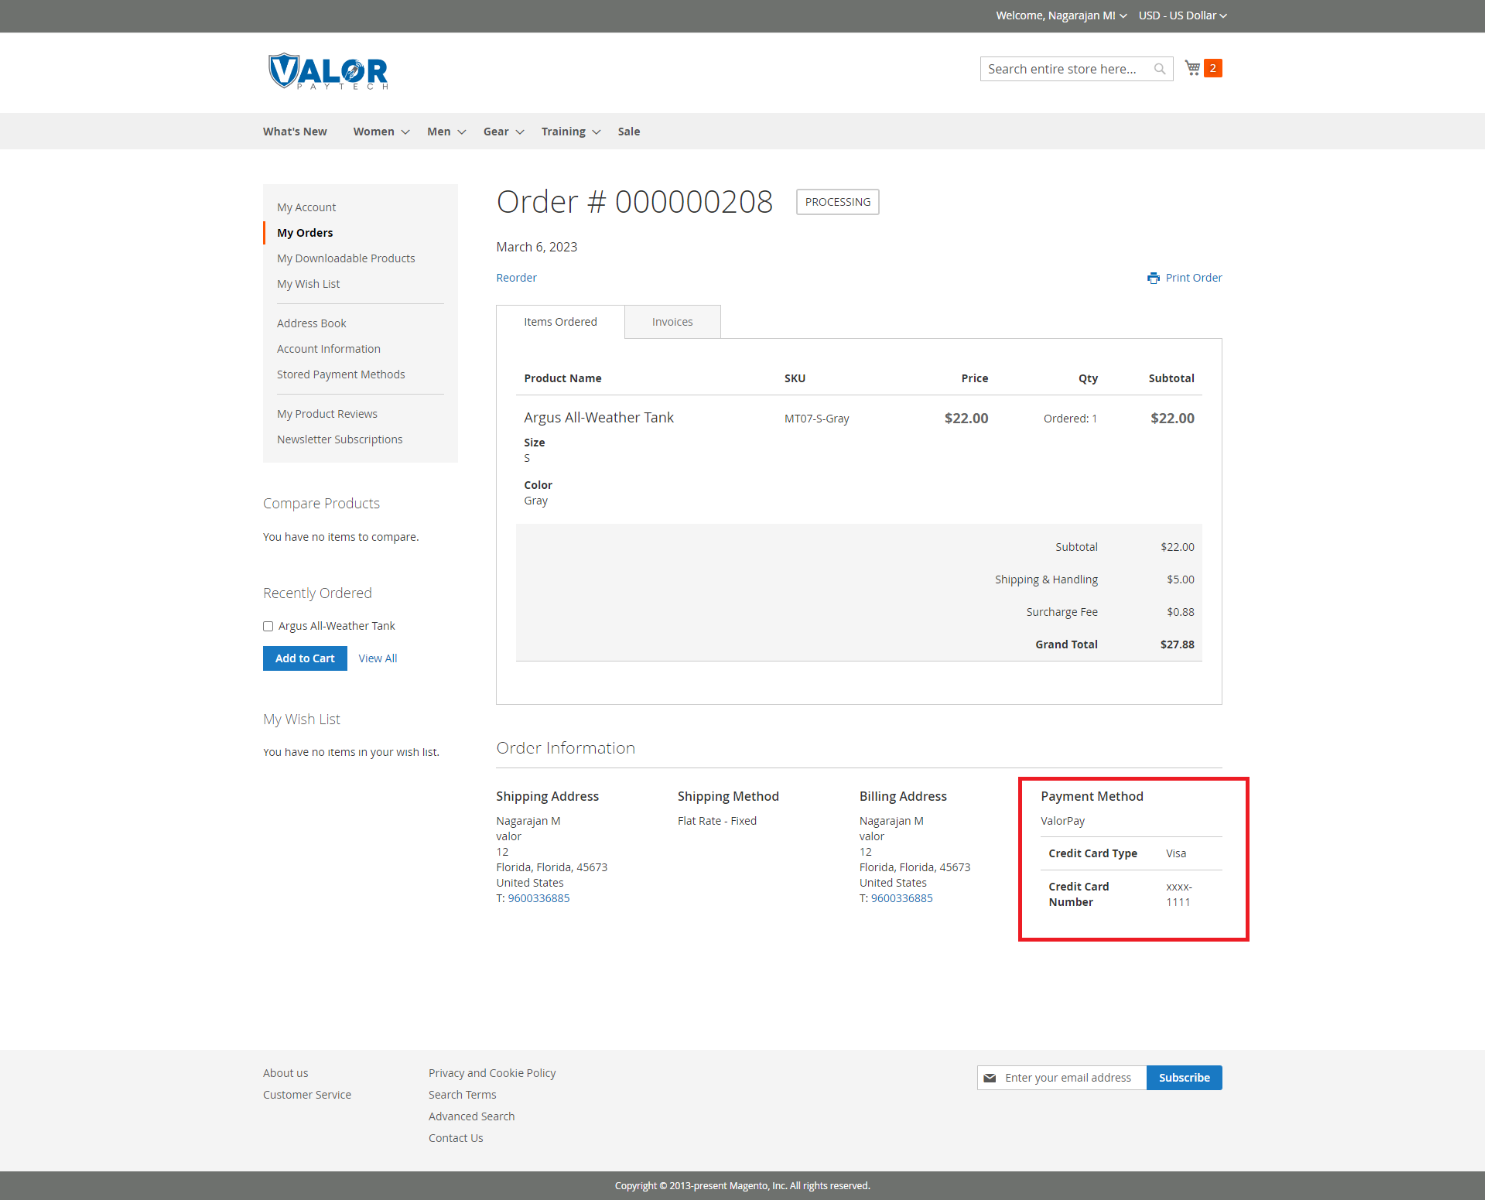
Valor Payment Details in My Account Section
- Once an order is placed, the Valor payment details can be seen here: My Account (top right) -> My Orders
- For a guest customer (with no login ID), order details can be seen via the link that is received after an order is placed.
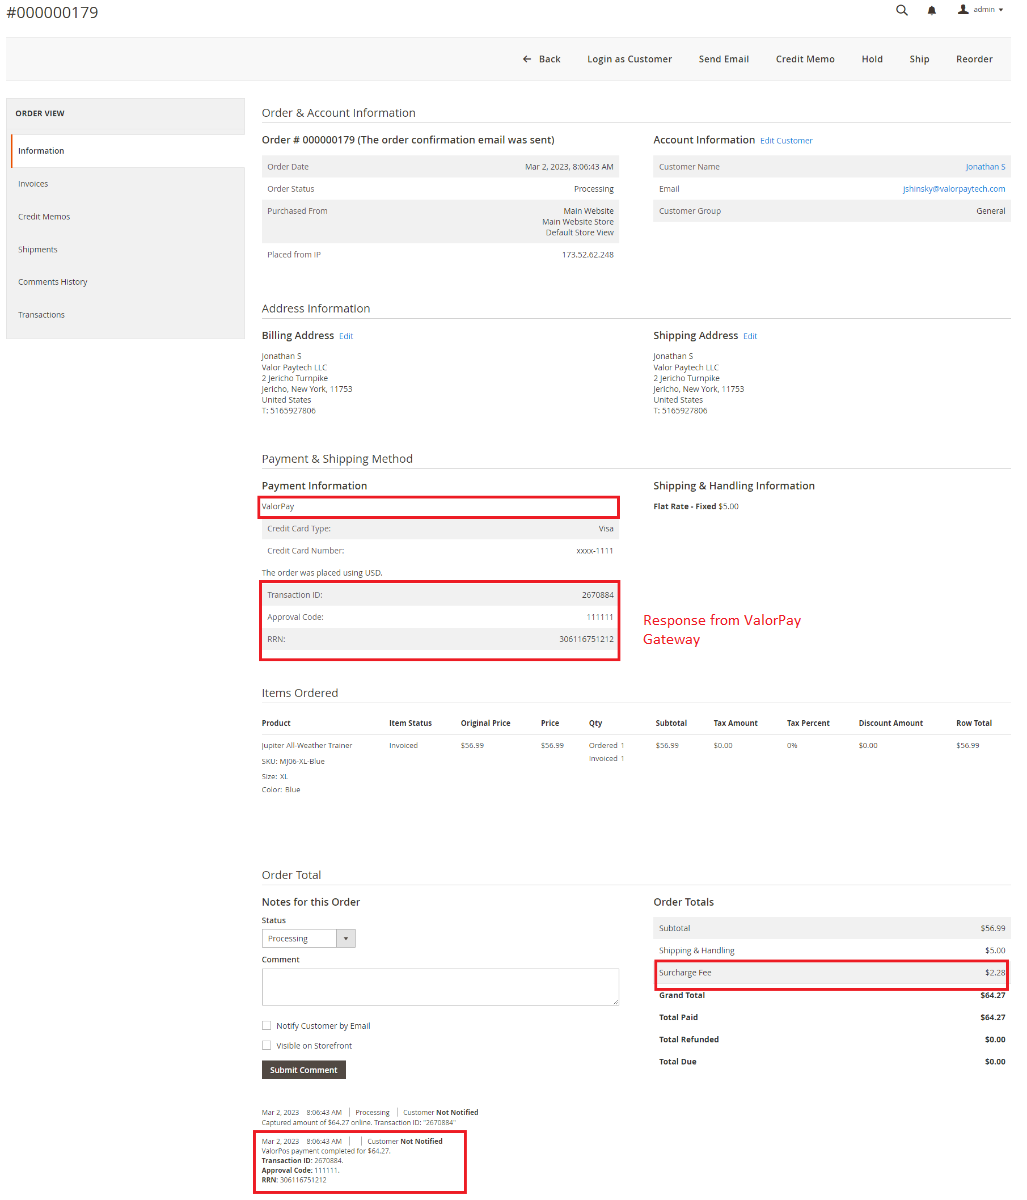
Valor Payment Details in Order View - Backend
Apart from the customers My Account section, the admin can see Valor payment details from: Sales -> Orders -> Click View in the Action column
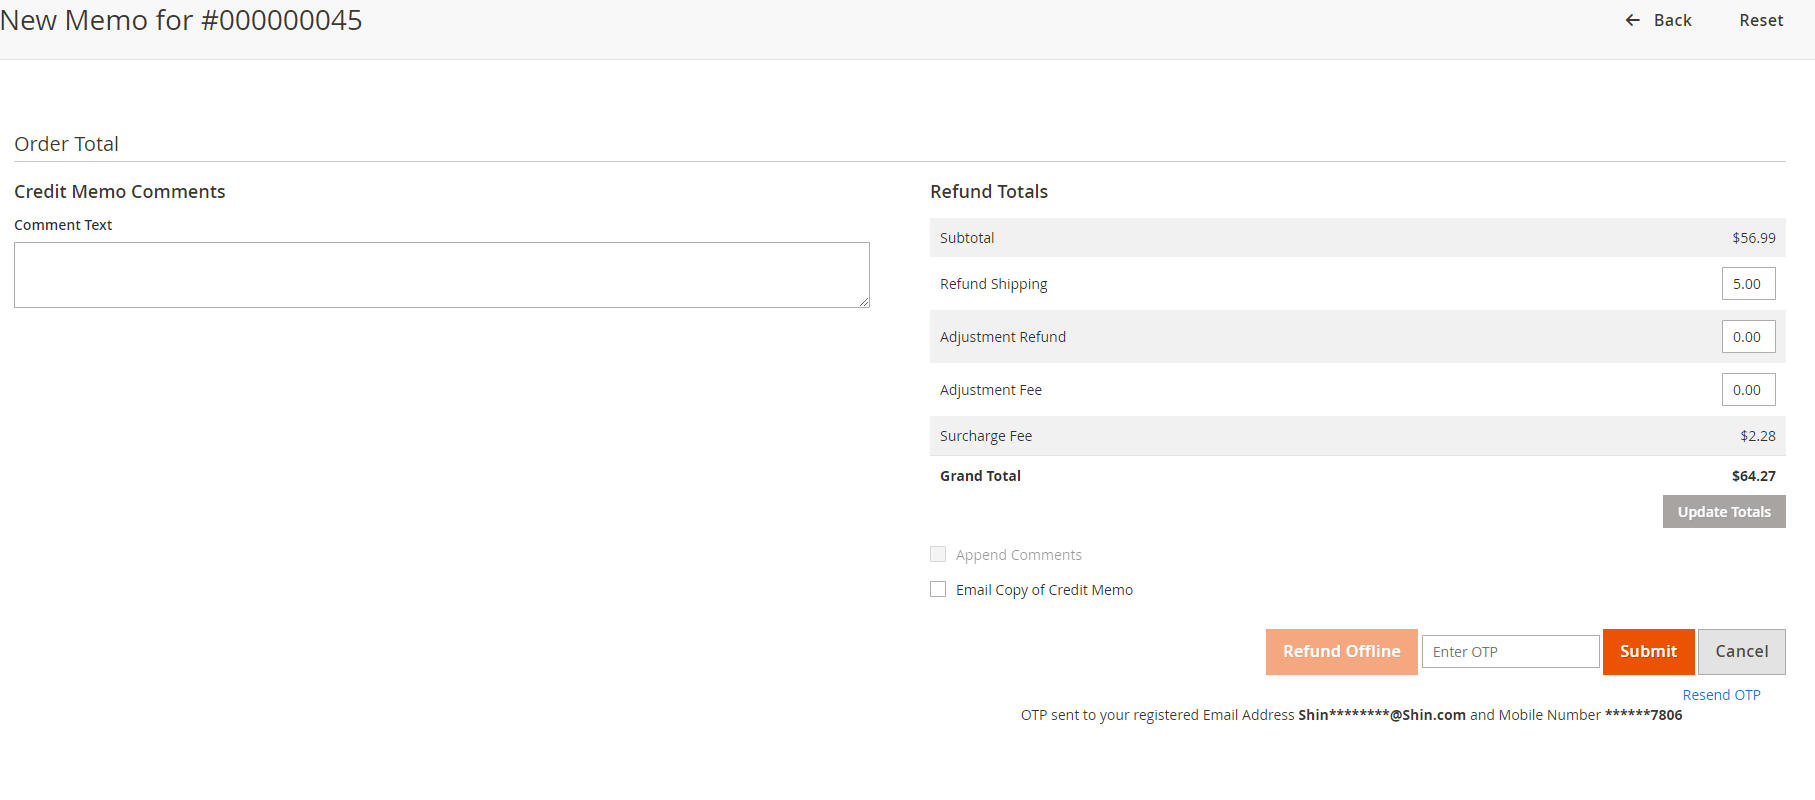
Valor Payment Method for Refund Order
For Refund Order, the admin has two options: Refund offline or Refund. To refund order via ValorPay Gateway, you need to click the Refund button. It will send an OTP to the admin's email and mobile number as mentioned in ValorPay Merchant Panel. Enter the OTP and the refund request will be processed at ValorPay Gateway and the response will be sent to store.
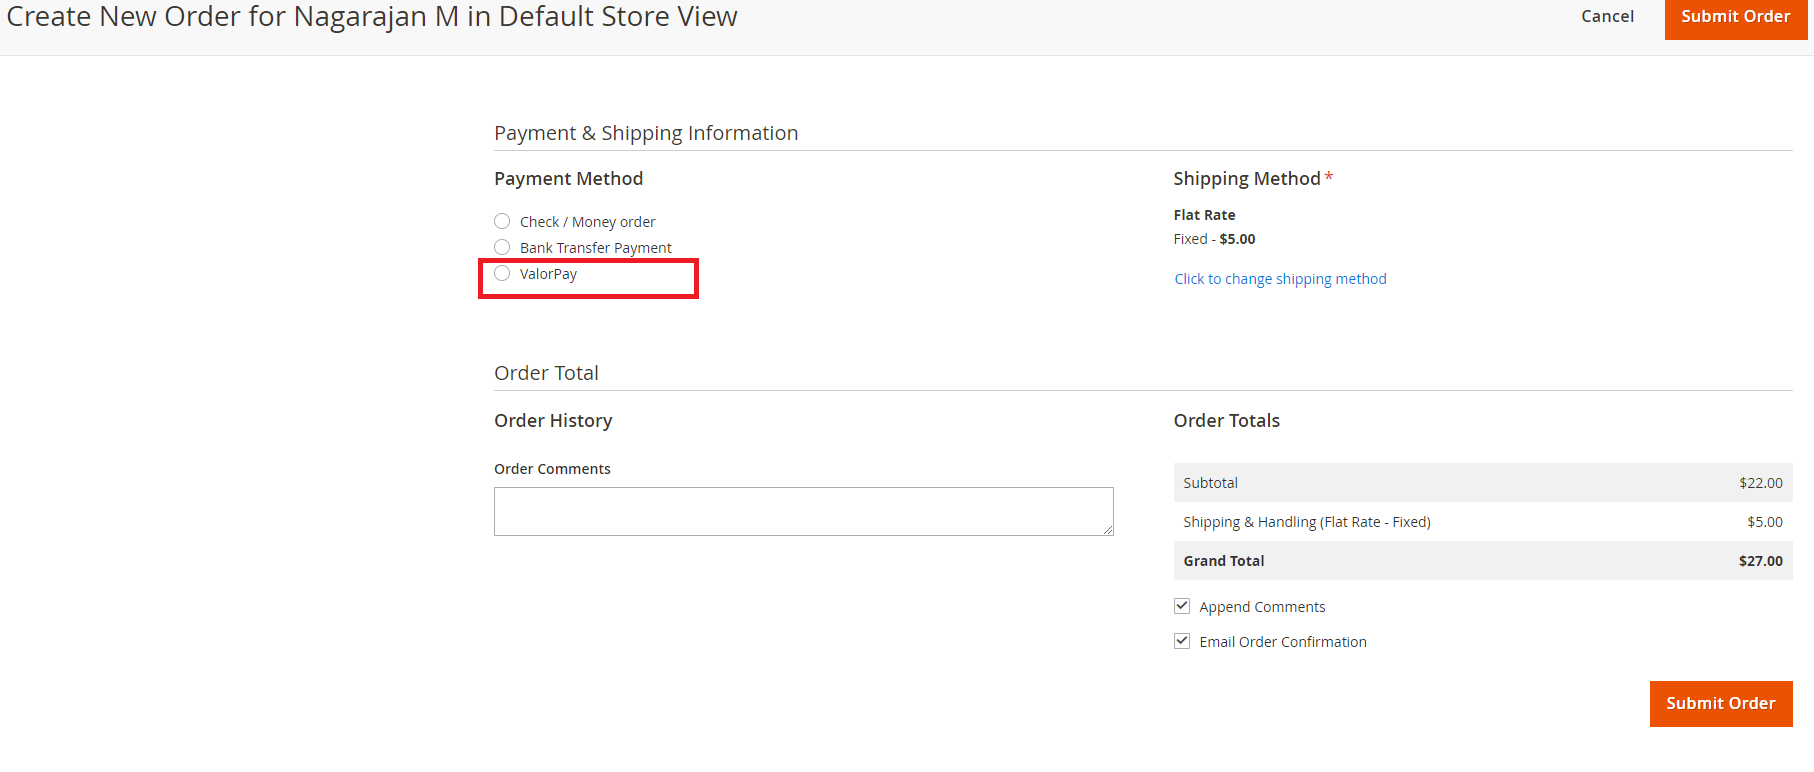
Valor Payment Method for Backend Order
Just as the frontend, Valor method also works with the backend orders. Admin needs to create a New Order, select the Customer, add Products, enter the Address Details, and select ValorPay payment method, add Card Details, and click Submit Order to place order from the backend.
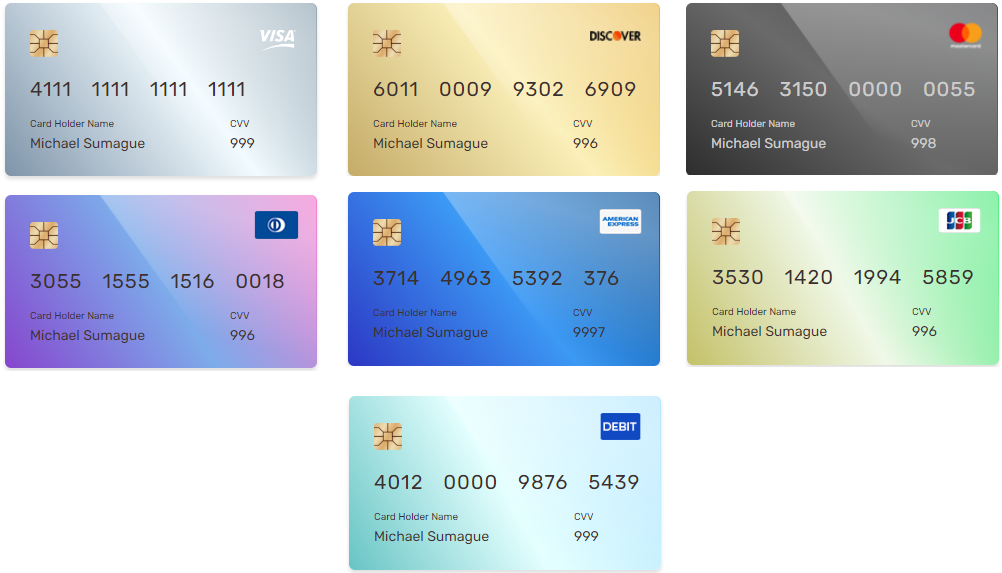
Test Cards
Address - 8320
Zip - 85284