BigCommerce
BigCommerce is a ecommerce platform that provides software as a service services to retailers. A payment gateway is a merchant service provided by an ecommerce application service provider that authorizes credit card or direct payment processing.
Generating API Keys
Objective
To perform any request on Valor virtual terminal, one should have the following credentials:
API ID (APP ID)
- API ID represents the merchant API; A merchant can create an API ID using the Valor portal
API KEY
- API KEY represents the EPI of the merchant, technically a merchant can have only one API ID but based on the count of the API KEY, a merchant can have several API KEYS
- Merchant can create their own API KEY using the Valor portal
EPI
- Basically EPI is an end point identifier, Identify the device on valor infrastructure, any devices including virtual terminal will be identified as an EPI, typically it's a 10 digit number starts with 2
STEPS TO CREATE API ID AND API KEY
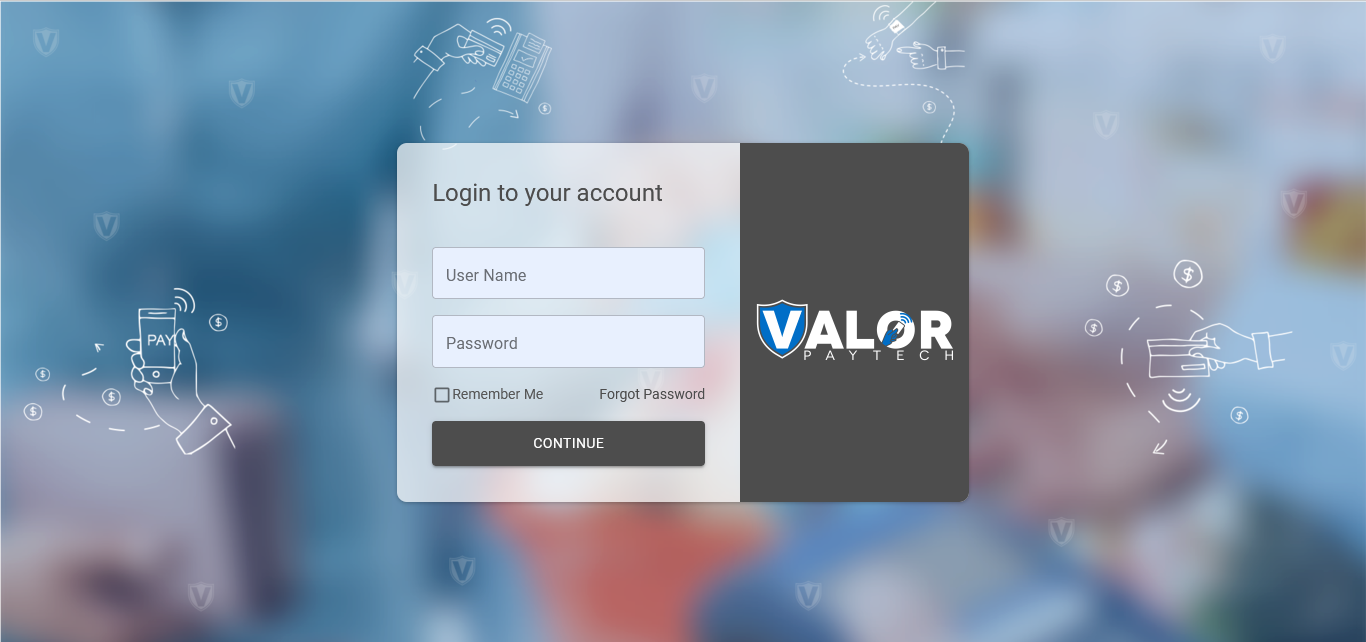
STEP 1 - Log Into The Valor Portal
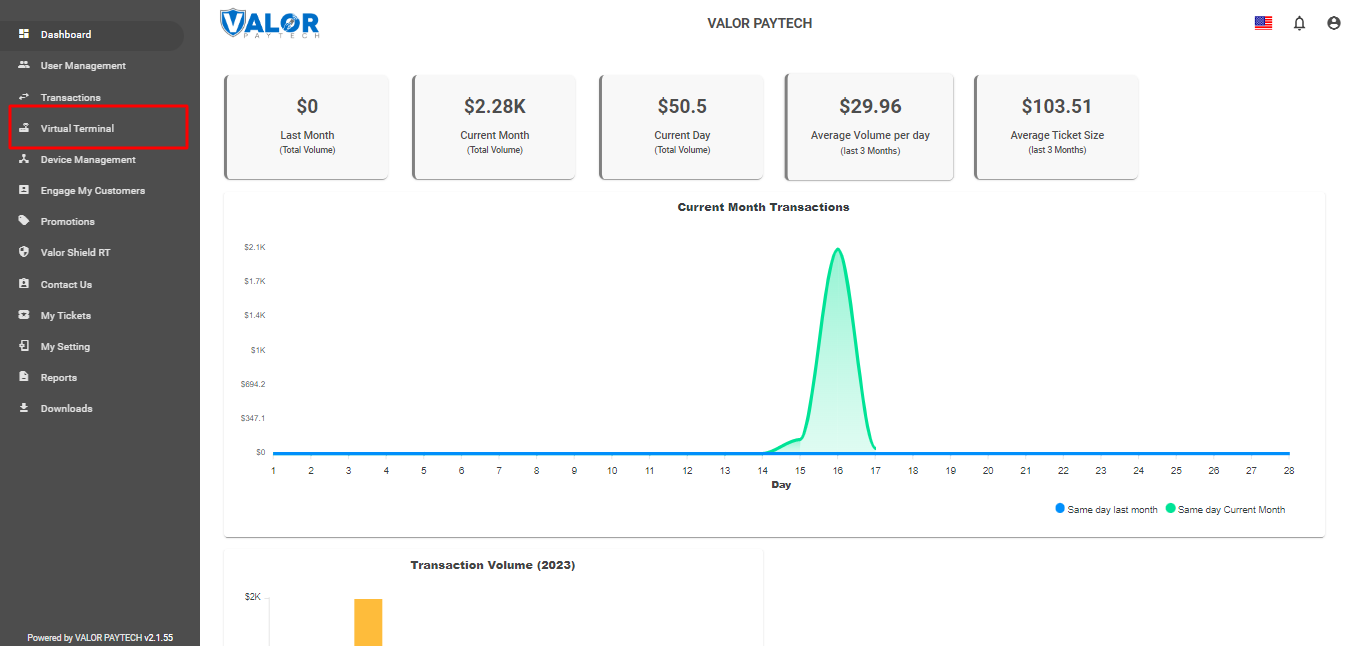
STEP 2 - Click Virtual Terminal in menu
STEP 3 - Click Manage Button
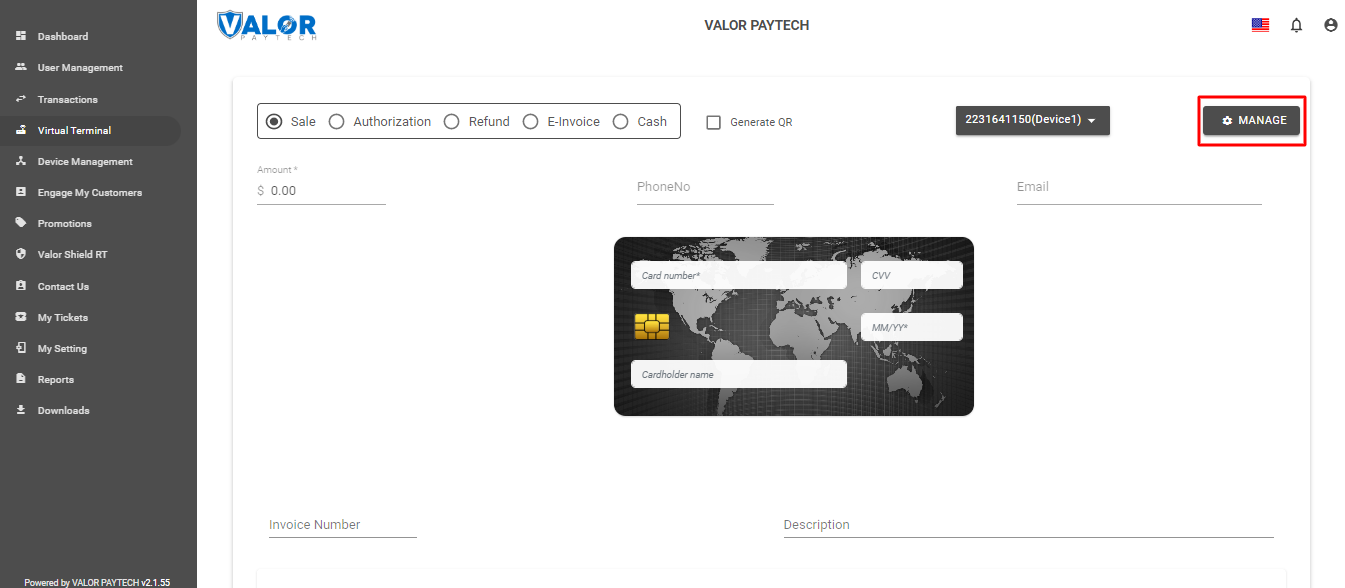
STEP 4 - Select API KEYS Tab
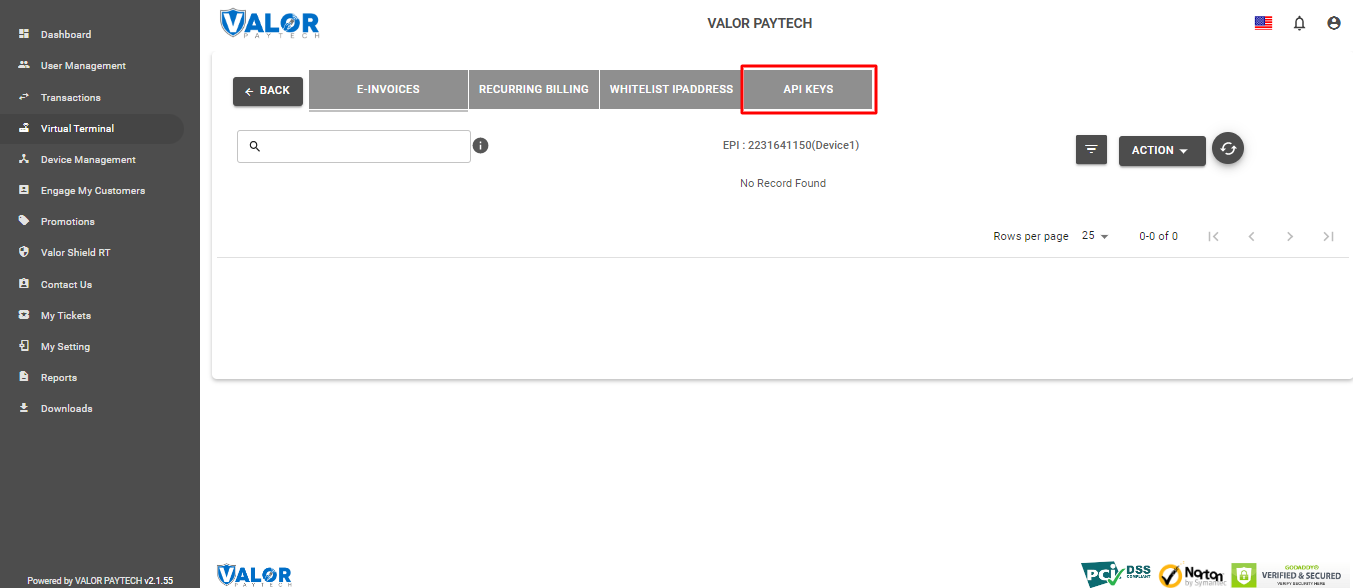
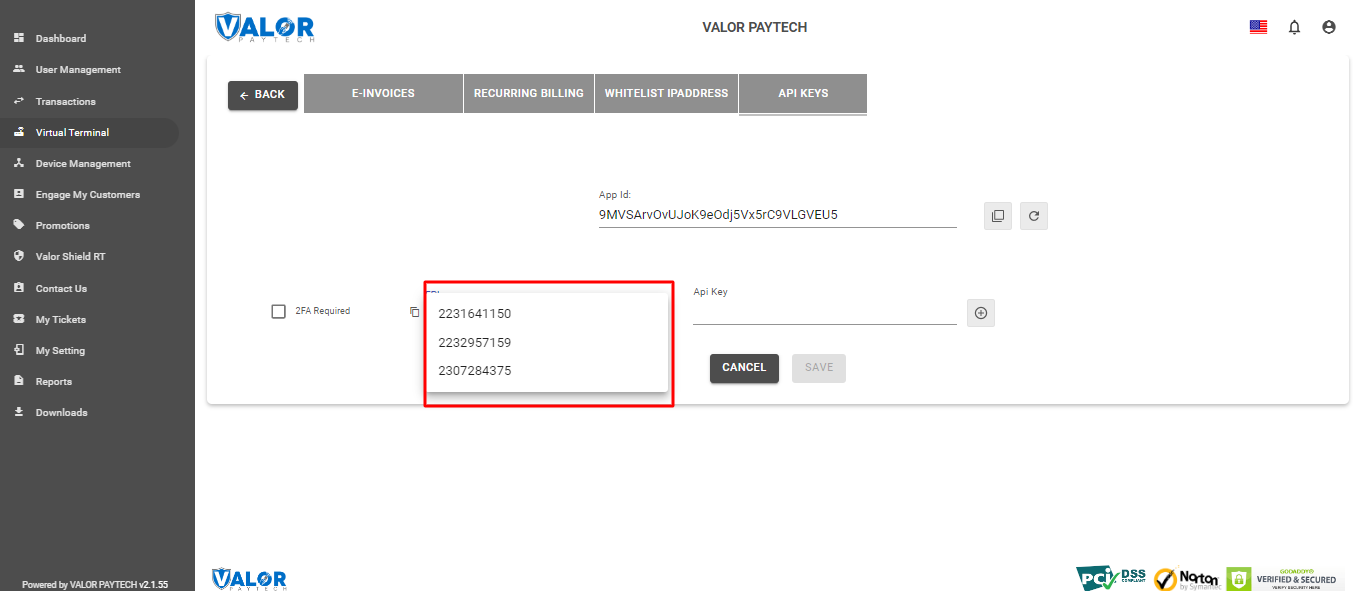
STEP 5 - Here you need to select the EPI to generate API Key.
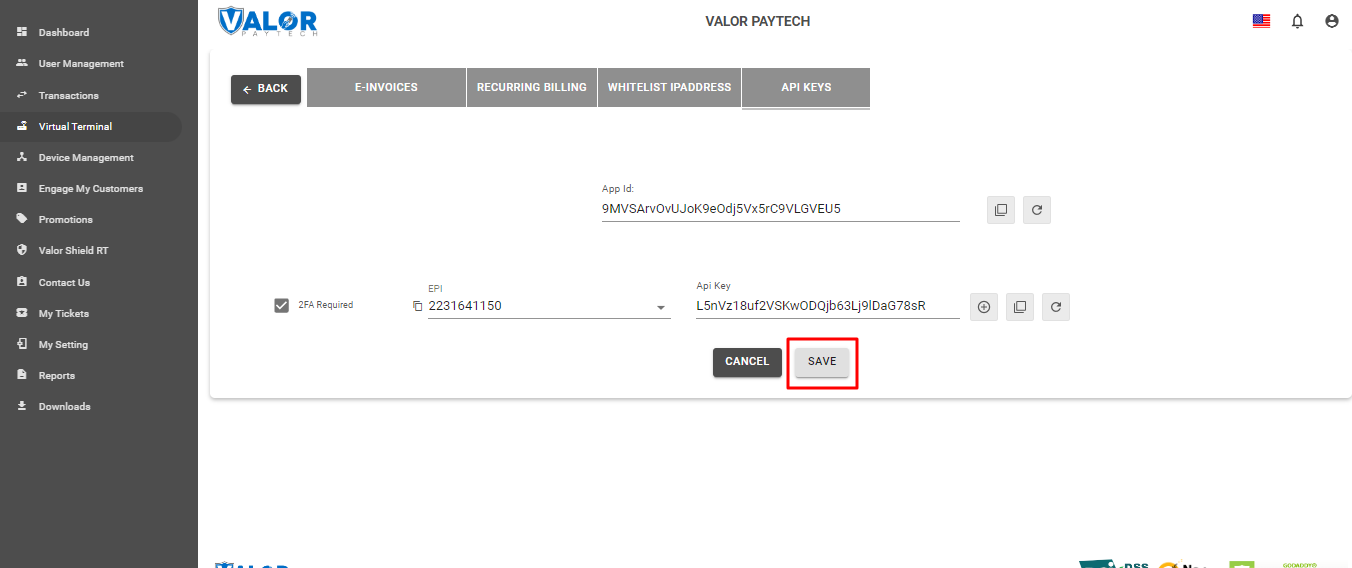
STEP 6 - Press Save after generating API Key.
Once you installed magento extension use this credentials in the payment gateway configuration.
Application Instalation
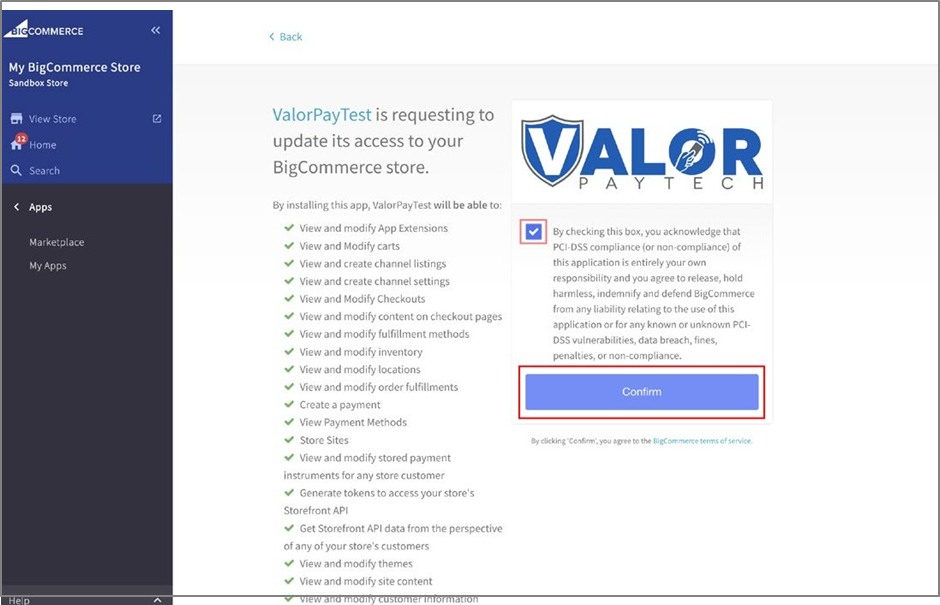
- Go to BigCommerce admin panel, click on Apps -> Marketplace -> Search for ValorPay. To install the ValorPay application. Click on the App and select the Install button to install the app.
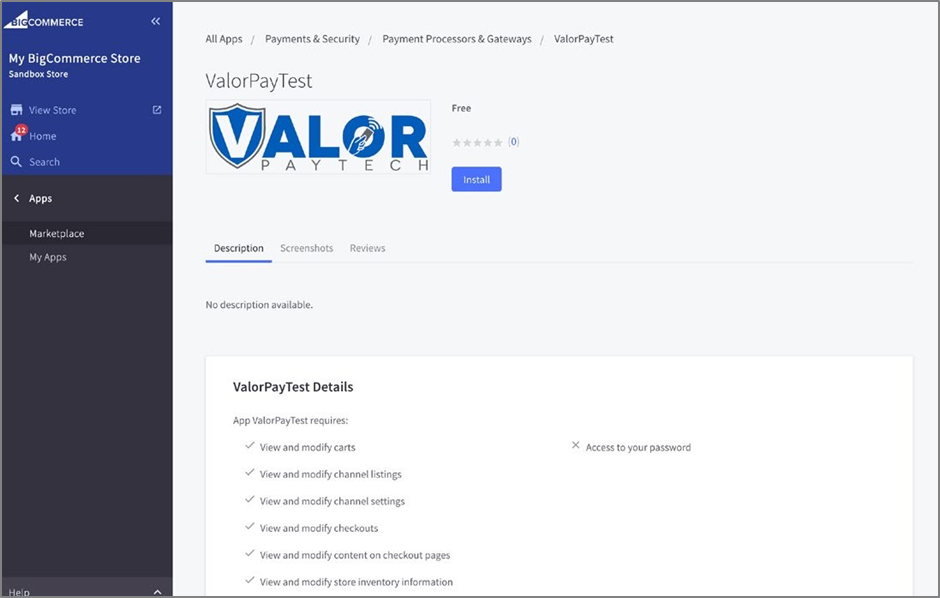
- Check and Confirm the permissions.
- Create New Merchant: If you are interested in using the ValorPay payment gateway to grow your business, click on Create New Merchant and you will be redirected to the ValorPay’s website. Fill in the details and our sales team will contact you at the earliest.
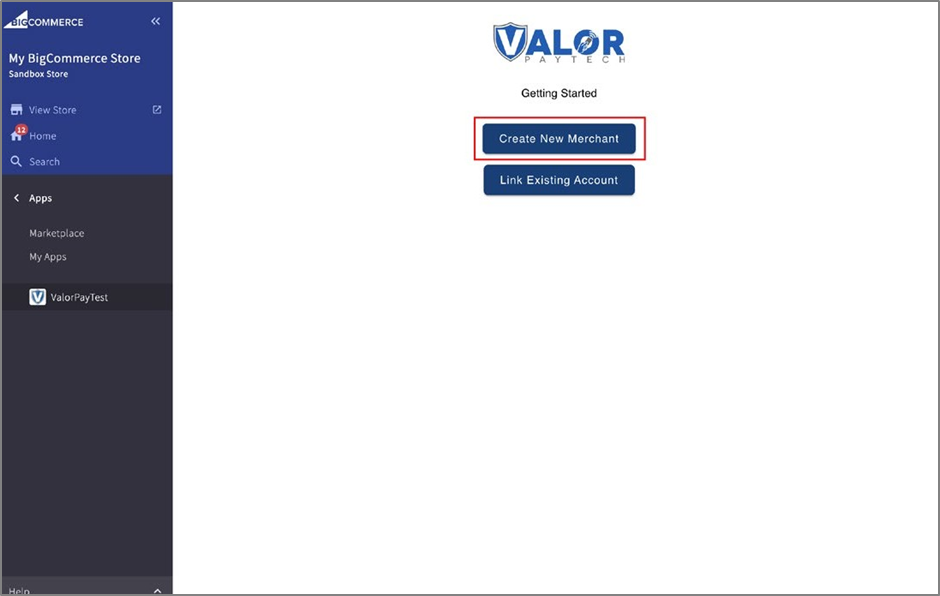
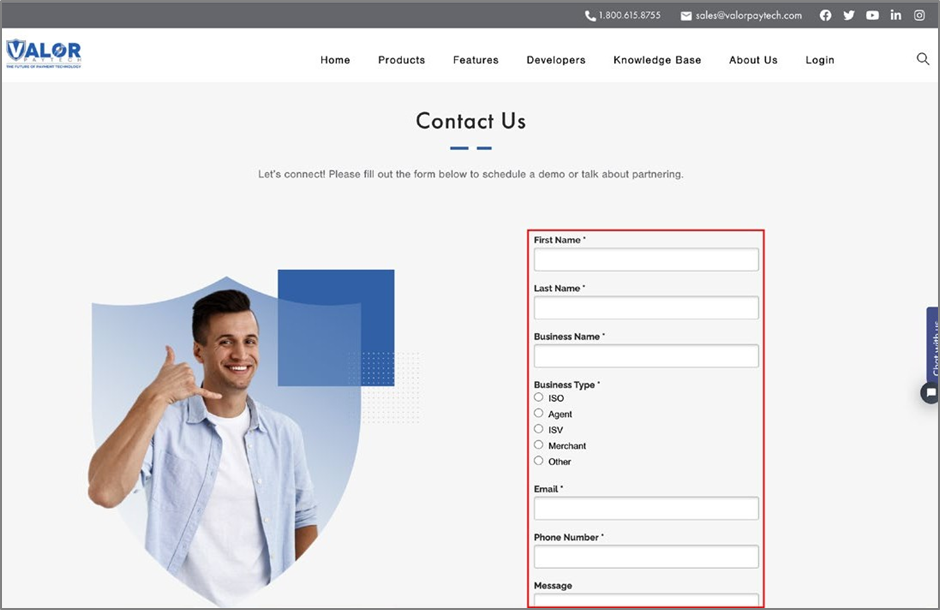
You can also call, email, or schedule a meeting to seek assistance for the onboarding process from the same page.
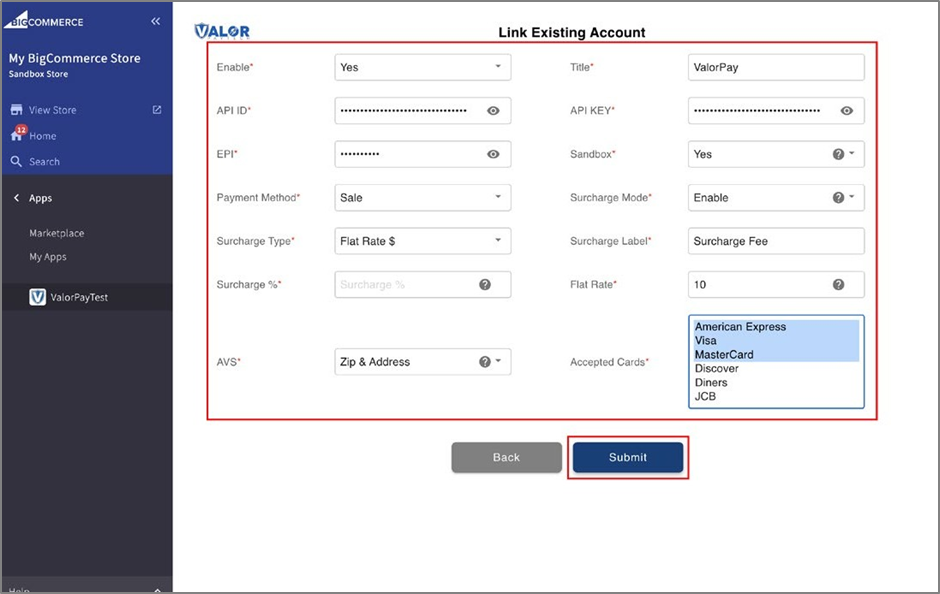
- Link Existing Merchant: If you are an existing merchant onboard the ValorPay gateway platform, click on Link Existing Merchant. Fill in the details and click on Submit. For more information on how to locate your keys and description of other fields, please see the user guide.
You will see the success dialogue box if your information is validated. Your app is now linked to your ValorPay merchant account. See below.
- After successfully linking your account, you will see the dashboard. If you wish to change settings, click on Change Settings and Save the changes.

- To see the description of items, please check the following section, and to explore the features of the app, and a step-by-step guide to create refund orders, please see Part II of the document.
Configuration
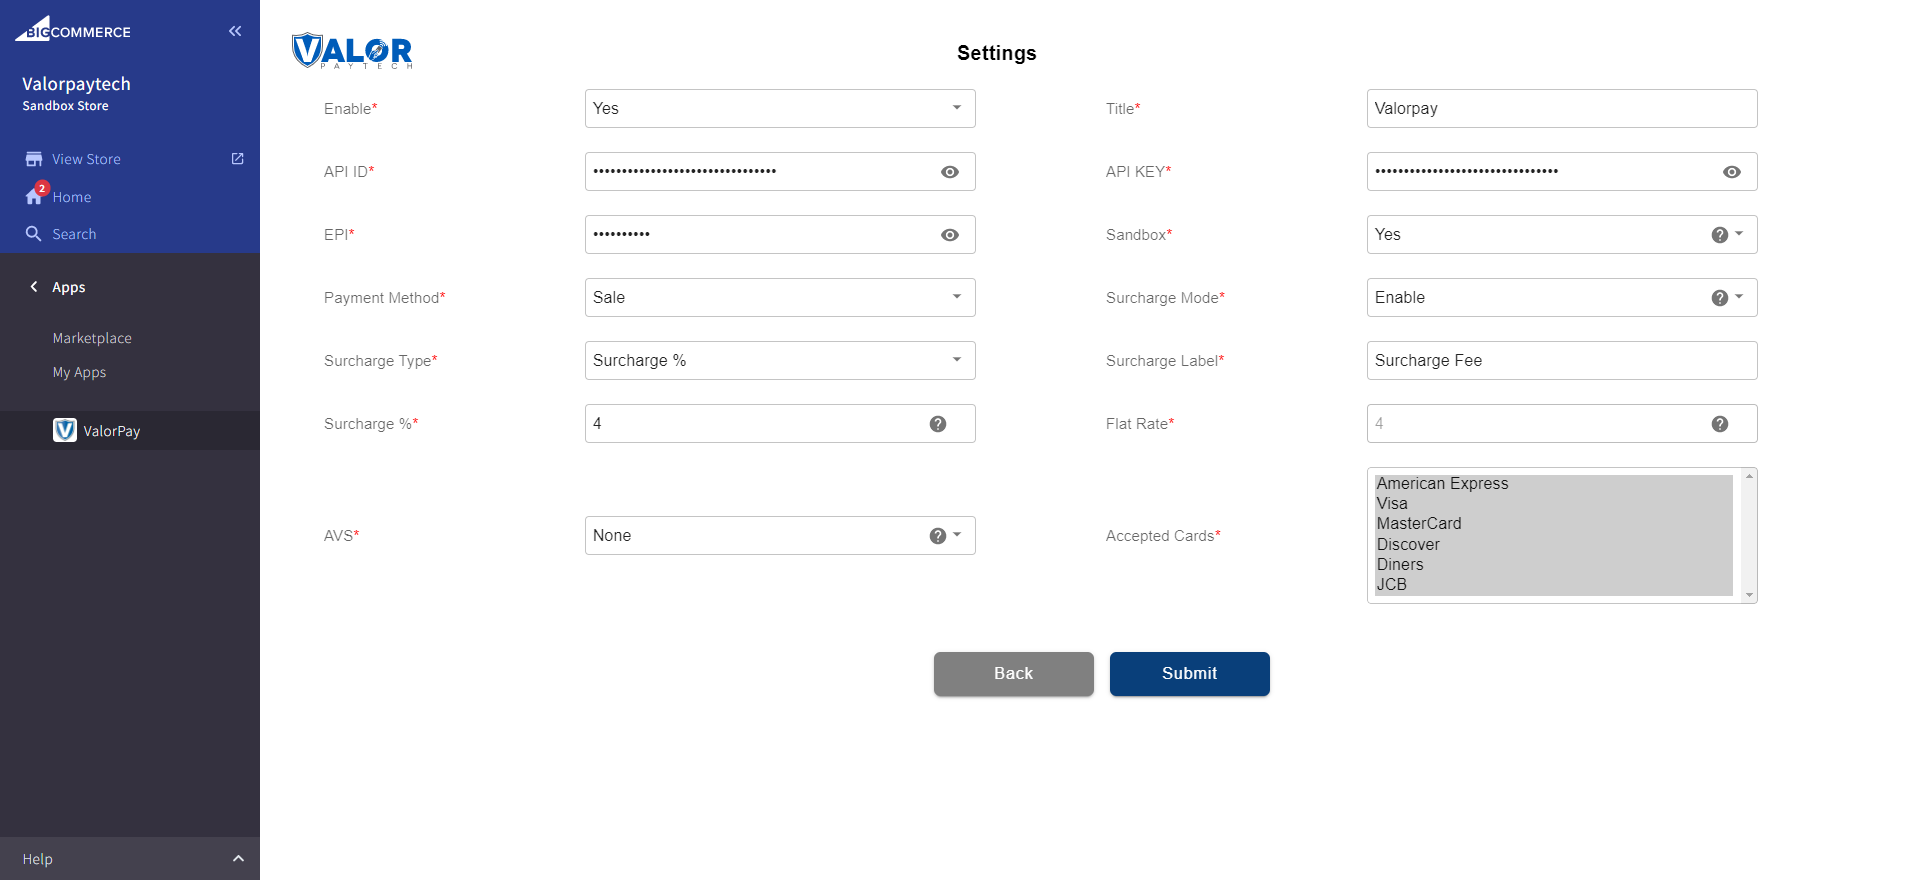
To configure the application, login to BigCommerce, move to - Home -> Apps -> My Apps -> ValorPay, where you can find various settings to configure the extension.
- Enable ValorPay: Enable or Disable ValorPay Payment Gateway for your BigCommerce store.
- Title: Enter Title for the ValorPay payment method to be shown in the frontend.
- Use Sandbox: Set No if Production Keys are set or Set Yes if Sandbox Keys are set then Live payments will not be taken.
- APP ID, API KEY & EPI: Set Production Valor API keys or If Sandbox Yes, then Sandbox API keys.
Read here Generating API KEYS (E-Commerce) | Valor PayTech
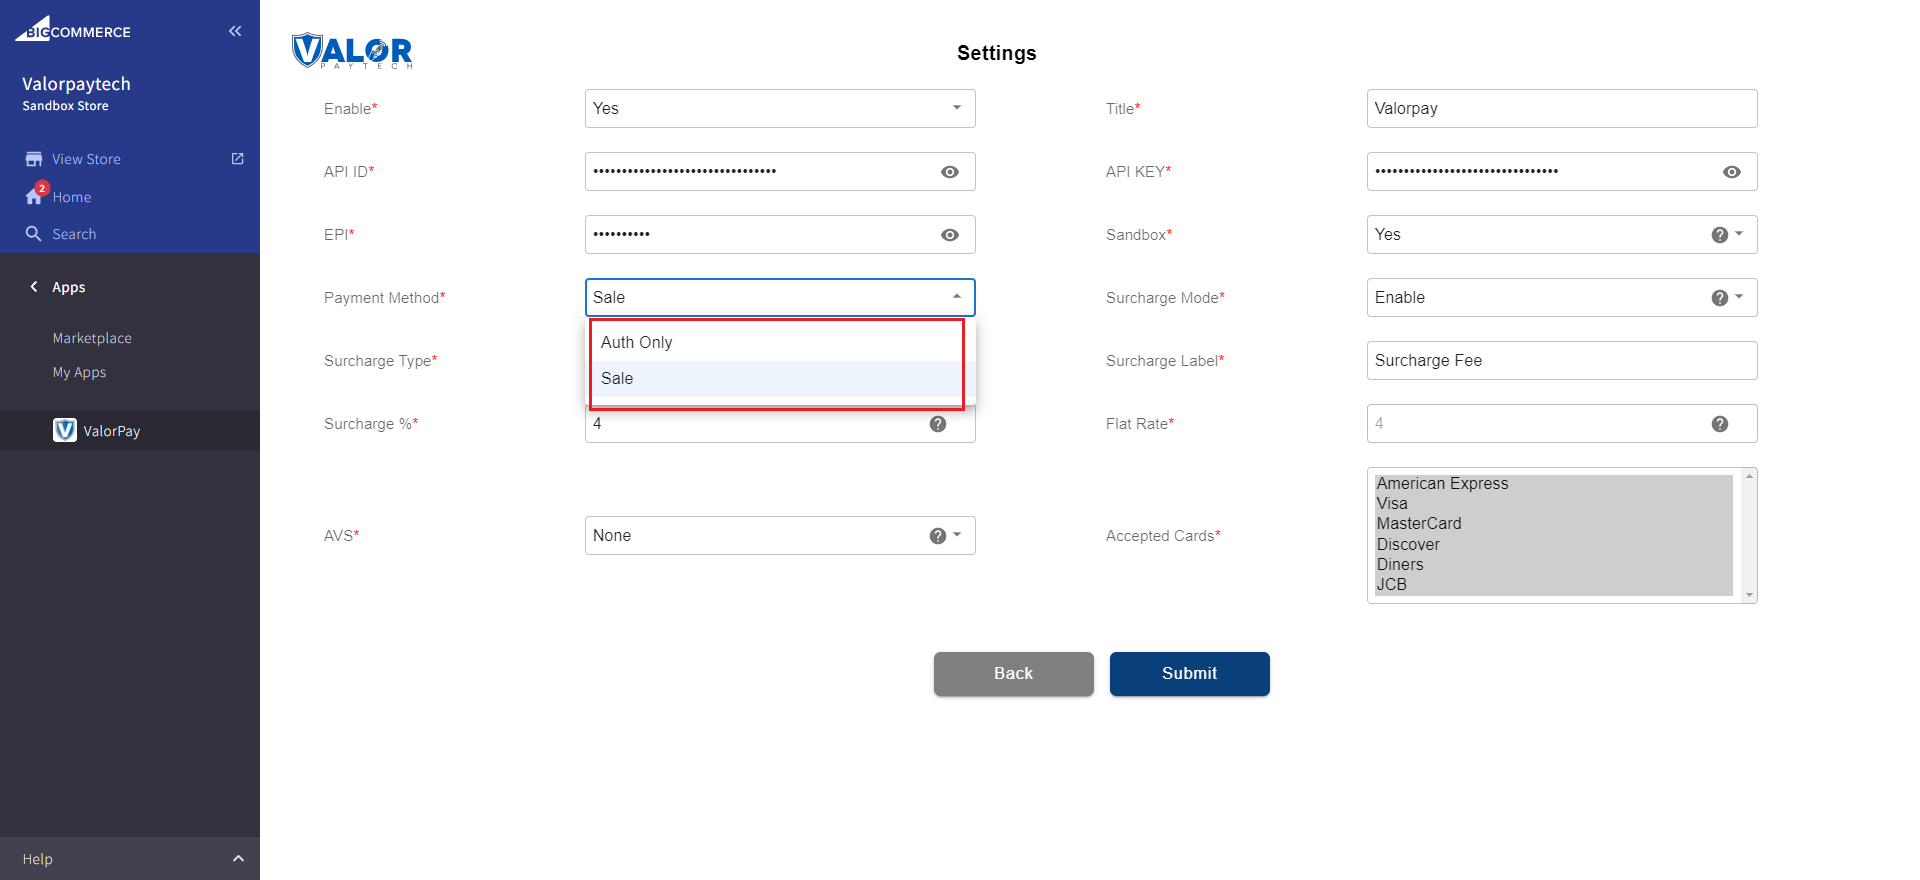
- Payment Method: Select one of the payment methods for the payment capture.
- Sale: Authorizes and captures the order amount immediately.
- Auth Only: Authorizes and validates card for the order amount. The admin needs to manually capture the amount (by generating invoice using “Capture Online” option) within the authorization hold period.
- Surcharge Mode: Set Yes if you want all transactions on surcharge mode. Merchant must have a Surcharge MID for it to function.
- Surcharge Label
- Set Surcharge Type - Surcharge % or Flat Rate $
- Surcharge% - Percentage will apply only on enabling surcharge Indicator to true and Surcharge type is set to Surcharge %.
- Flat Rate $ - Flat rate will apply only on if Enable surcharge mode is true and Surcharge type is set to Flat Rate $
- AVS - The address verification service will add a text field to the checkout page based on the selected option.
- Accepted Cards: Select the card types to be accepted for payments from customers.
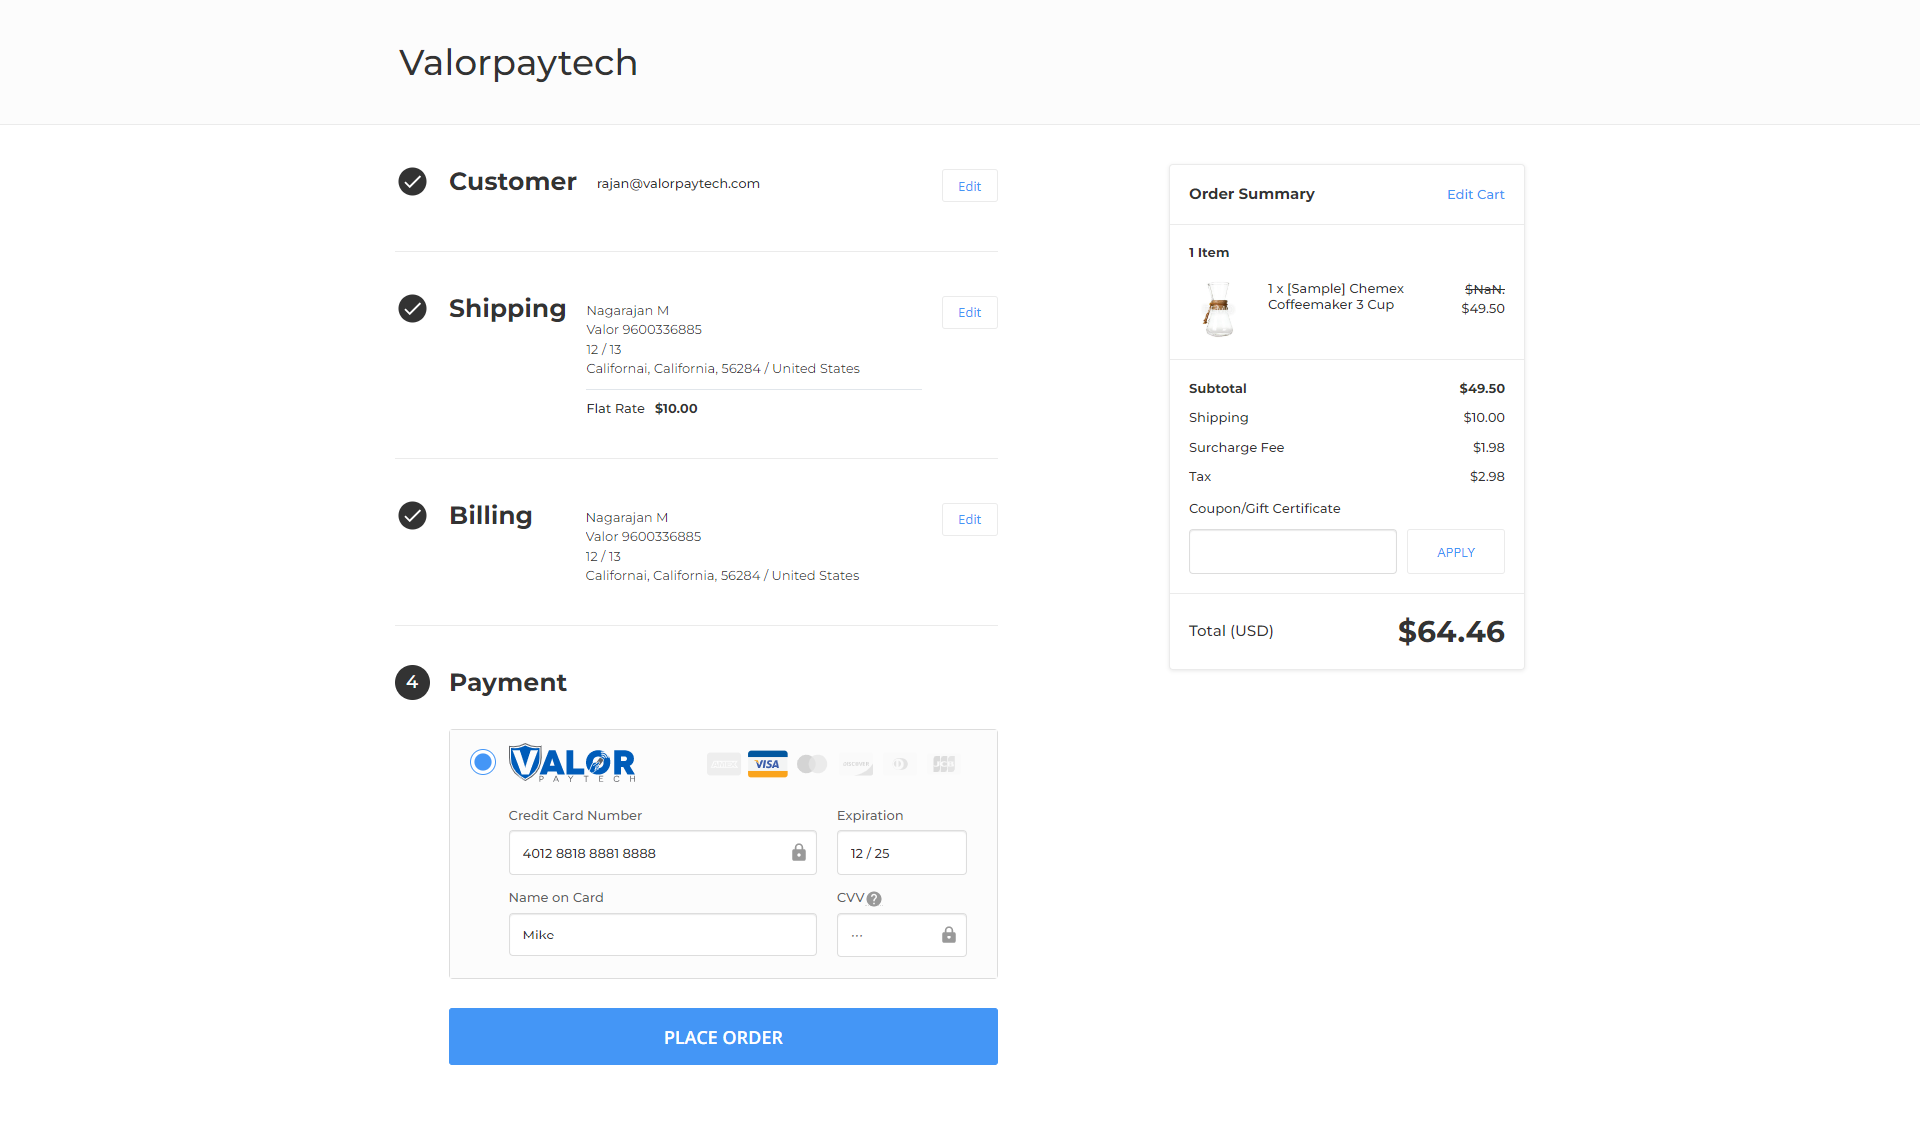
ValorPay Payment Method - Frontend
This is an example of how a customer will see the ValorPay payment method on your store after you have enabled it. They will experience a quick and secure checkout with their items.
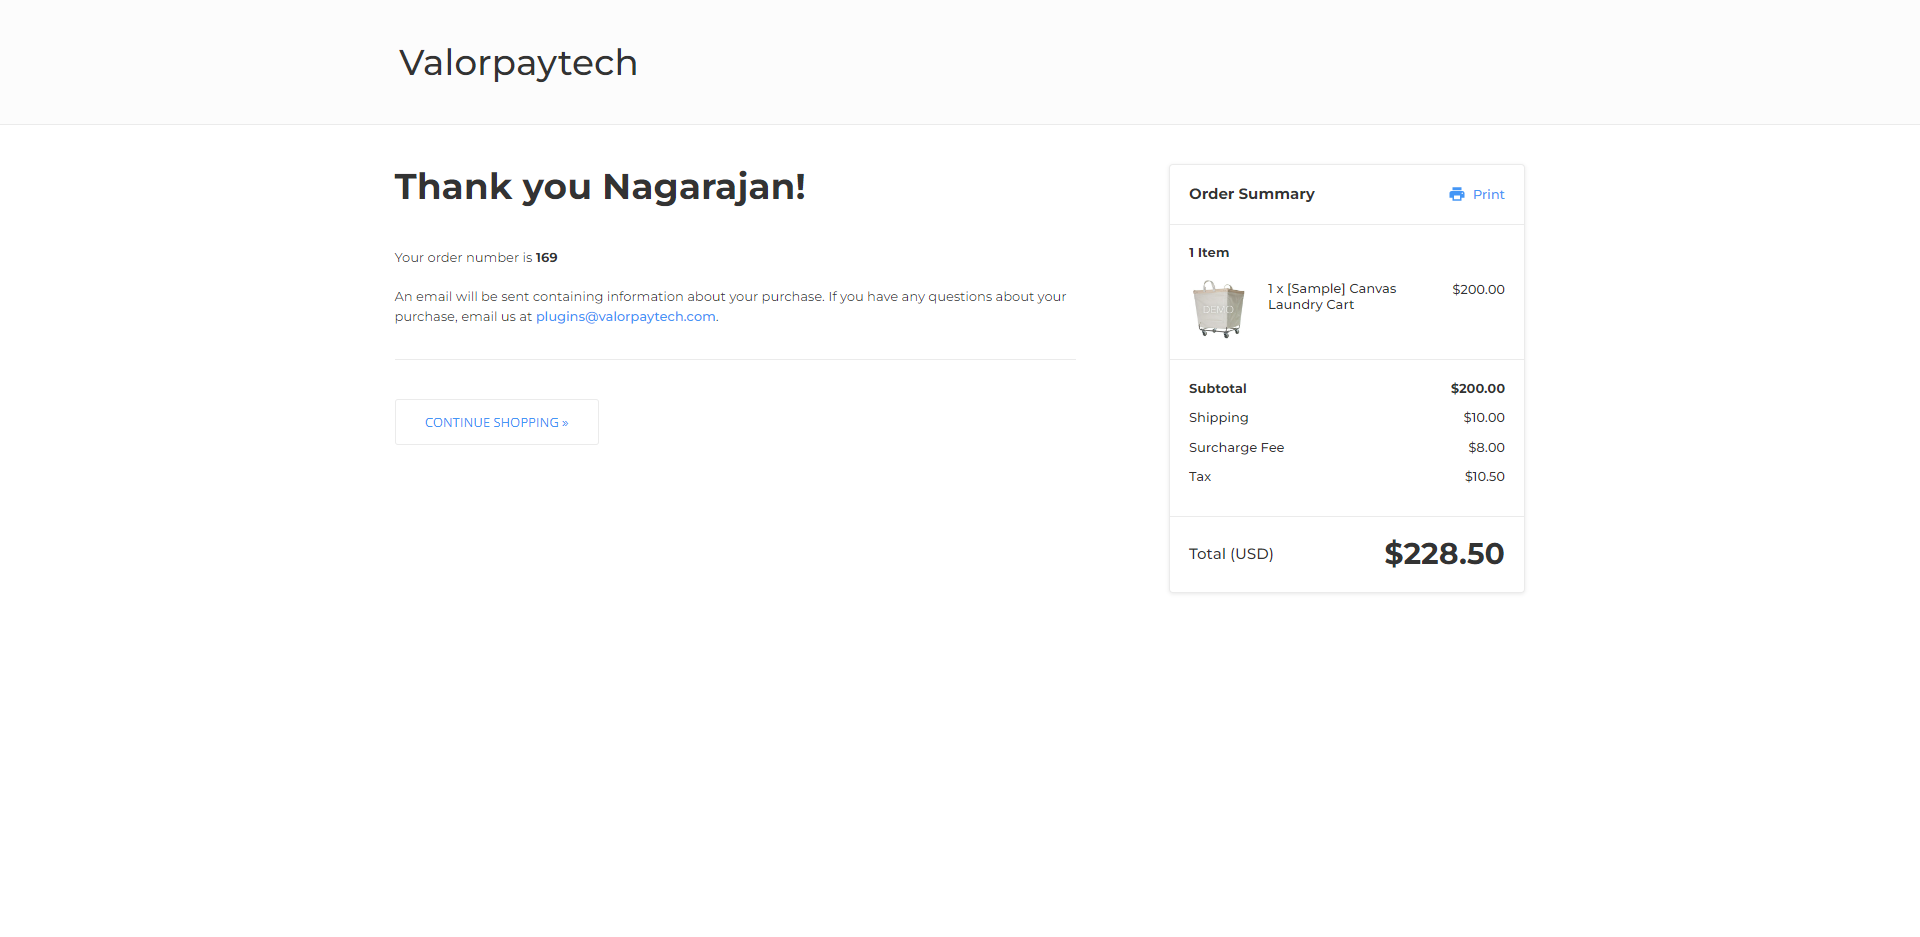
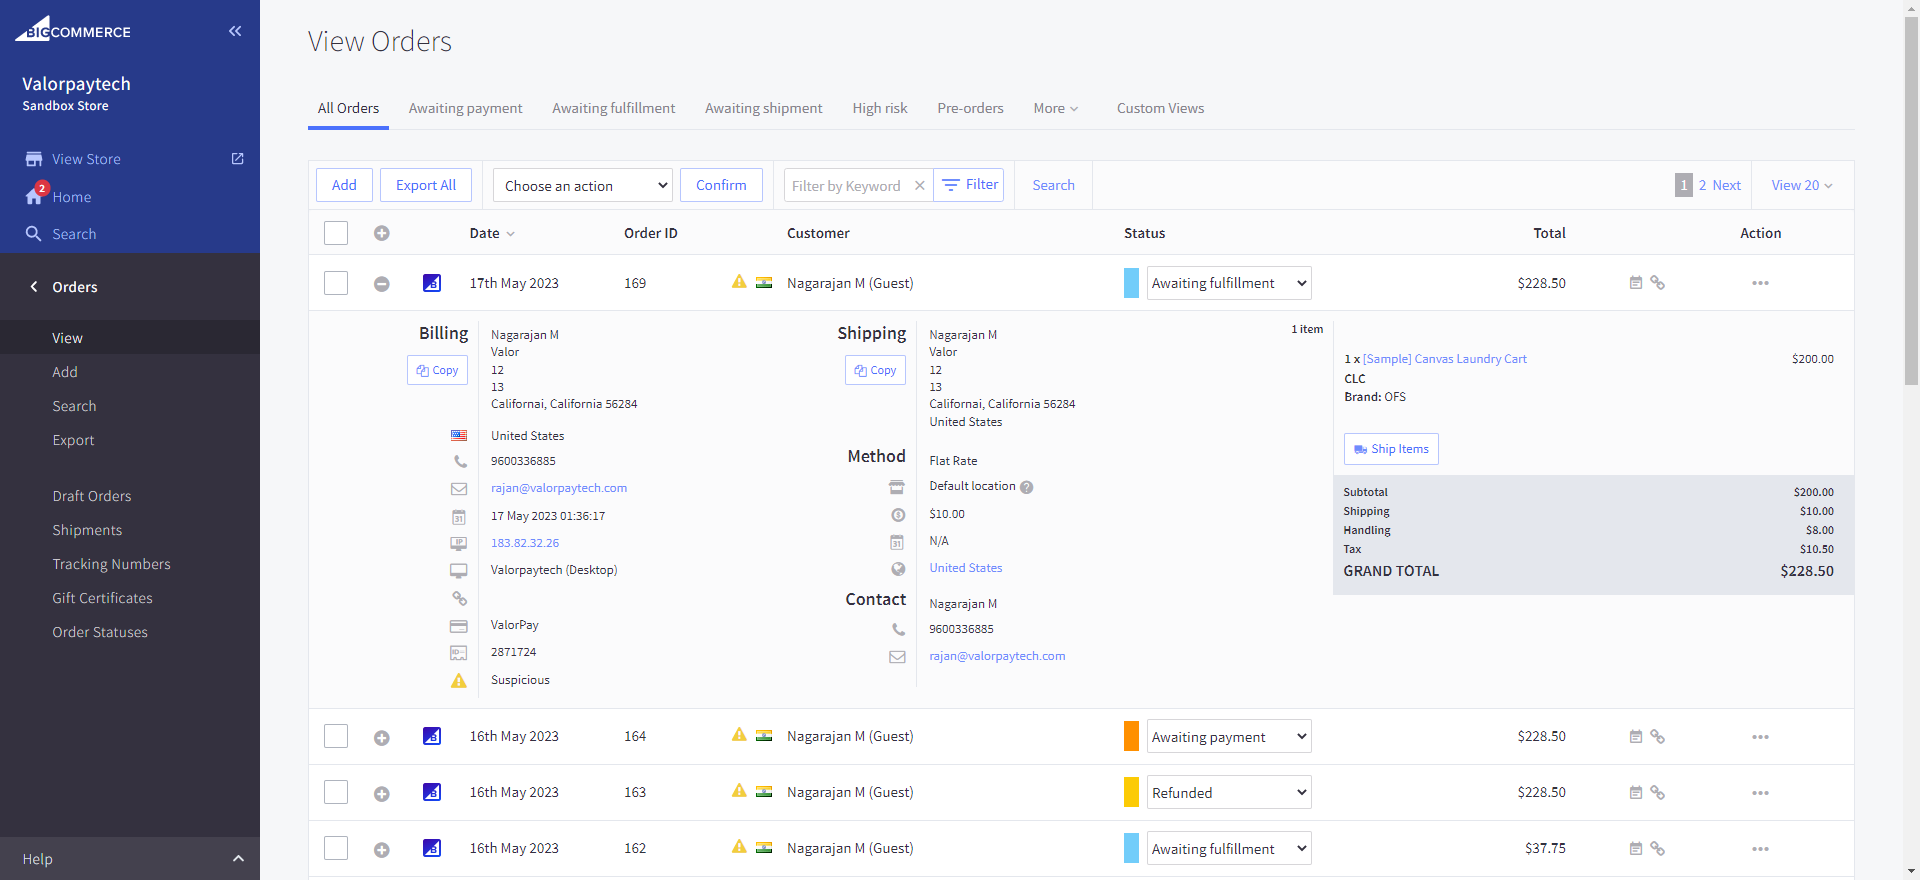
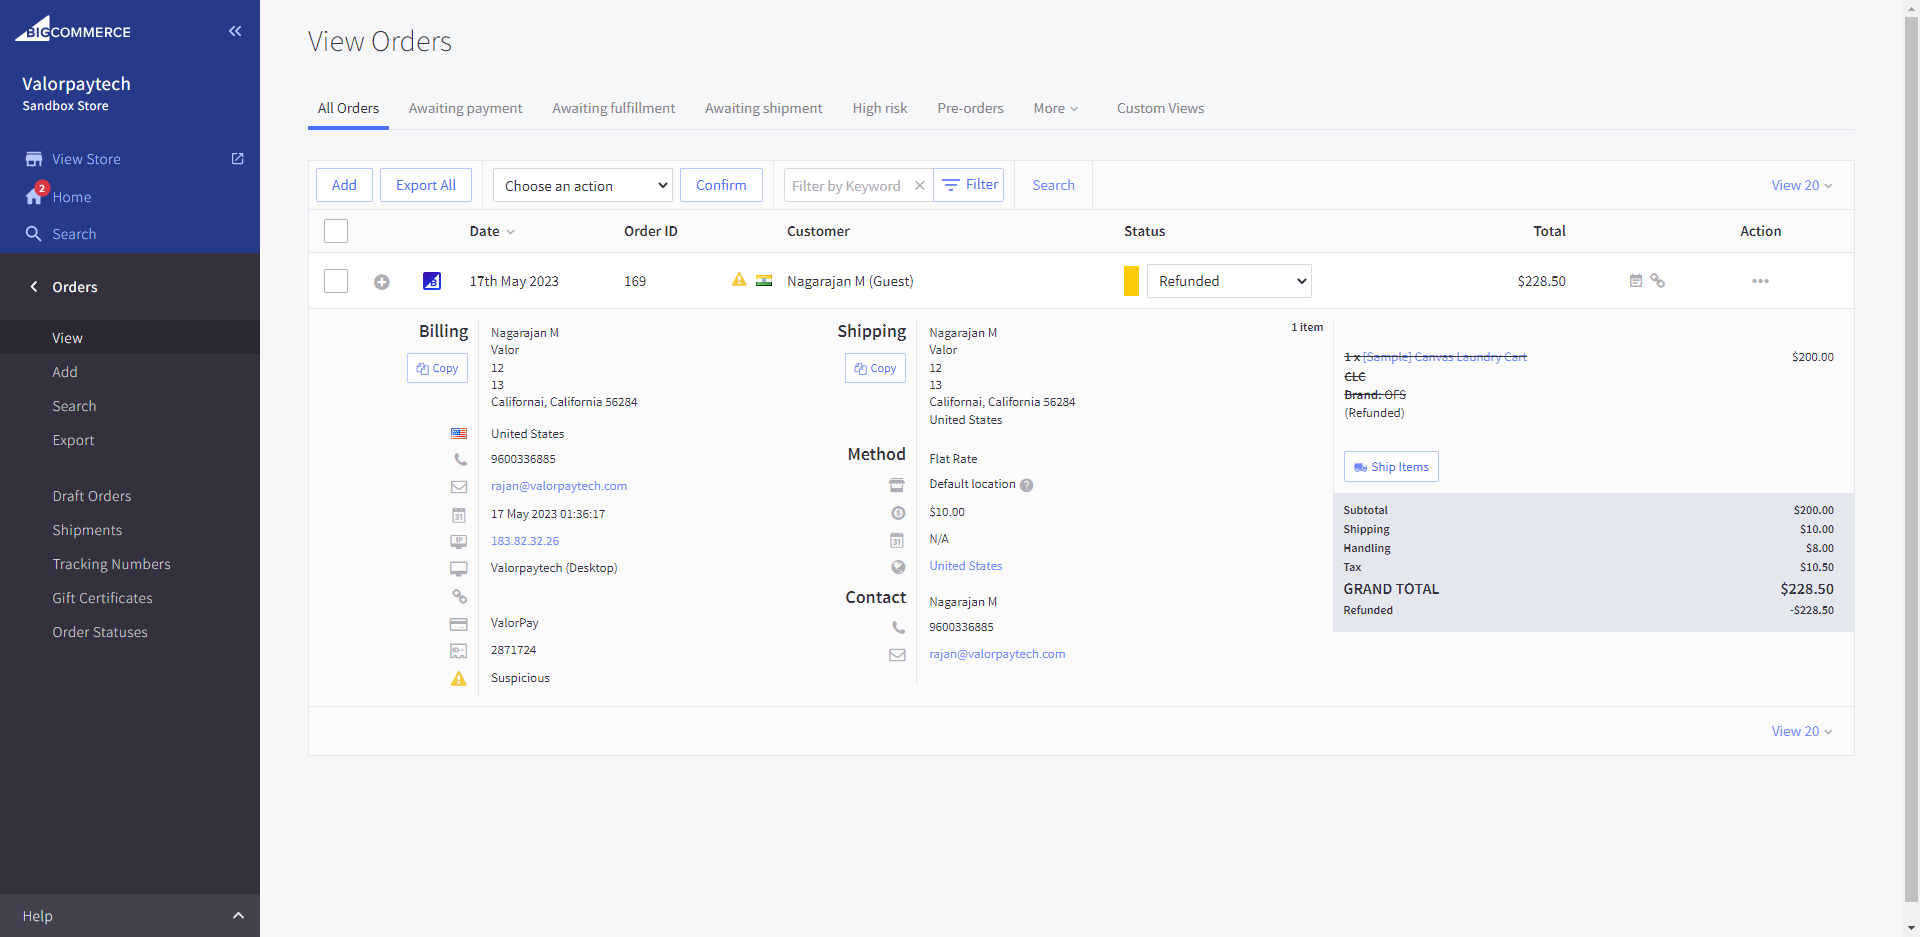
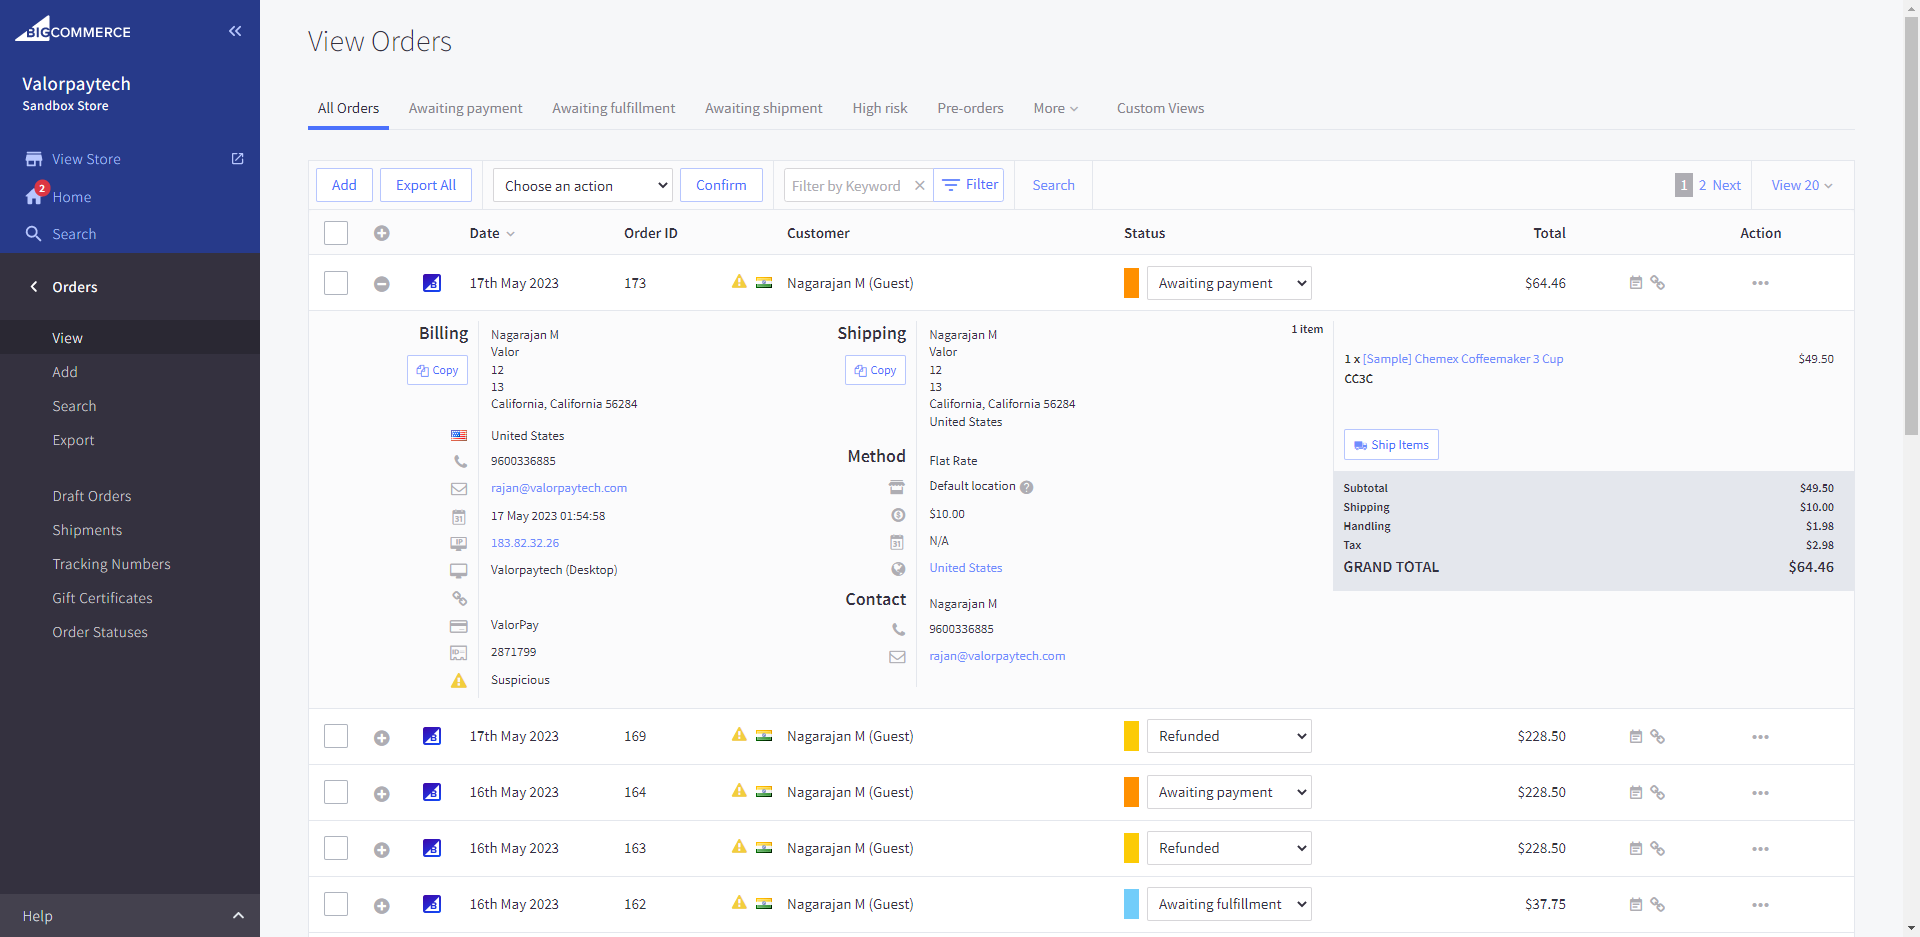
Once the order is placed, the order details can be seen in Home -> Orders -> View (Click on the ‘+’ button to expand the order details.)
Creating Refund Orders on the BigCommerce Order Panel
An order can be marked for refund following which it will appear on the Refund Order page of the ValorPay application. Admin can pay for refund orders using ValorPay payment gateway from the application.
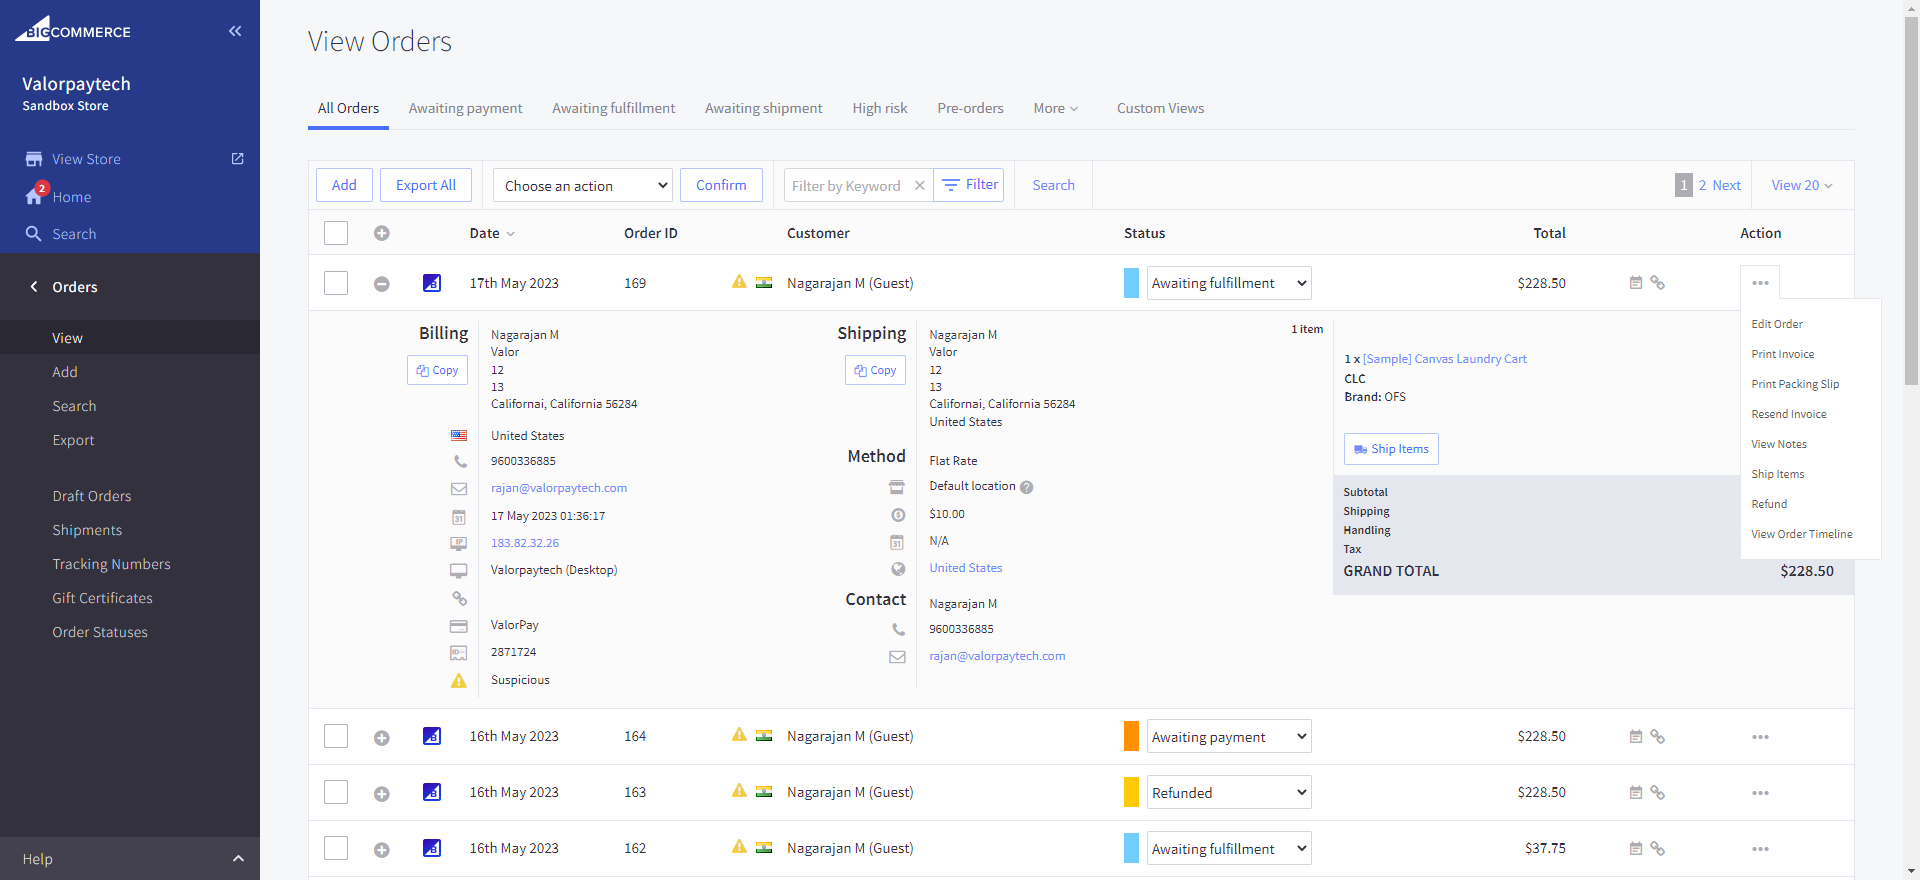
Go to Home -> Orders -> View -> Click on the Action button -> Select Refund
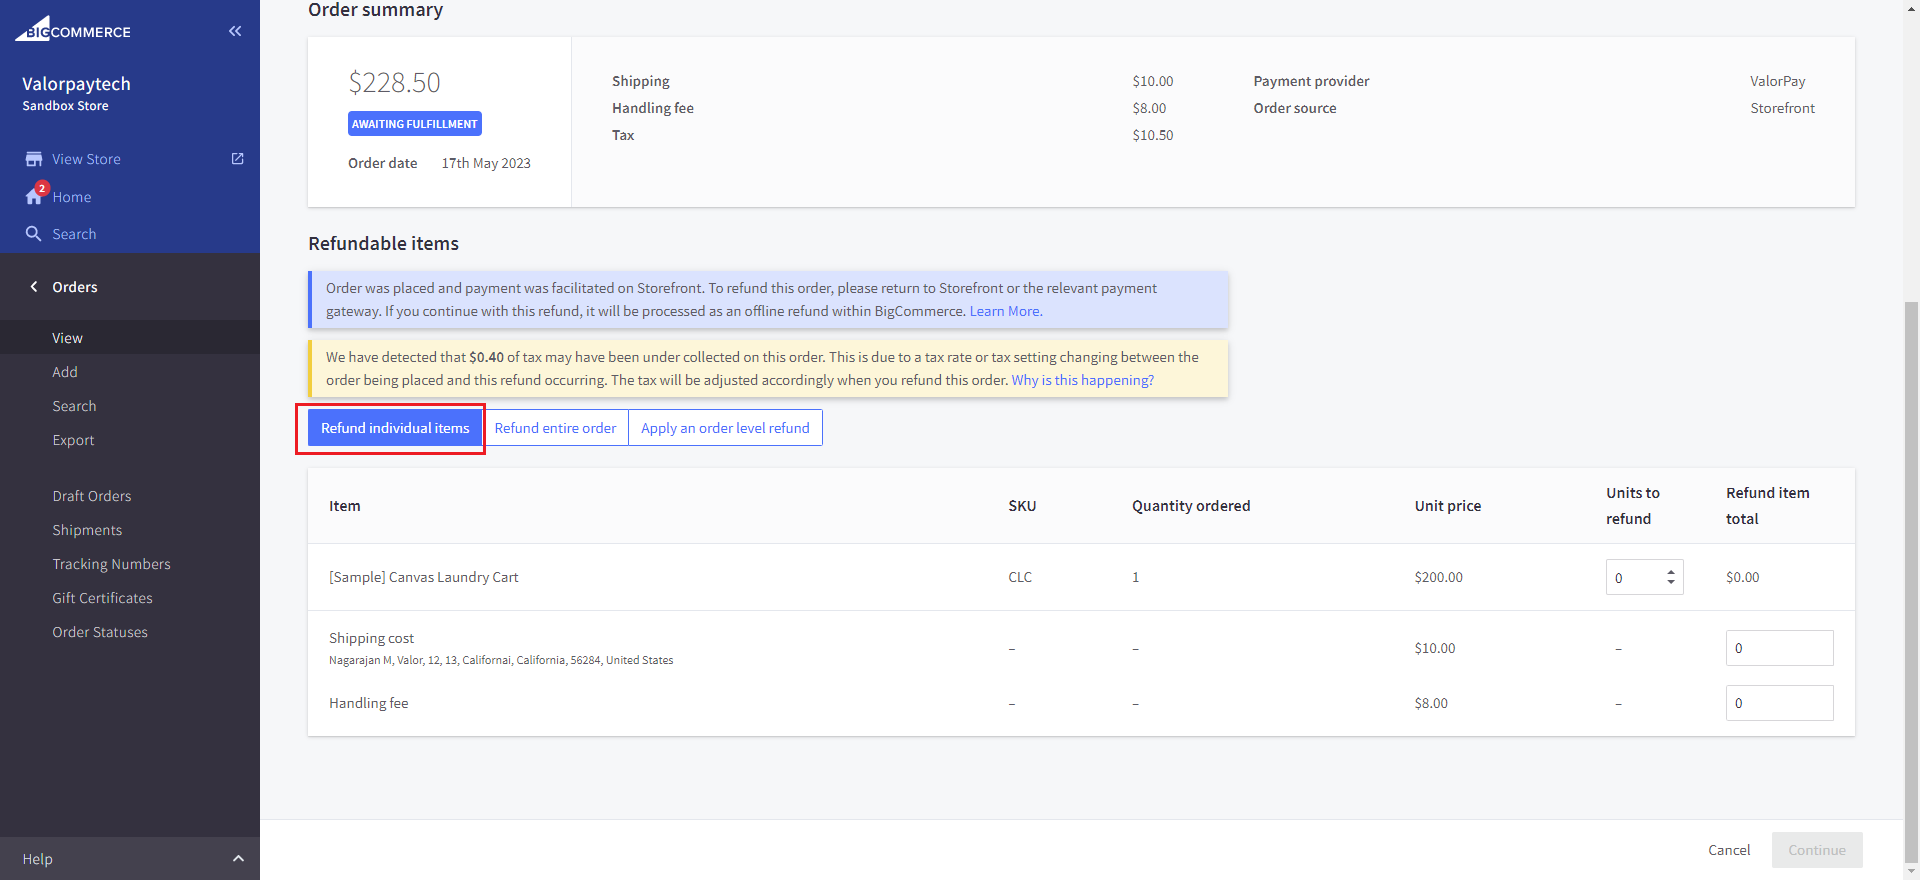
To refund against individual items in an order, select the quantity of units and other items like shipping cost or handling fee [BigCommerce labels Surcharge Fee (in configuration settings) or any other fees as Handling Fee] and click ‘Continue’.
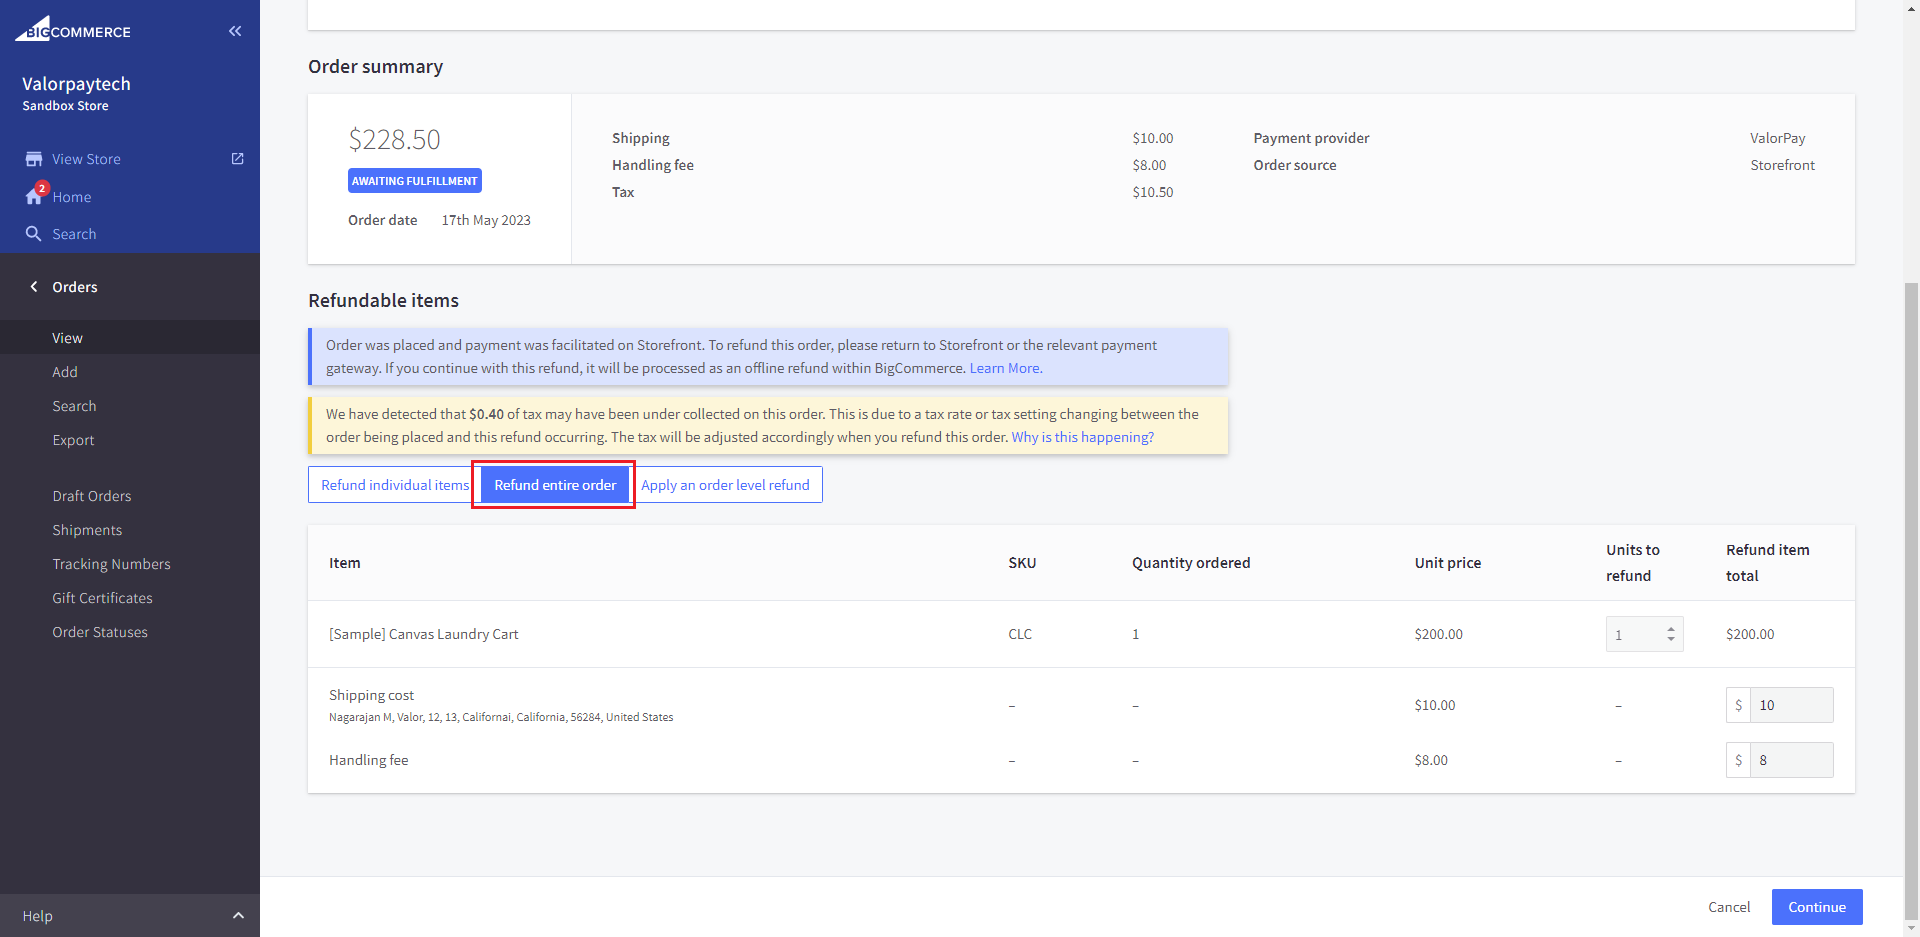
To refund an entire order including all types of additional fees, click on the Refund entire order tab and click ‘Continue’.
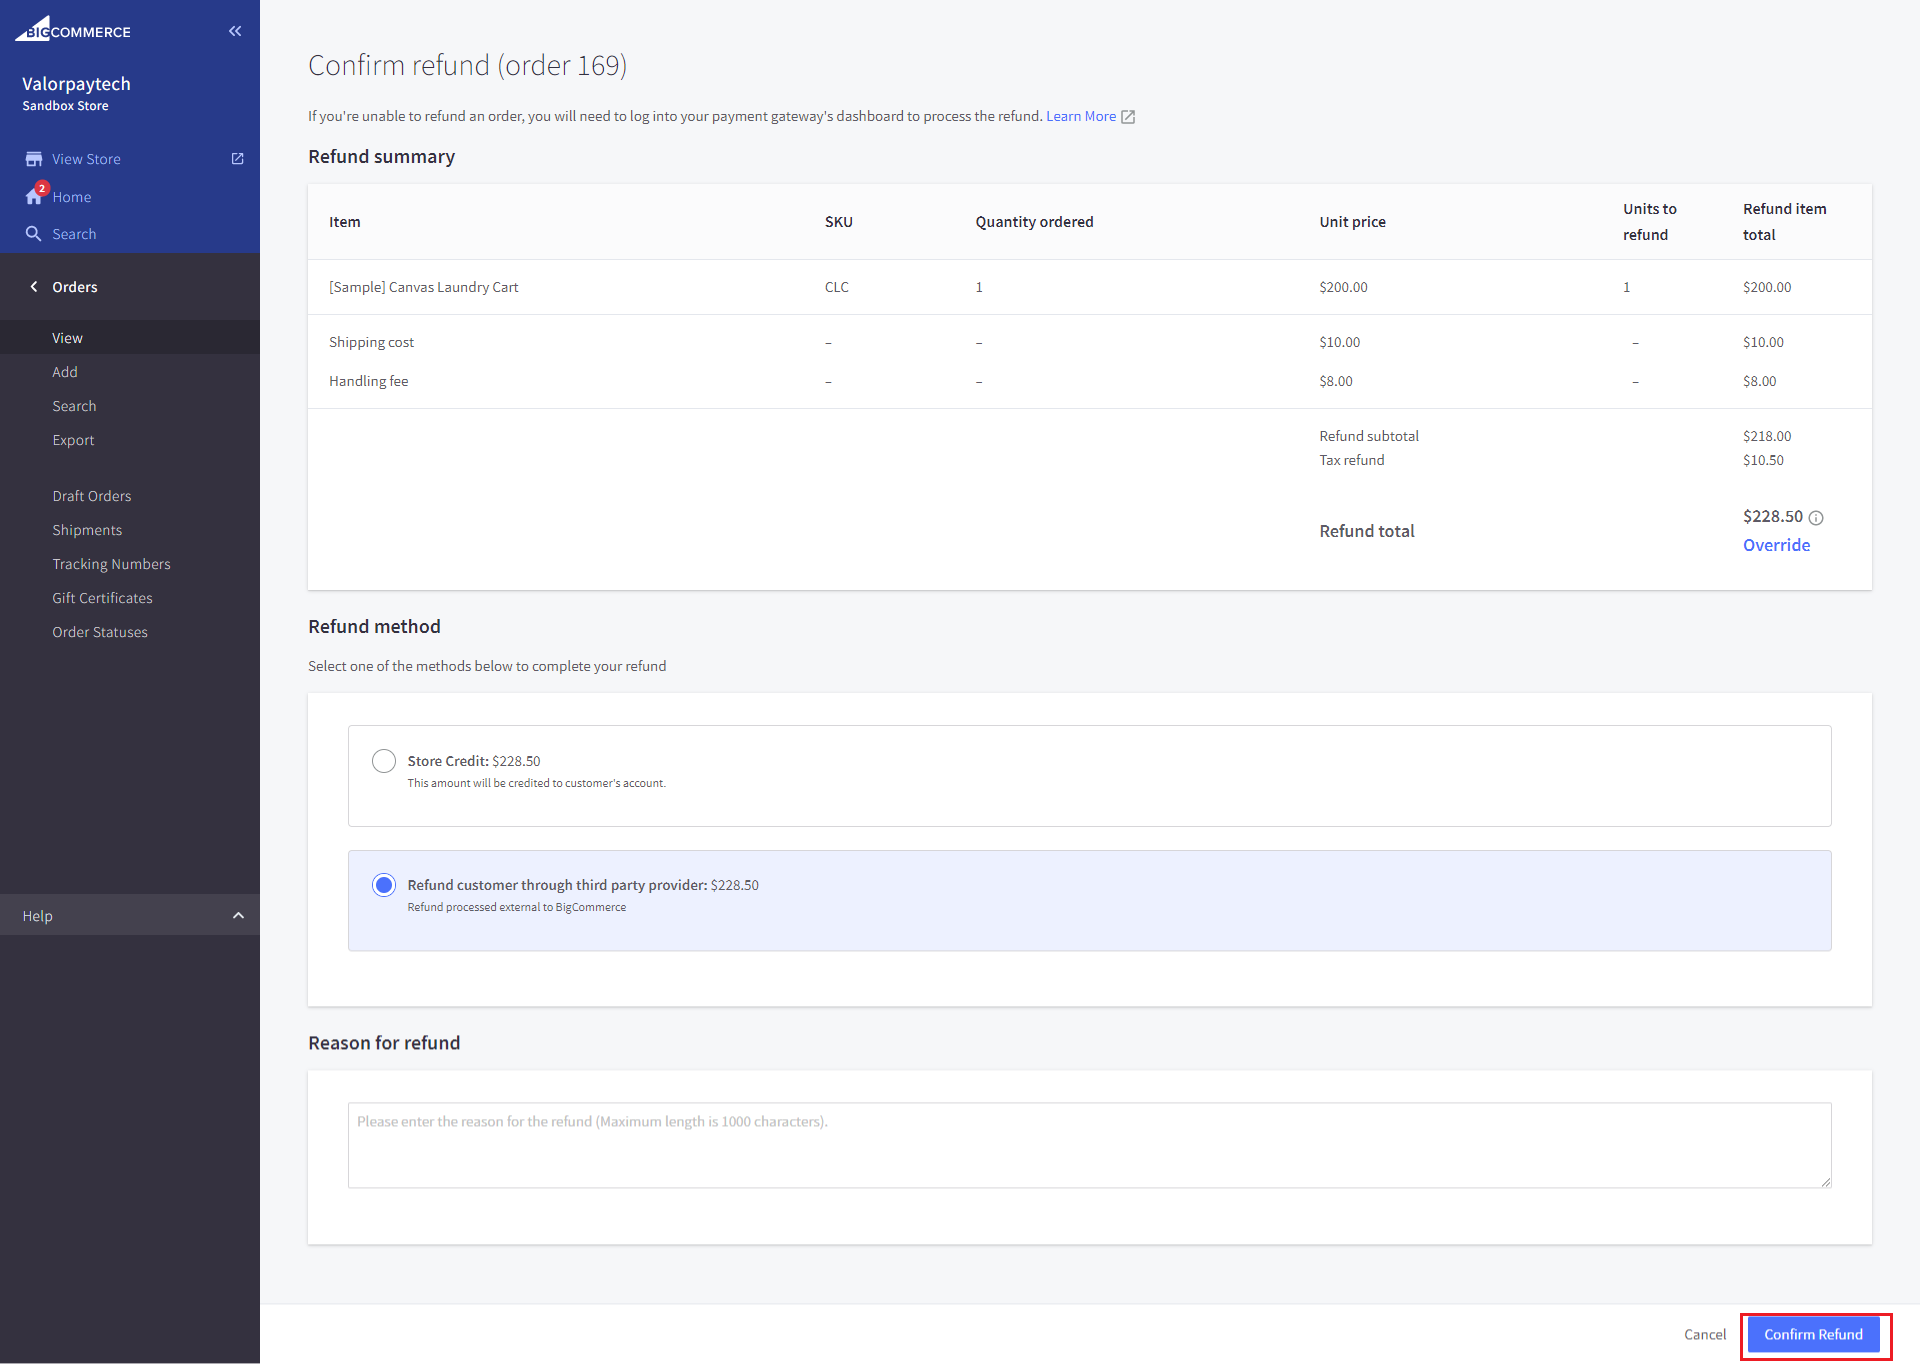
Select the refund method: Refund customer through third party provider to ensure that your refund payments are processed reliably by ValorPay. Click Confirm Refund.
A success message will be displayed indicating that the refund order has been submitted successfully. This refund order will now be visible on the Refund Order page on the ValorPay application.
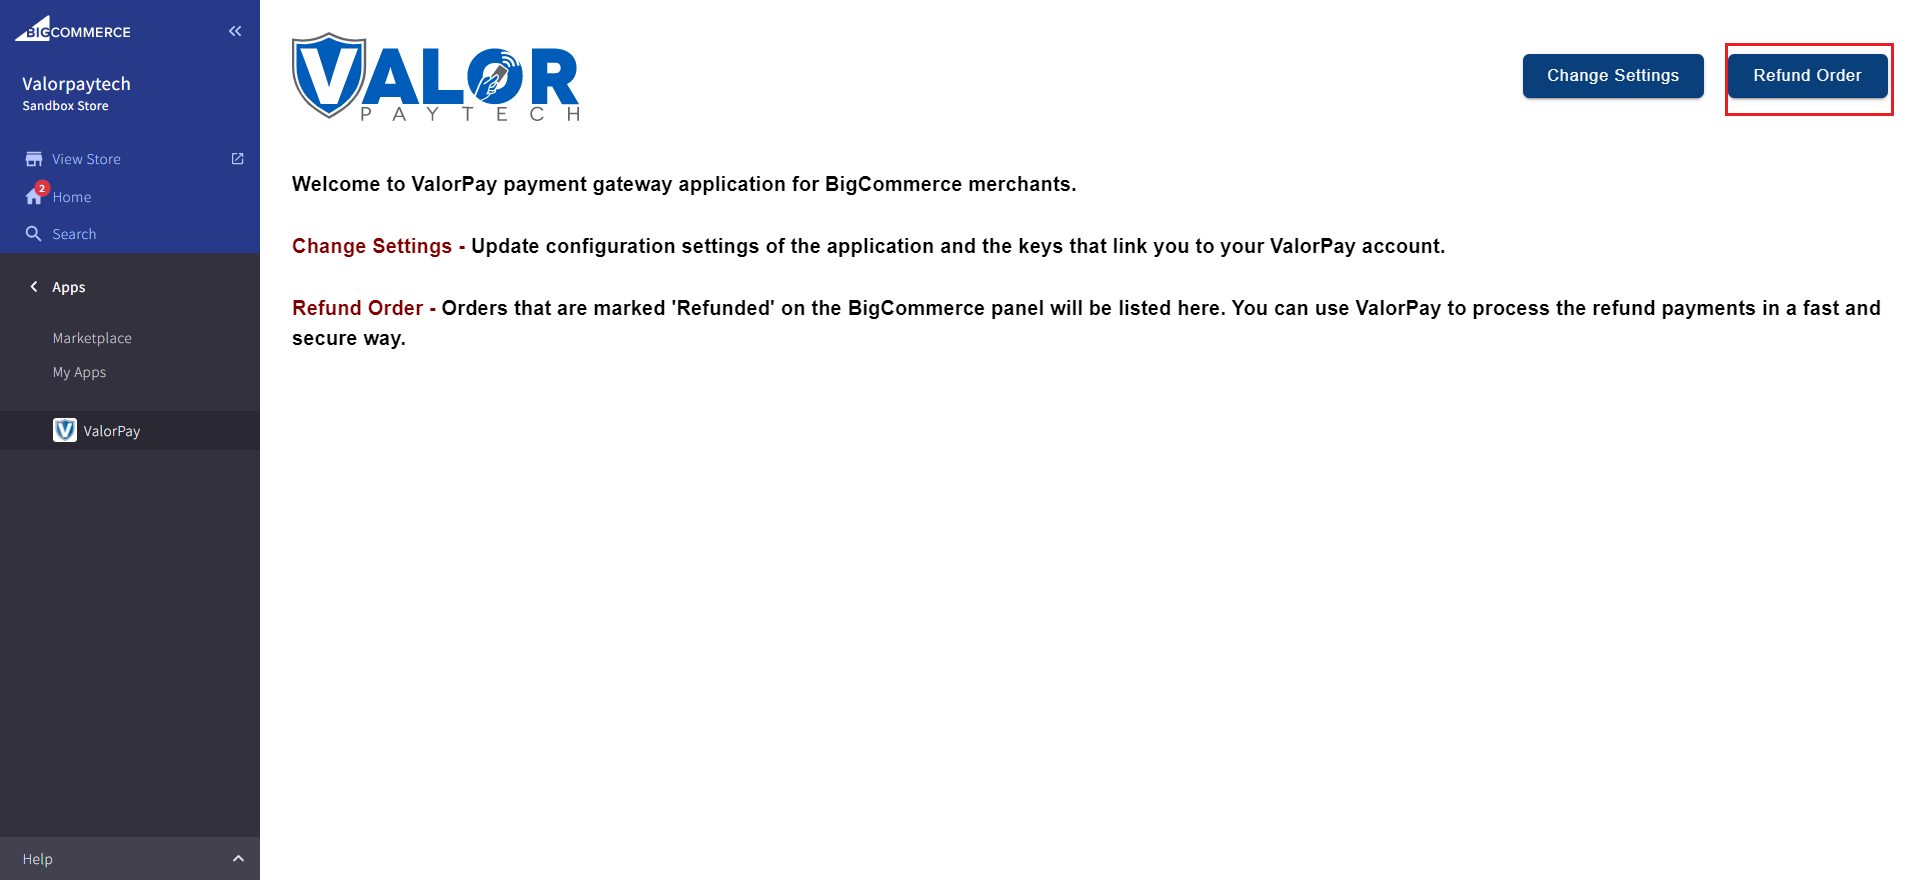
Find the ValorPay application at Home -> Apps -> My Apps -> ValorPay and click on Refund Order to see the list of orders marked for refund.
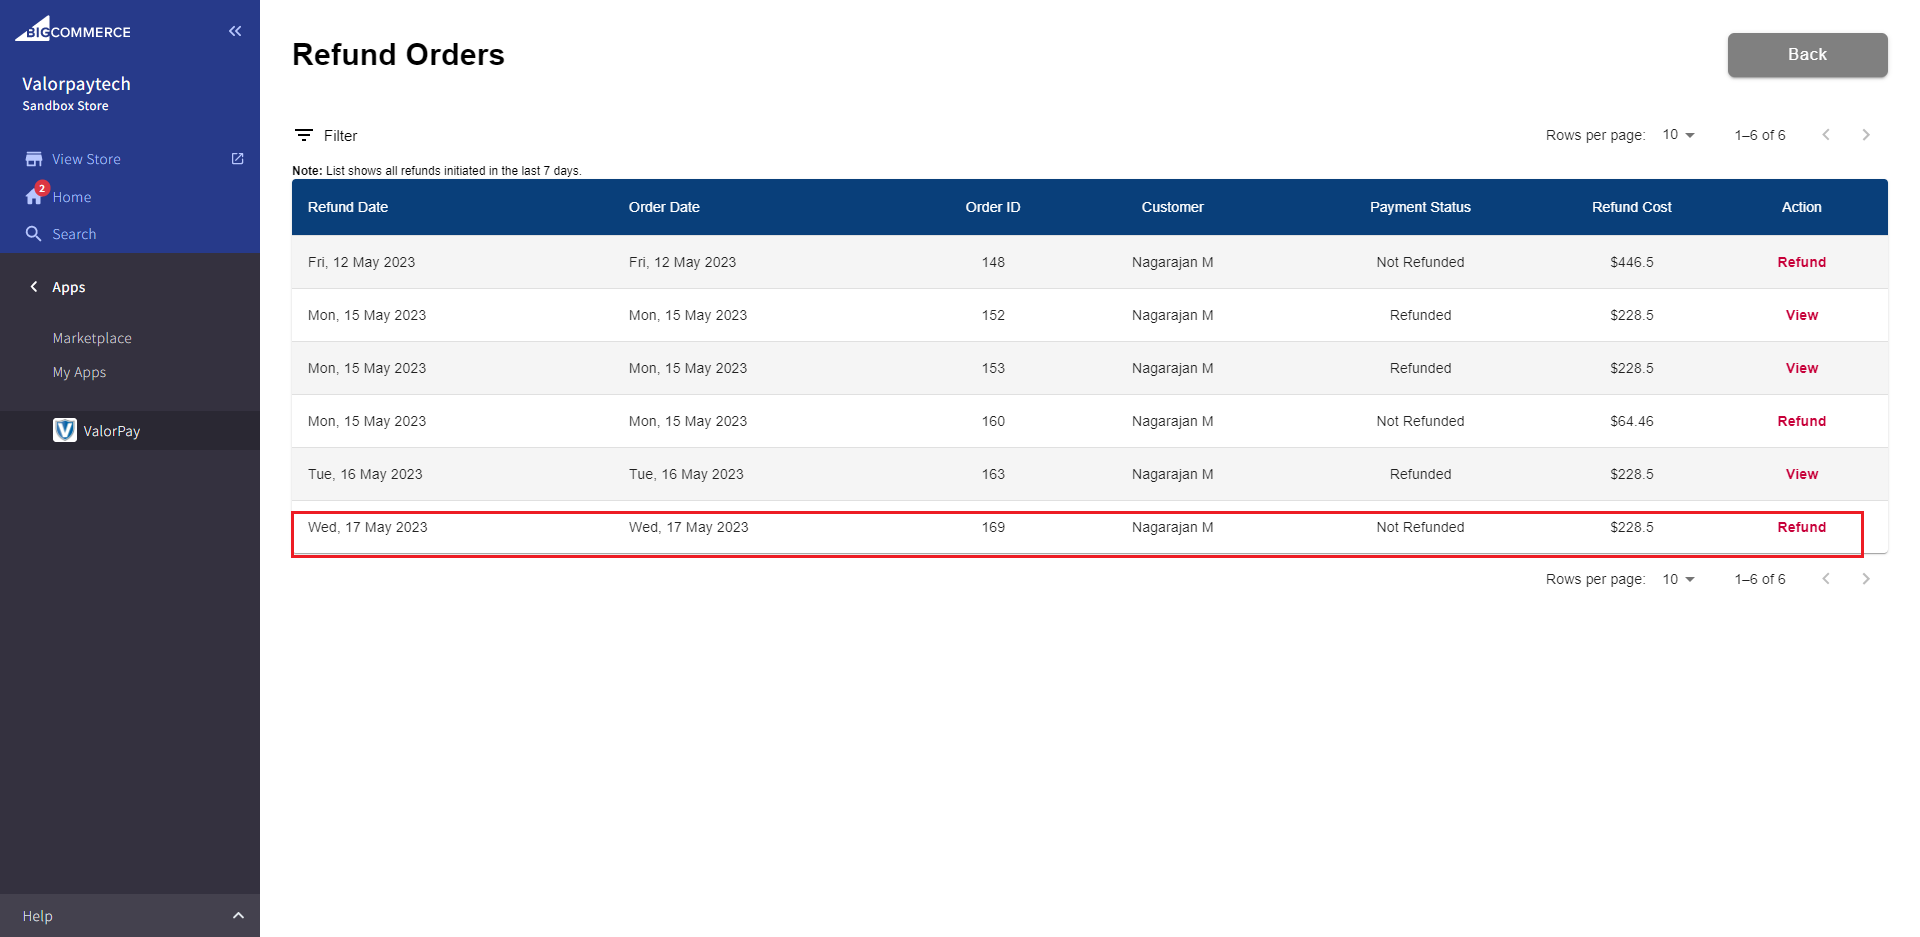
Locate the order-by Order ID and click Refund. By default, this list only shows orders that have been marked for refund or refunded in the last seven days. To see orders for any duration, click on ‘Filter’ and select the desired duration.
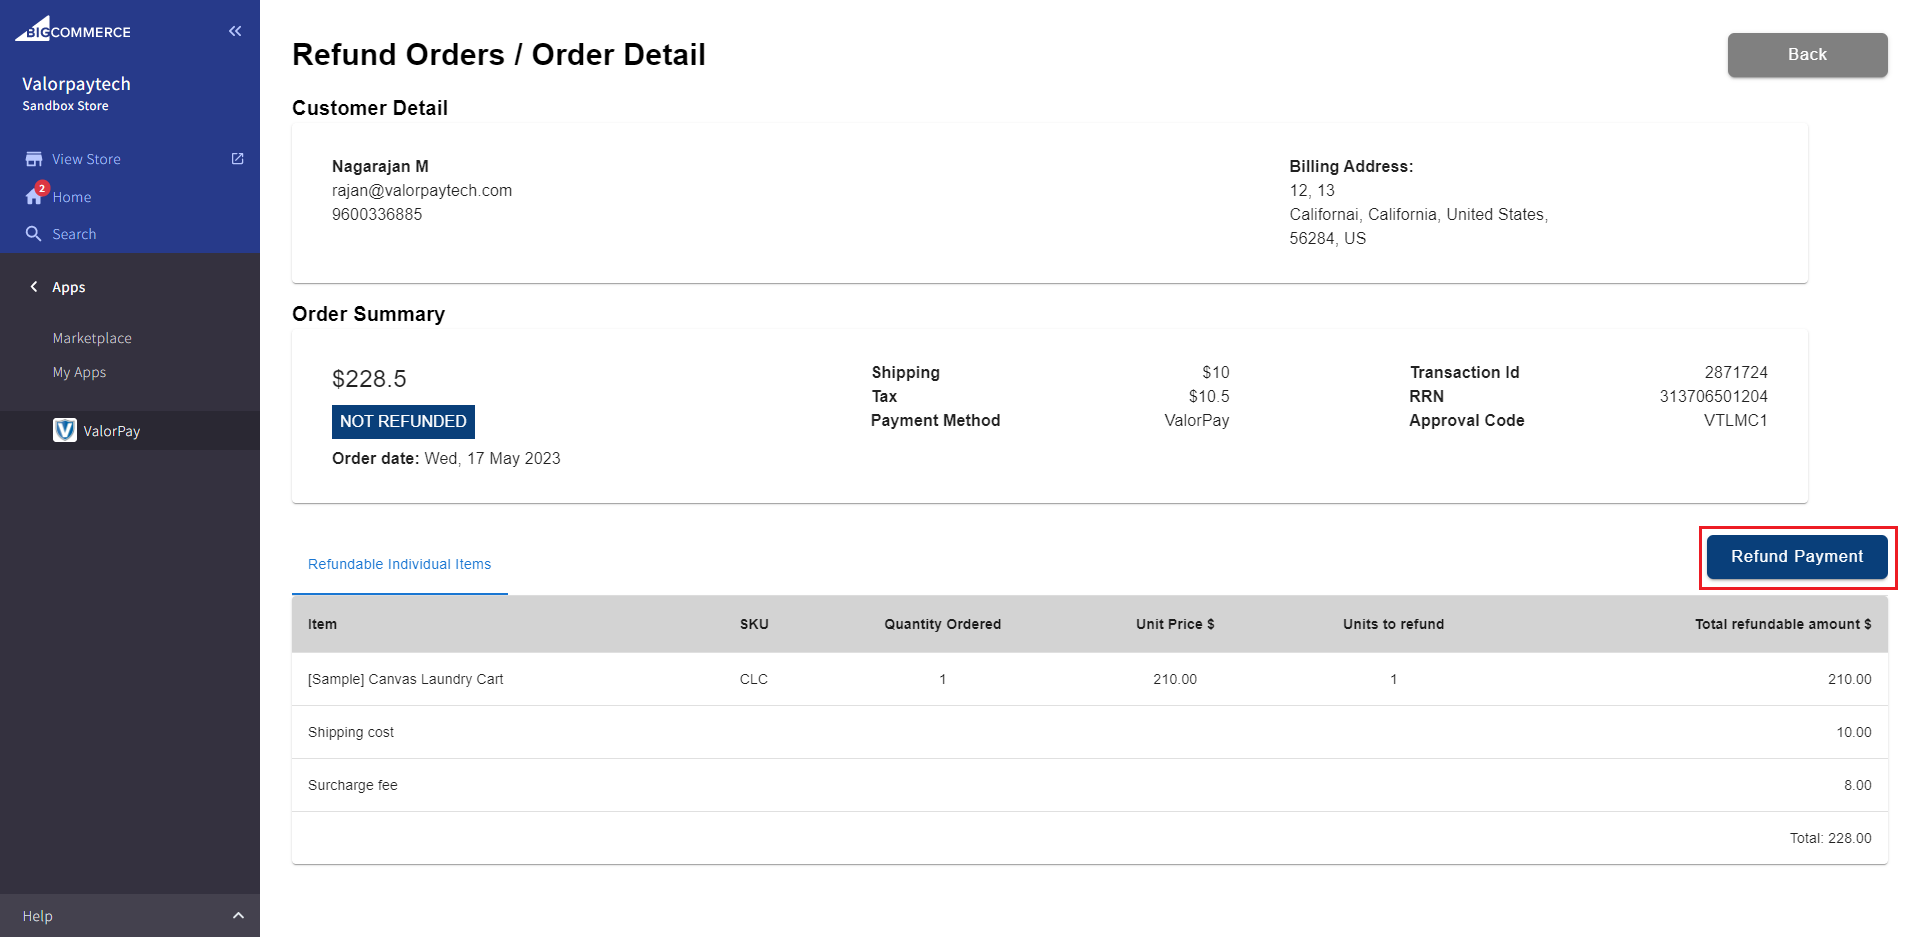
Review the refund details and click on Refund Payment
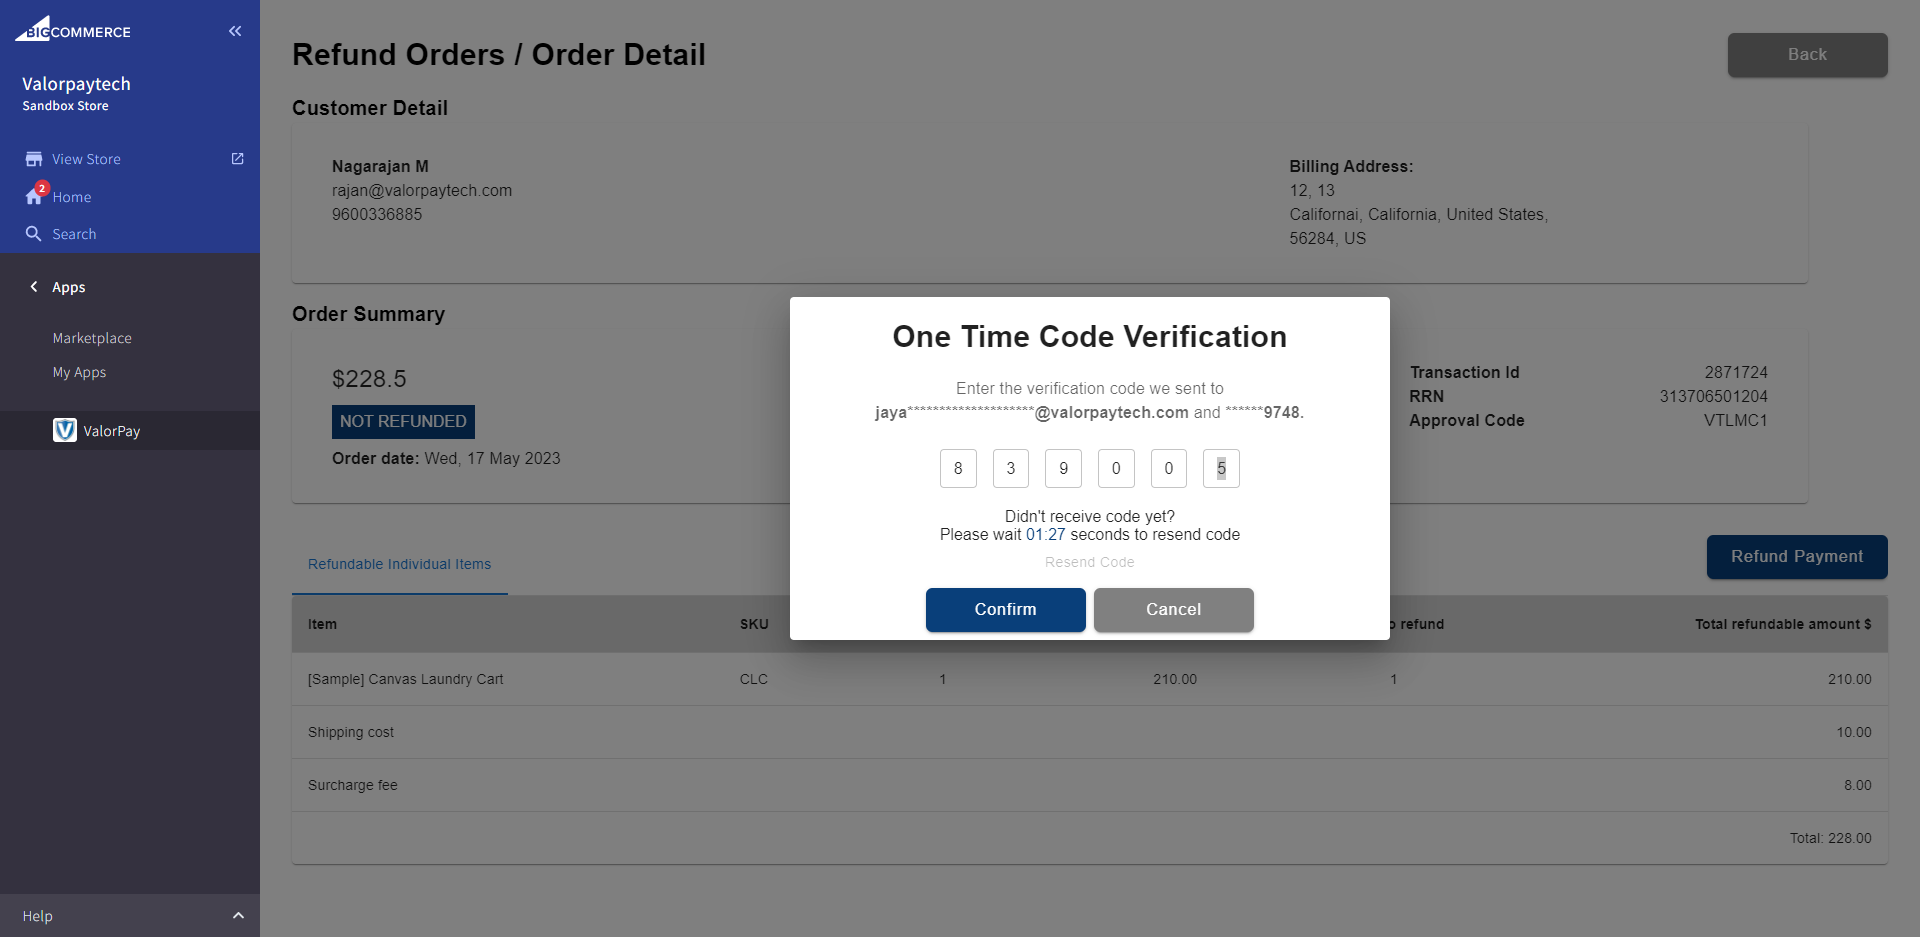
Enter the One Time Code received on your registered email address and phone number.
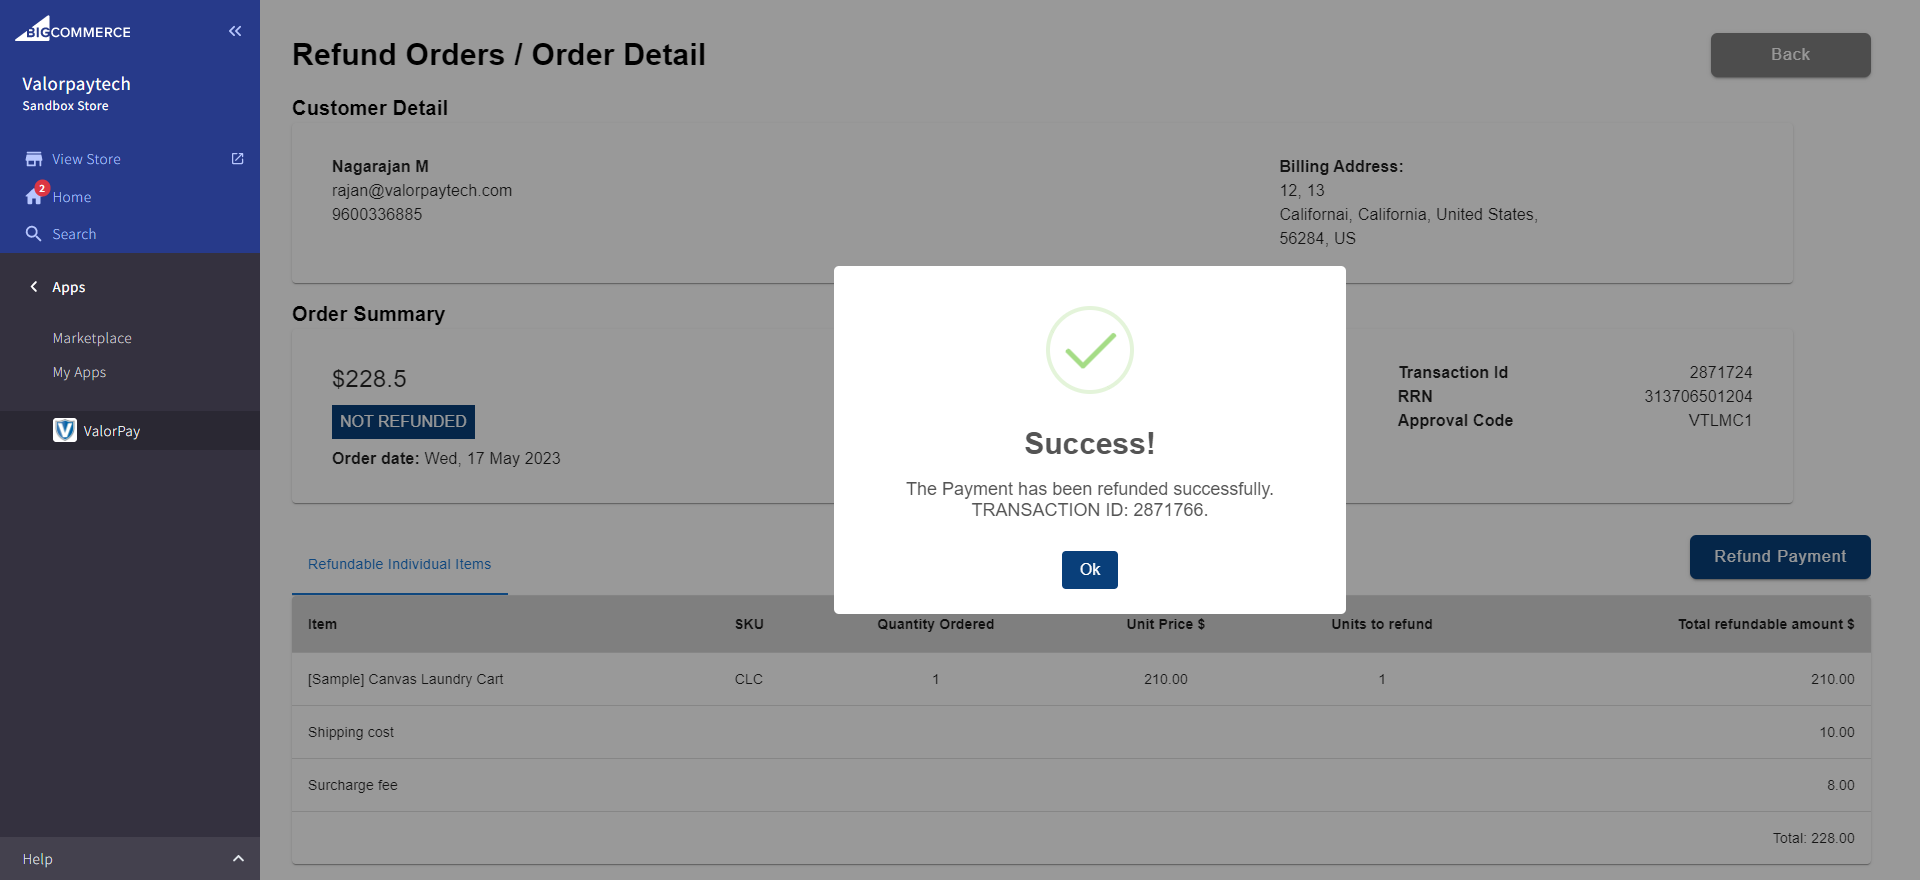
The refund payment is successfully completed.
Locate the details of the refund payment at the bottom of the page.
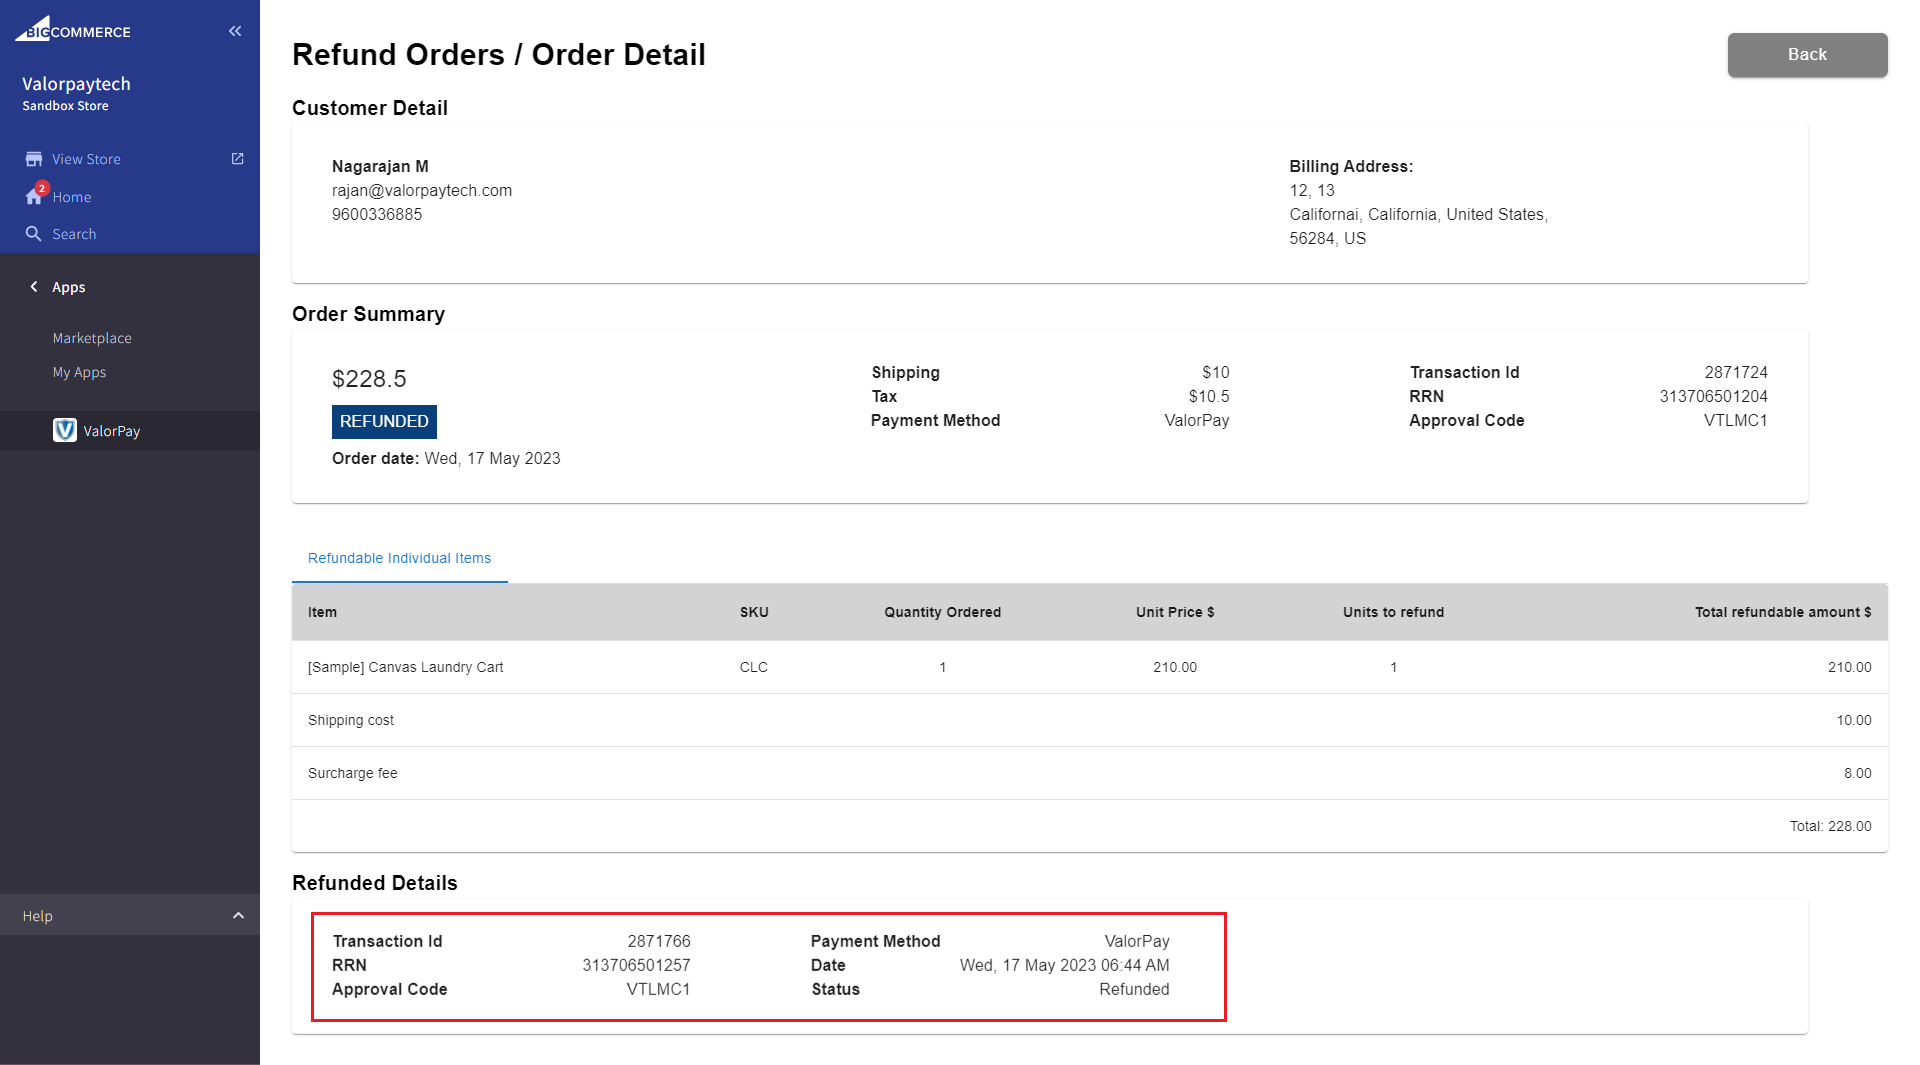
To view the refund details anytime in future, click on View on the Refund Order page.

Capturing Auth Only Transactions Using ValorPay Merchant Portal
Select Payment Method as Auth Only if you wish to take only authorization of payment from the customer and deduct it later as per your business arrangement.
Remember, this will apply to all the orders that customers place on your store.
A customer will place an order as usual.

Once the order is placed, the order details can be seen in Home -> Orders -> View (Click on the ‘+’ button to expand the order details.)
Logon to Valor Portal and enter your merchant credentials.
Click Transactions in the left menu. You should see the most recent order on top.
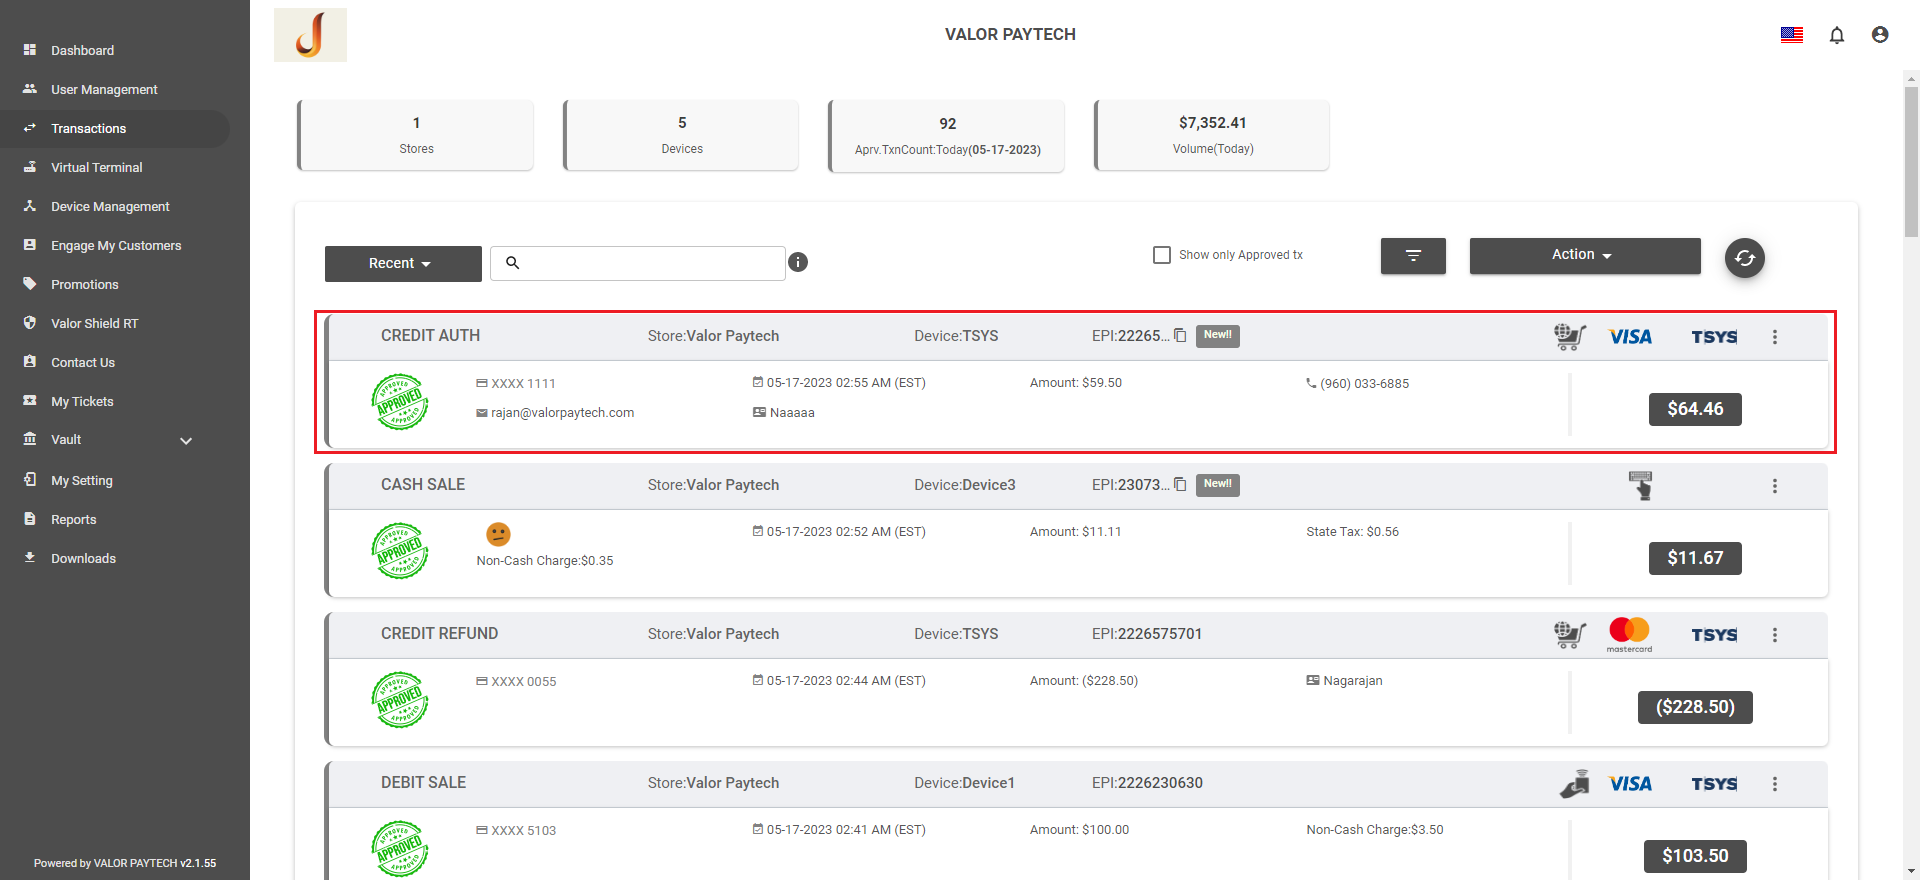
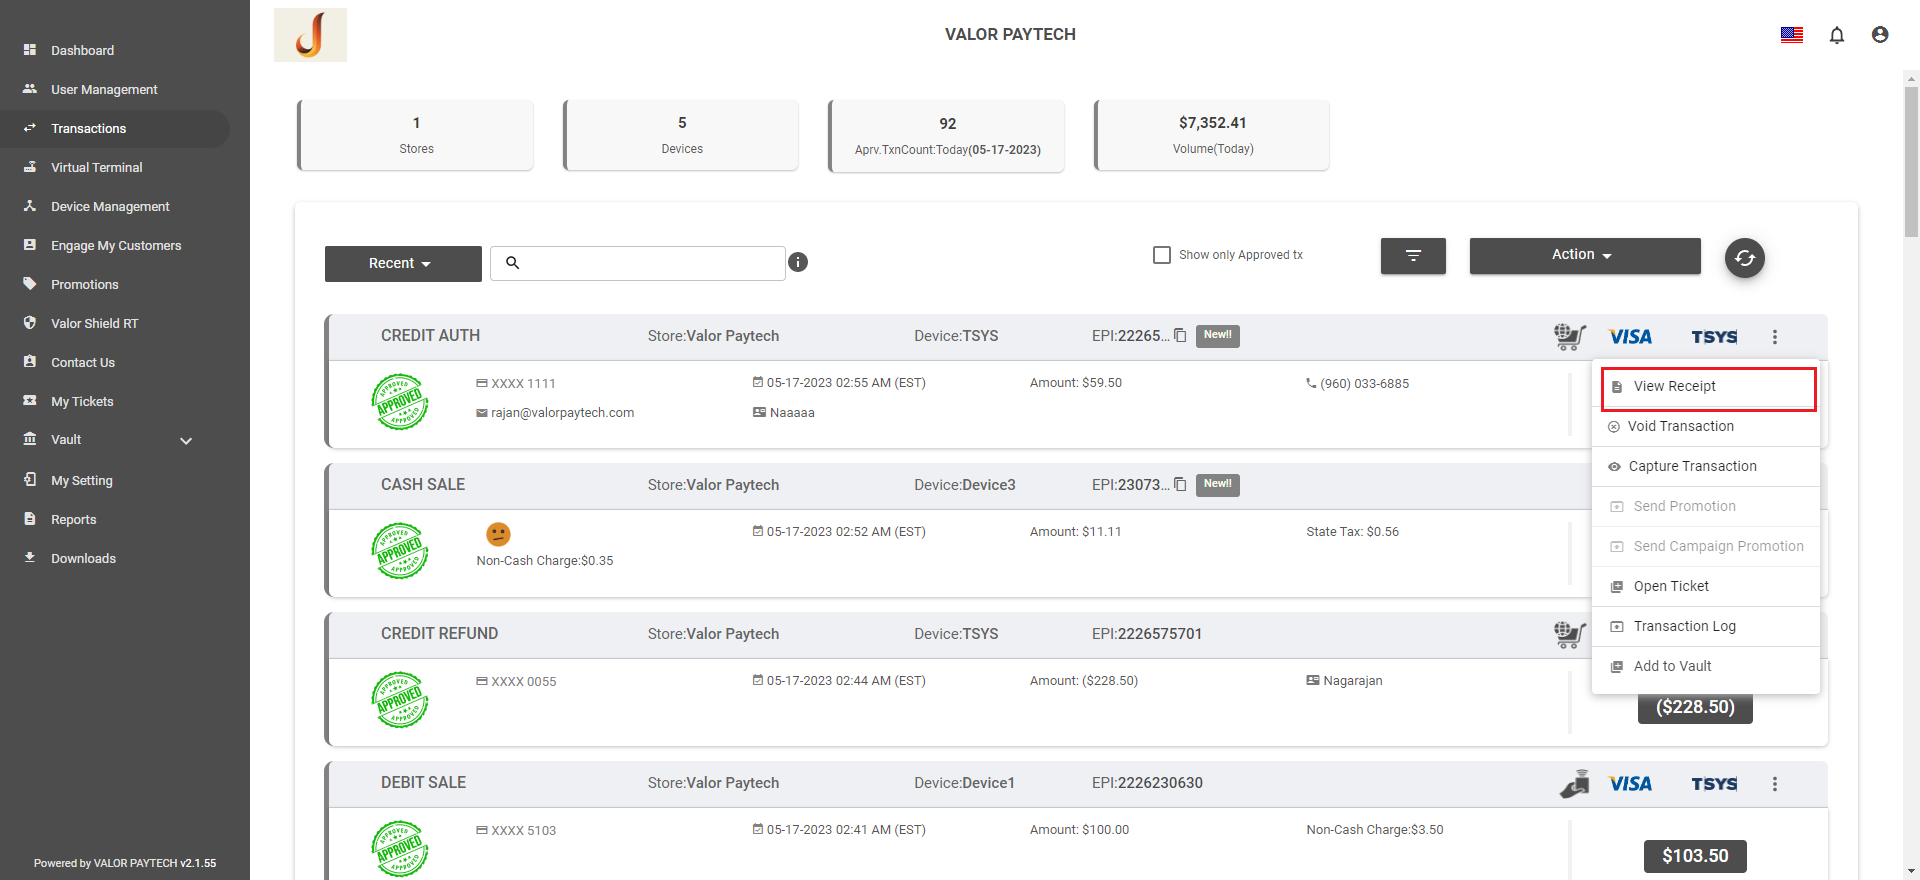
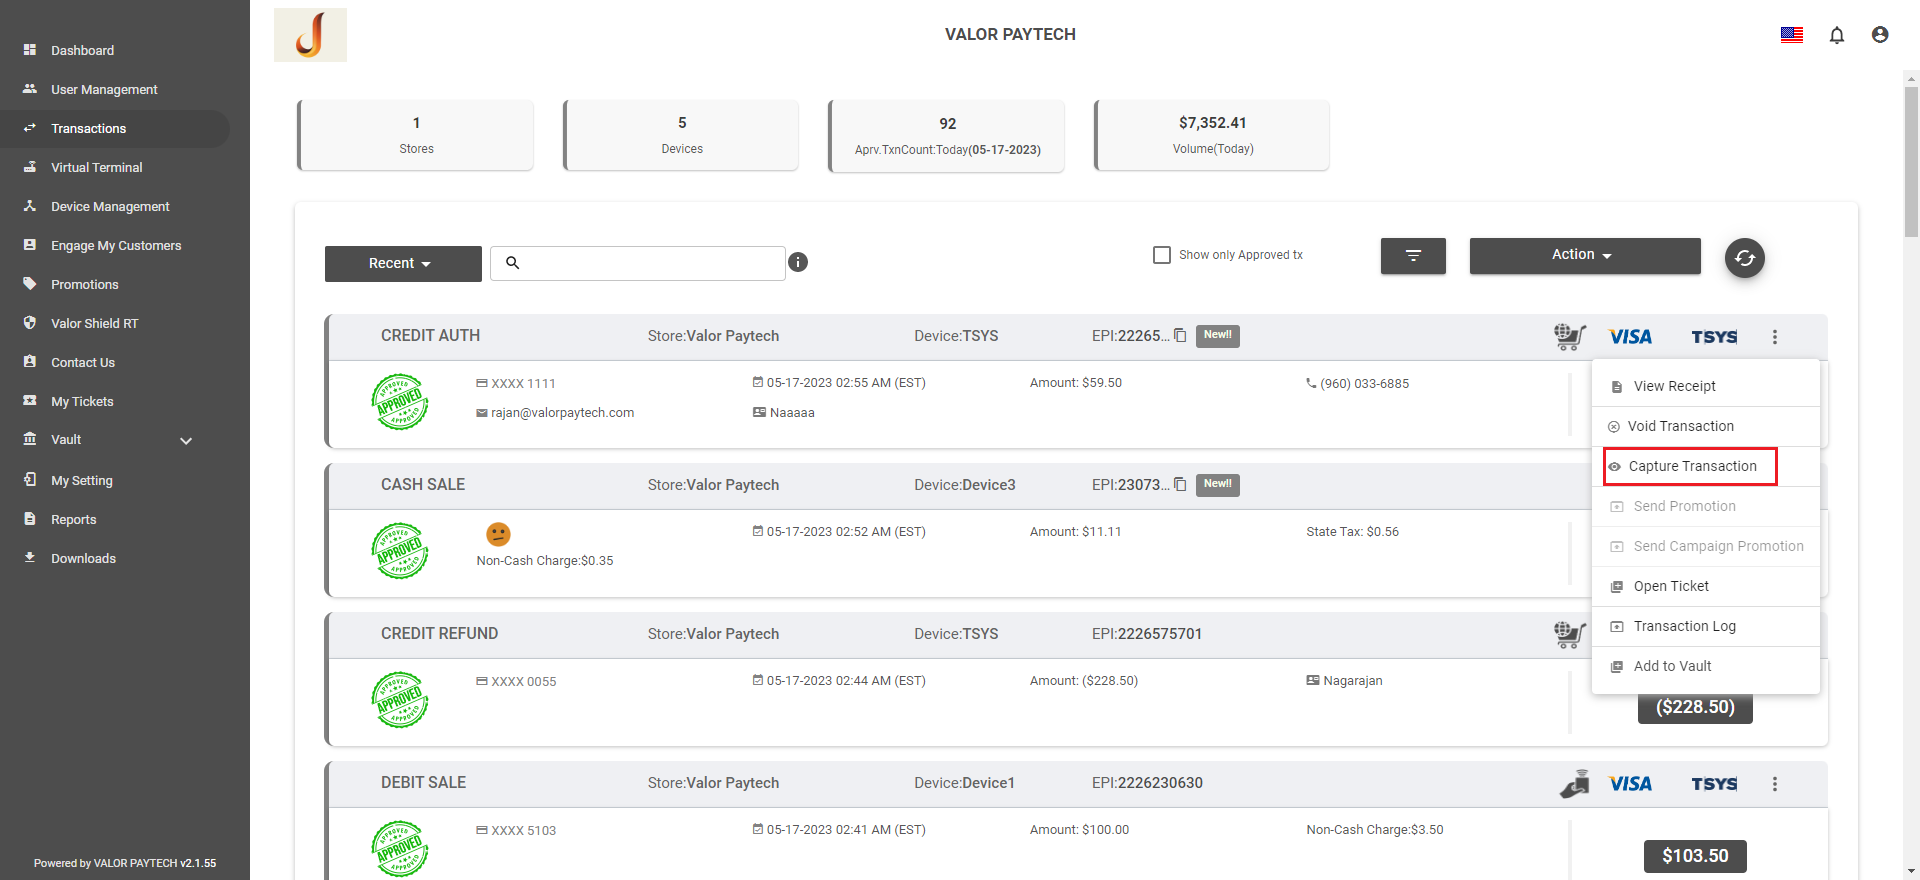
The header CREDIT AUTH suggests that this is an Auth Only transaction. CREDIT SALE indicates an order which is fully paid for. You can also click on View Receipt if you wish to confirm what type of order it is; Auth or Sale.
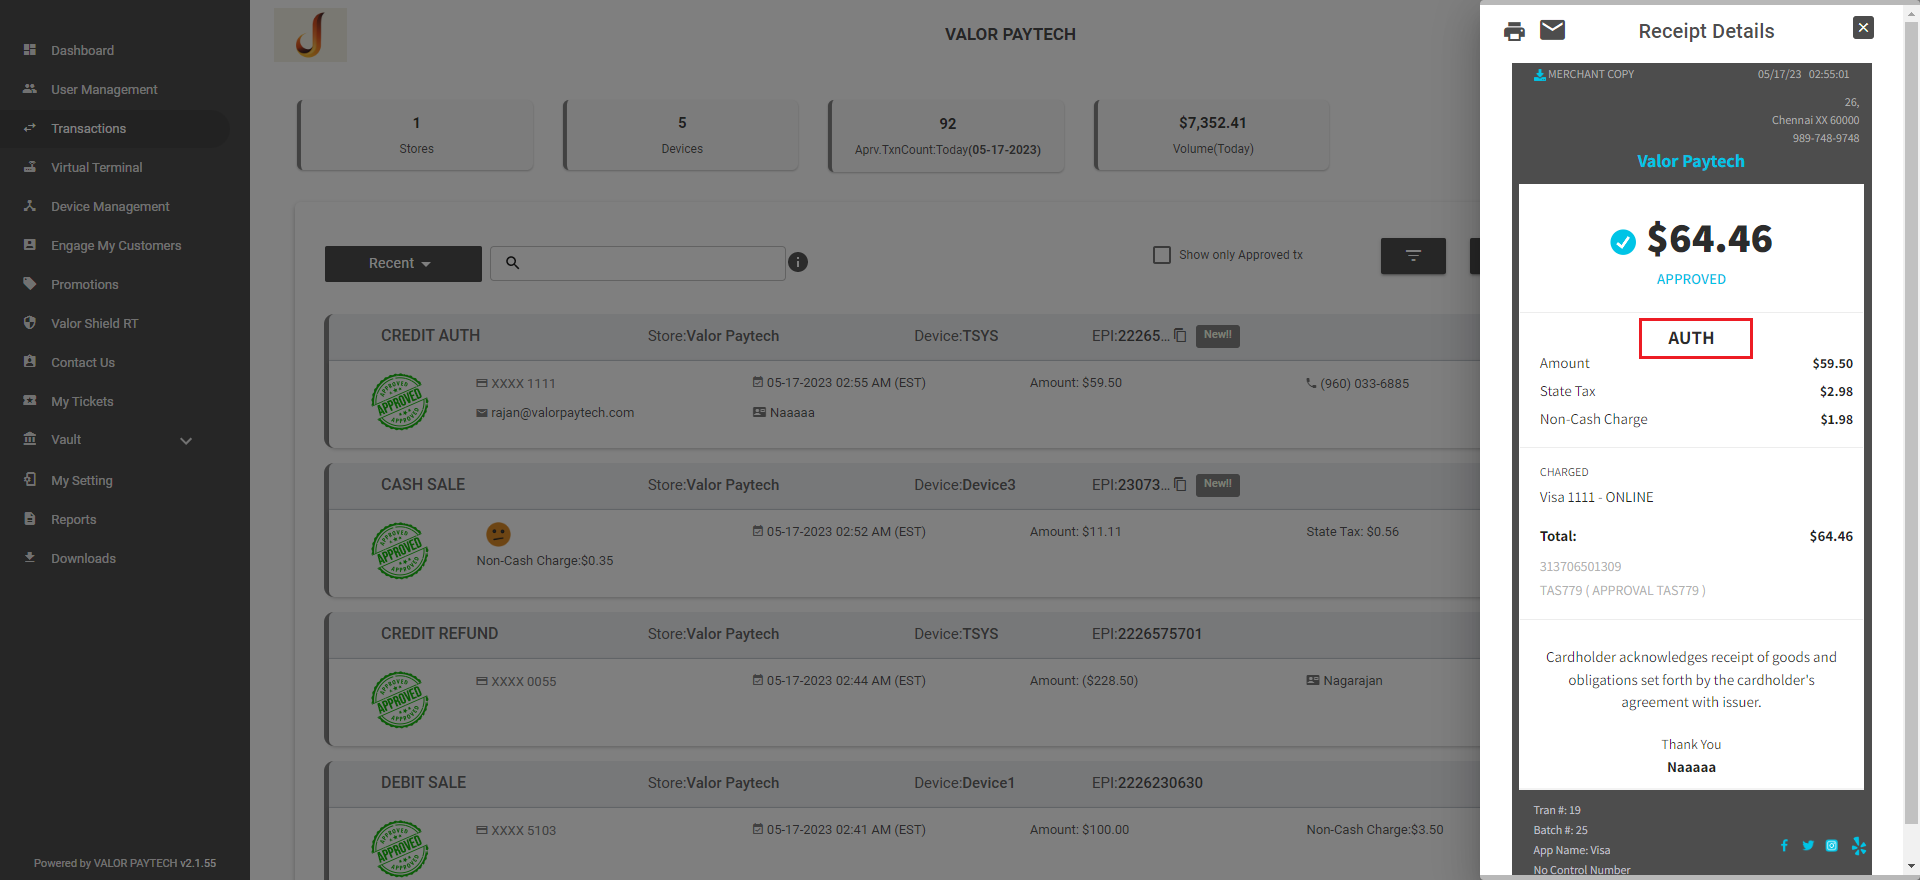
AUTH indicates and confirms that this transaction is Auth Only.
To collect payment against this authorization, click on the vertical ellipsis button and click Capture Transaction.
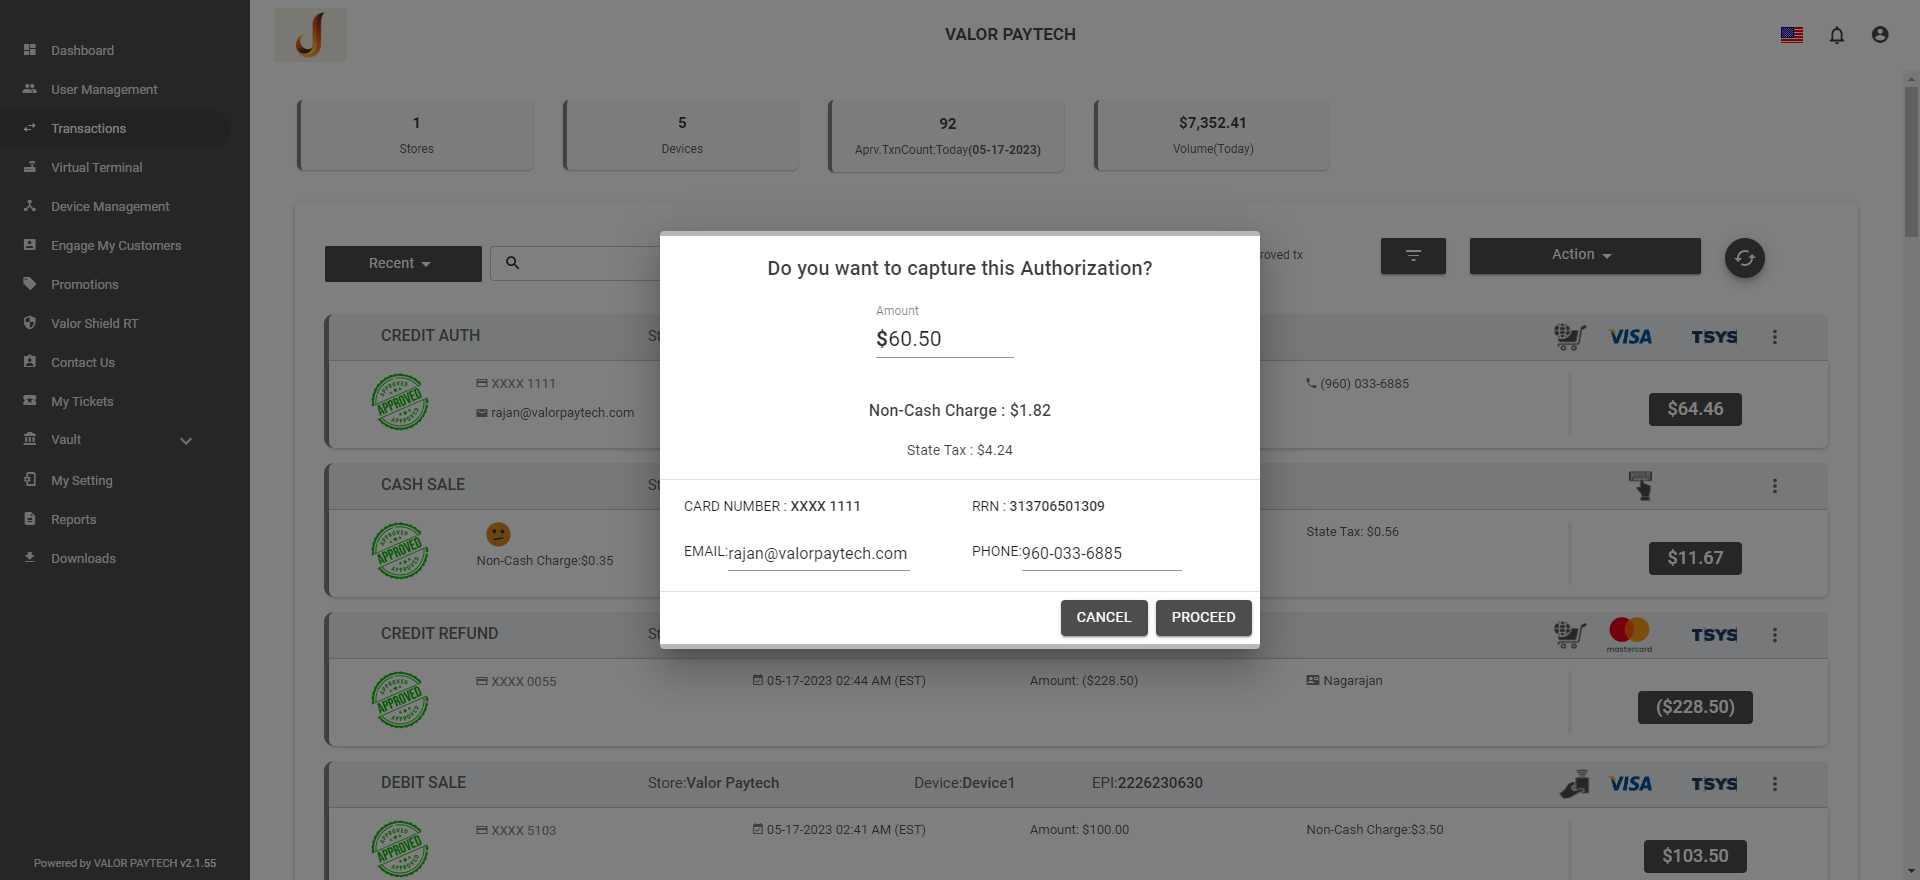
Confirm the amount and click Proceed.
The transaction is approved and successfully completed.
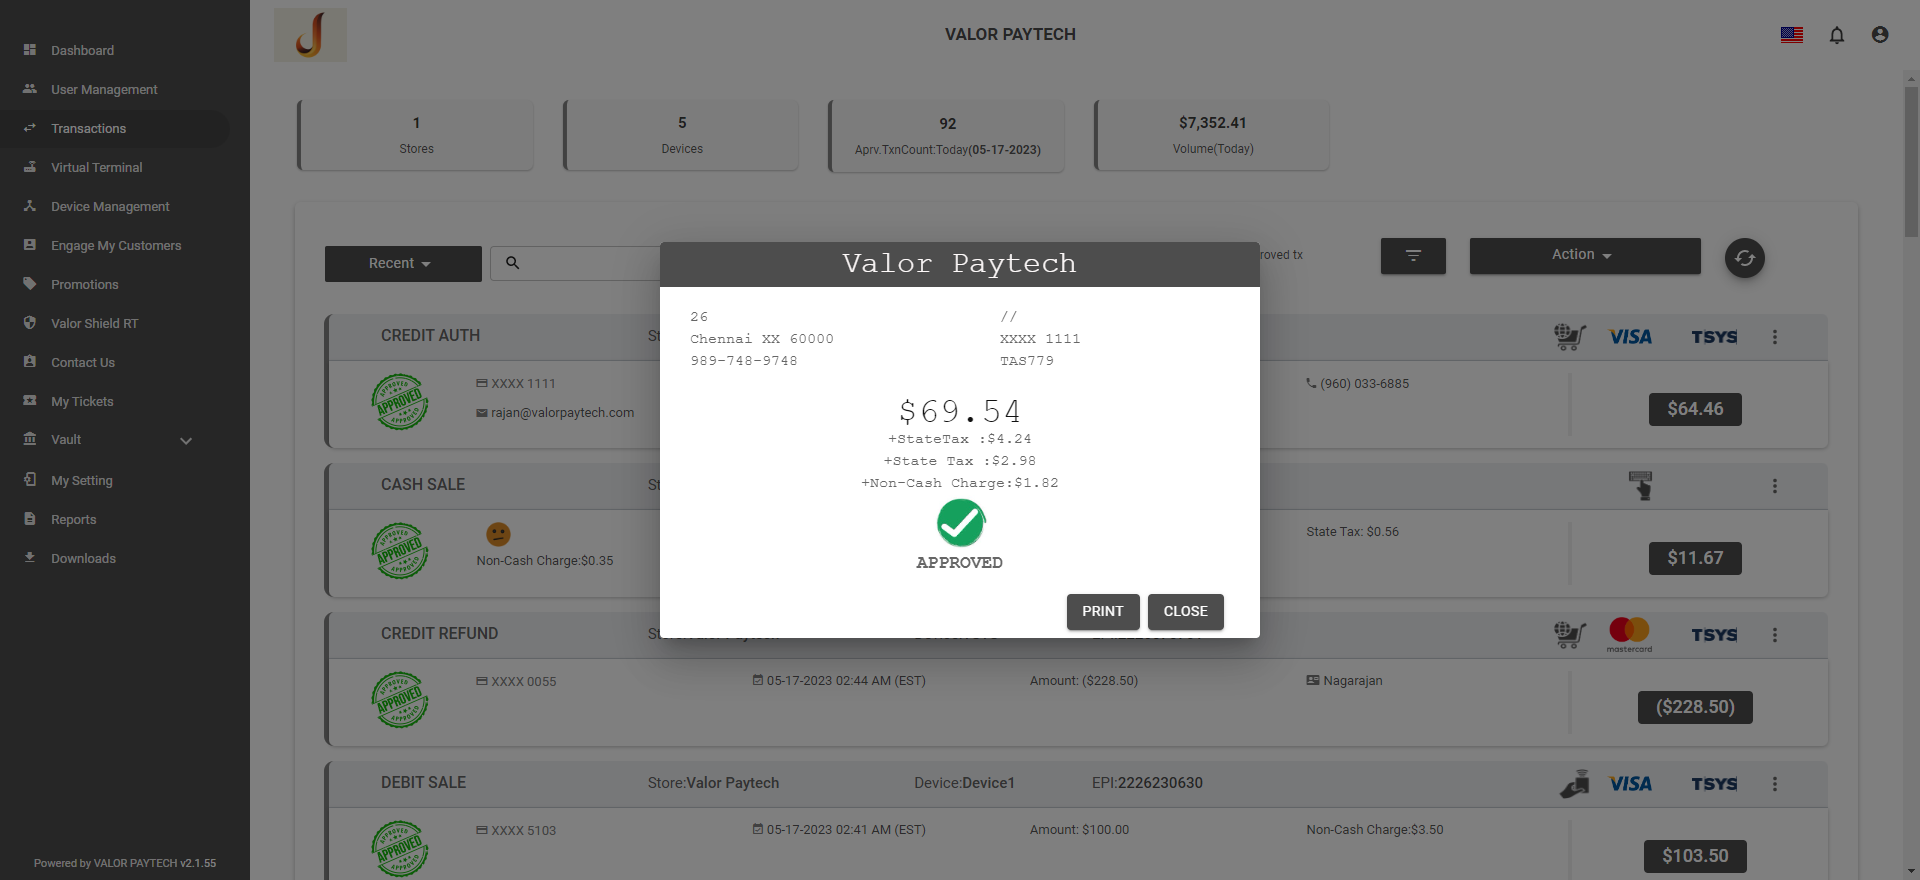
The header now reads COMPLETION. You can also click on View Receipt again to confirm that the sale is now completed. Use the print icon on top to take a print of the receipt.

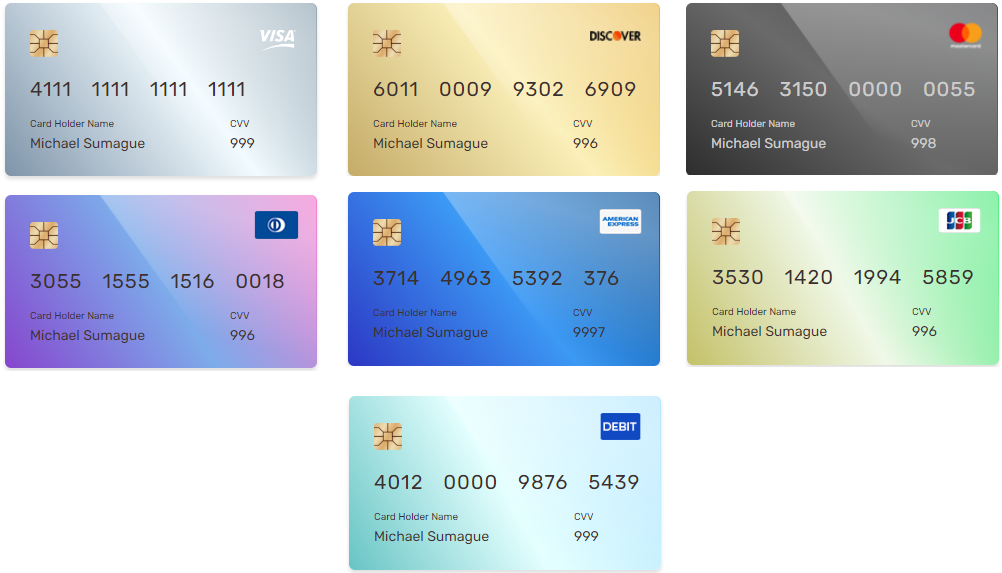
Test Cards
Address - 8320
Zip - 85284